Quick HOWTO : Ch10 : Windows, Linux, and Samba/zh:修订间差异
无编辑摘要 |
无编辑摘要 |
||
| 第382行: | 第382行: | ||
|} | |} | ||
</div> | </div> | ||
下面是如何通过SWAT来进行设置. | |||
# 登入SWAT,点击 [global]小节. | # 登入SWAT,点击 [global]小节. | ||
# 点击Advanced按钮查看更多选项 | # 点击Advanced按钮查看更多选项 | ||
# | # 进行设置完成后点击Commit Changes按钮。 | ||
# | # 当你完成后,你的smb.conf 文件将自动记录这些改变。 你可以登陆到samba服务器上通过命令“cat /etc/samba/smb.conf”来查看验证刚才所做的改变。 | ||
[global] | [global] | ||
2008年2月18日 (一) 15:48的版本
| 文章出处: |
{{#if: | {{{2}}} | http://wiki.ubuntu.org.cn/Quick_HOWTO_:_Ch10_:_Windows%2C_Linux%2C_and_Samba }} |
| 翻译人员: |
spin |
| 点击翻译: |
English {{#ifexist: {{#if: php5 | php5 | {{#if: | :}}Quick HOWTO : Ch10 : Windows, Linux, and Samba/zh}}/af | • {{#if: php5|Afrikaans| [[::Quick HOWTO : Ch10 : Windows, Linux, and Samba/zh/af|Afrikaans]]}}|}} {{#ifexist: {{#if: php5 | php5 | {{#if: | :}}Quick HOWTO : Ch10 : Windows, Linux, and Samba/zh}}/ar | • {{#if: php5|العربية| [[::Quick HOWTO : Ch10 : Windows, Linux, and Samba/zh/ar|العربية]]}}|}} {{#ifexist: {{#if: php5 | php5 | {{#if: | :}}Quick HOWTO : Ch10 : Windows, Linux, and Samba/zh}}/az | • {{#if: php5|azərbaycanca| [[::Quick HOWTO : Ch10 : Windows, Linux, and Samba/zh/az|azərbaycanca]]}}|}} {{#ifexist: {{#if: php5 | php5 | {{#if: | :}}Quick HOWTO : Ch10 : Windows, Linux, and Samba/zh}}/bcc | • {{#if: php5|جهلسری بلوچی| [[::Quick HOWTO : Ch10 : Windows, Linux, and Samba/zh/bcc|جهلسری بلوچی]]}}|}} {{#ifexist: {{#if: php5 | php5 | {{#if: | :}}Quick HOWTO : Ch10 : Windows, Linux, and Samba/zh}}/bg | • {{#if: php5|български| [[::Quick HOWTO : Ch10 : Windows, Linux, and Samba/zh/bg|български]]}}|}} {{#ifexist: {{#if: php5 | php5 | {{#if: | :}}Quick HOWTO : Ch10 : Windows, Linux, and Samba/zh}}/br | • {{#if: php5|brezhoneg| [[::Quick HOWTO : Ch10 : Windows, Linux, and Samba/zh/br|brezhoneg]]}}|}} {{#ifexist: {{#if: php5 | php5 | {{#if: | :}}Quick HOWTO : Ch10 : Windows, Linux, and Samba/zh}}/ca | • {{#if: php5|català| [[::Quick HOWTO : Ch10 : Windows, Linux, and Samba/zh/ca|català]]}}|}} {{#ifexist: {{#if: php5 | php5 | {{#if: | :}}Quick HOWTO : Ch10 : Windows, Linux, and Samba/zh}}/cs | • {{#if: php5|čeština| [[::Quick HOWTO : Ch10 : Windows, Linux, and Samba/zh/cs|čeština]]}}|}} {{#ifexist: {{#if: php5 | php5 | {{#if: | :}}Quick HOWTO : Ch10 : Windows, Linux, and Samba/zh}}/de | • {{#if: php5|Deutsch| [[::Quick HOWTO : Ch10 : Windows, Linux, and Samba/zh/de|Deutsch]]}}|}} {{#ifexist: {{#if: php5 | php5 | {{#if: | :}}Quick HOWTO : Ch10 : Windows, Linux, and Samba/zh}}/el | • {{#if: php5|Ελληνικά| [[::Quick HOWTO : Ch10 : Windows, Linux, and Samba/zh/el|Ελληνικά]]}}|}} {{#ifexist: {{#if: php5 | php5 | {{#if: | :}}Quick HOWTO : Ch10 : Windows, Linux, and Samba/zh}}/es | • {{#if: php5|español| [[::Quick HOWTO : Ch10 : Windows, Linux, and Samba/zh/es|español]]}}|}} {{#ifexist: {{#if: php5 | php5 | {{#if: | :}}Quick HOWTO : Ch10 : Windows, Linux, and Samba/zh}}/fa | • {{#if: php5|فارسی| [[::Quick HOWTO : Ch10 : Windows, Linux, and Samba/zh/fa|فارسی]]}}|}} {{#ifexist: {{#if: php5 | php5 | {{#if: | :}}Quick HOWTO : Ch10 : Windows, Linux, and Samba/zh}}/fi | • {{#if: php5|suomi| [[::Quick HOWTO : Ch10 : Windows, Linux, and Samba/zh/fi|suomi]]}}|}} {{#ifexist: {{#if: php5 | php5 | {{#if: | :}}Quick HOWTO : Ch10 : Windows, Linux, and Samba/zh}}/fr | • {{#if: php5|français| [[::Quick HOWTO : Ch10 : Windows, Linux, and Samba/zh/fr|français]]}}|}} {{#ifexist: {{#if: php5 | php5 | {{#if: | :}}Quick HOWTO : Ch10 : Windows, Linux, and Samba/zh}}/gu | • {{#if: php5|ગુજરાતી| [[::Quick HOWTO : Ch10 : Windows, Linux, and Samba/zh/gu|ગુજરાતી]]}}|}} {{#ifexist: {{#if: php5 | php5 | {{#if: | :}}Quick HOWTO : Ch10 : Windows, Linux, and Samba/zh}}/he | • {{#if: php5|עברית| [[::Quick HOWTO : Ch10 : Windows, Linux, and Samba/zh/he|עברית]]}}|}} {{#ifexist: {{#if: php5 | php5 | {{#if: | :}}Quick HOWTO : Ch10 : Windows, Linux, and Samba/zh}}/hu | • {{#if: php5|magyar| [[::Quick HOWTO : Ch10 : Windows, Linux, and Samba/zh/hu|magyar]]}}|}} {{#ifexist: {{#if: php5 | php5 | {{#if: | :}}Quick HOWTO : Ch10 : Windows, Linux, and Samba/zh}}/id | • {{#if: php5|Bahasa Indonesia| [[::Quick HOWTO : Ch10 : Windows, Linux, and Samba/zh/id|Bahasa Indonesia]]}}|}} {{#ifexist: {{#if: php5 | php5 | {{#if: | :}}Quick HOWTO : Ch10 : Windows, Linux, and Samba/zh}}/it | • {{#if: php5|italiano| [[::Quick HOWTO : Ch10 : Windows, Linux, and Samba/zh/it|italiano]]}}|}} {{#ifexist: {{#if: php5 | php5 | {{#if: | :}}Quick HOWTO : Ch10 : Windows, Linux, and Samba/zh}}/ja | • {{#if: php5|日本語| [[::Quick HOWTO : Ch10 : Windows, Linux, and Samba/zh/ja|日本語]]}}|}} {{#ifexist: {{#if: php5 | php5 | {{#if: | :}}Quick HOWTO : Ch10 : Windows, Linux, and Samba/zh}}/ko | • {{#if: php5|한국어| [[::Quick HOWTO : Ch10 : Windows, Linux, and Samba/zh/ko|한국어]]}}|}} {{#ifexist: {{#if: php5 | php5 | {{#if: | :}}Quick HOWTO : Ch10 : Windows, Linux, and Samba/zh}}/ksh | • {{#if: php5|Ripoarisch| [[::Quick HOWTO : Ch10 : Windows, Linux, and Samba/zh/ksh|Ripoarisch]]}}|}} {{#ifexist: {{#if: php5 | php5 | {{#if: | :}}Quick HOWTO : Ch10 : Windows, Linux, and Samba/zh}}/mr | • {{#if: php5|मराठी| [[::Quick HOWTO : Ch10 : Windows, Linux, and Samba/zh/mr|मराठी]]}}|}} {{#ifexist: {{#if: php5 | php5 | {{#if: | :}}Quick HOWTO : Ch10 : Windows, Linux, and Samba/zh}}/ms | • {{#if: php5|Bahasa Melayu| [[::Quick HOWTO : Ch10 : Windows, Linux, and Samba/zh/ms|Bahasa Melayu]]}}|}} {{#ifexist: {{#if: php5 | php5 | {{#if: | :}}Quick HOWTO : Ch10 : Windows, Linux, and Samba/zh}}/nl | • {{#if: php5|Nederlands| [[::Quick HOWTO : Ch10 : Windows, Linux, and Samba/zh/nl|Nederlands]]}}|}} {{#ifexist: {{#if: php5 | php5 | {{#if: | :}}Quick HOWTO : Ch10 : Windows, Linux, and Samba/zh}}/no | • {{#if: php5|norsk| [[::Quick HOWTO : Ch10 : Windows, Linux, and Samba/zh/no|norsk]]}}|}} {{#ifexist: {{#if: php5 | php5 | {{#if: | :}}Quick HOWTO : Ch10 : Windows, Linux, and Samba/zh}}/oc | • {{#if: php5|occitan| [[::Quick HOWTO : Ch10 : Windows, Linux, and Samba/zh/oc|occitan]]}}|}} {{#ifexist: {{#if: php5 | php5 | {{#if: | :}}Quick HOWTO : Ch10 : Windows, Linux, and Samba/zh}}/pl | • {{#if: php5|polski| [[::Quick HOWTO : Ch10 : Windows, Linux, and Samba/zh/pl|polski]]}}|}} {{#ifexist: {{#if: php5 | php5 | {{#if: | :}}Quick HOWTO : Ch10 : Windows, Linux, and Samba/zh}}/pt | • {{#if: php5|português| [[::Quick HOWTO : Ch10 : Windows, Linux, and Samba/zh/pt|português]]}}|}} {{#ifexist: {{#if: php5 | php5 | {{#if: | :}}Quick HOWTO : Ch10 : Windows, Linux, and Samba/zh}}/ro | • {{#if: php5|română| [[::Quick HOWTO : Ch10 : Windows, Linux, and Samba/zh/ro|română]]}}|}} {{#ifexist: {{#if: php5 | php5 | {{#if: | :}}Quick HOWTO : Ch10 : Windows, Linux, and Samba/zh}}/ru | • {{#if: php5|русский| [[::Quick HOWTO : Ch10 : Windows, Linux, and Samba/zh/ru|русский]]}}|}} {{#ifexist: {{#if: php5 | php5 | {{#if: | :}}Quick HOWTO : Ch10 : Windows, Linux, and Samba/zh}}/si | • {{#if: php5|සිංහල| [[::Quick HOWTO : Ch10 : Windows, Linux, and Samba/zh/si|සිංහල]]}}|}} {{#ifexist: {{#if: php5 | php5 | {{#if: | :}}Quick HOWTO : Ch10 : Windows, Linux, and Samba/zh}}/sq | • {{#if: php5|shqip| [[::Quick HOWTO : Ch10 : Windows, Linux, and Samba/zh/sq|shqip]]}}|}} {{#ifexist: {{#if: php5 | php5 | {{#if: | :}}Quick HOWTO : Ch10 : Windows, Linux, and Samba/zh}}/sr | • {{#if: php5|српски / srpski| [[::Quick HOWTO : Ch10 : Windows, Linux, and Samba/zh/sr|српски / srpski]]}}|}} {{#ifexist: {{#if: php5 | php5 | {{#if: | :}}Quick HOWTO : Ch10 : Windows, Linux, and Samba/zh}}/sv | • {{#if: php5|svenska| [[::Quick HOWTO : Ch10 : Windows, Linux, and Samba/zh/sv|svenska]]}}|}} {{#ifexist: {{#if: php5 | php5 | {{#if: | :}}Quick HOWTO : Ch10 : Windows, Linux, and Samba/zh}}/th | • {{#if: php5|ไทย| [[::Quick HOWTO : Ch10 : Windows, Linux, and Samba/zh/th|ไทย]]}}|}} {{#ifexist: {{#if: php5 | php5 | {{#if: | :}}Quick HOWTO : Ch10 : Windows, Linux, and Samba/zh}}/tr | • {{#if: php5|Türkçe| [[::Quick HOWTO : Ch10 : Windows, Linux, and Samba/zh/tr|Türkçe]]}}|}} {{#ifexist: {{#if: php5 | php5 | {{#if: | :}}Quick HOWTO : Ch10 : Windows, Linux, and Samba/zh}}/vi | • {{#if: php5|Tiếng Việt| [[::Quick HOWTO : Ch10 : Windows, Linux, and Samba/zh/vi|Tiếng Việt]]}}|}} {{#ifexist: {{#if: php5 | php5 | {{#if: | :}}Quick HOWTO : Ch10 : Windows, Linux, and Samba/zh}}/yue | • {{#if: php5|粵語| [[::Quick HOWTO : Ch10 : Windows, Linux, and Samba/zh/yue|粵語]]}}|}} {{#ifexist: {{#if: php5 | php5 | {{#if: | :}}Quick HOWTO : Ch10 : Windows, Linux, and Samba/zh}}/zh | • {{#if: php5|中文| [[::Quick HOWTO : Ch10 : Windows, Linux, and Samba/zh/zh|中文]]}}|}} {{#ifexist: {{#if: php5 | php5 | {{#if: | :}}Quick HOWTO : Ch10 : Windows, Linux, and Samba/zh}}/zh-hans | • {{#if: php5|中文(简体)| [[::Quick HOWTO : Ch10 : Windows, Linux, and Samba/zh/zh-hans|中文(简体)]]}}|}} {{#ifexist: {{#if: php5 | php5 | {{#if: | :}}Quick HOWTO : Ch10 : Windows, Linux, and Samba/zh}}/zh-hant | • {{#if: php5|中文(繁體)| [[::Quick HOWTO : Ch10 : Windows, Linux, and Samba/zh/zh-hant|中文(繁體)]]}}|}} |
{{#ifeq:php5|:Quick HOWTO : Ch10 : Windows, Linux, and Samba/zh|请不要直接编辑翻译本页,本页将定期与来源同步。}} |
{{#ifexist: :Quick HOWTO : Ch10 : Windows, Linux, and Samba/zh/zh | | {{#ifexist: Quick HOWTO : Ch10 : Windows, Linux, and Samba/zh/zh | | {{#ifeq: {{#titleparts:Quick HOWTO : Ch10 : Windows, Linux, and Samba/zh|1|-1|}} | zh | | }} }} }} {{#ifeq: {{#titleparts:Quick HOWTO : Ch10 : Windows, Linux, and Samba/zh|1|-1|}} | zh | | }}
介绍
Samba是一个用来共享linux的资源(包括文件和打印机)给Windows的软件套装。本章介绍如何使Linux成为Windows主域名服务器(PDC)或者Windows工作组服务器。两种配置都允许用户:
- their own logins on all the home windows boxes while having their files on the Linux box appear to be located on a new Windows drive
- 使用linux上的共享打印机
- 访问linux用户组所共享的文件
域成员和工作组成员有什么区别呢,详细的描述超出本章的内容,但是这个简单的解释已经足够了:
- 一个域服务器把所有的登陆信息存储到自己的数据库上。这允许每个用户在网络的所有电脑上采用同样的用户名和密码登陆。
- 在Windows工作组中, 每台电脑都把用户名和密码存储在本地所以对于每台电脑用唯一的用户名和密码。
本章只包括最流行的域服务器设置方法。默认方式下,Samba几乎模拟Windows域服务器所有用来共享文件的方式。当你设置Samba时,linux本身的功能完全保留。Samba域和linux共享同样的用户名,所以你可以采用linux的密码来登陆基于samba的域并且立即获得你的linux用户的主目录下的权限。为了增加安全性,你可以为Samba和linux设置不同的密码。
Samba启动後每当有客户请求时,Samba的守护程序读取配置文件/etc/samba/smb.conf来决定不同的操作方式。你可以使用文本编辑器或者基于Web的SWAT软件来设置配置文件。使用SWAT设置相对简单些,但是如果你先用文本模式的编辑器创建/etc/samba/smb.conf接着再用SWAT来编辑配置文件,你用文本模式编辑器添加进配置文件中的所有注释都将丢失。下面介绍如何使用SWAT和文本模式编辑器来配置Samba。
注意事项:因为smb.conf文件经常的读写,你最好保存一份这个文件的拷贝以备不使用SWAT来时来设置此文件。当完成修改以後,使用第12章“Samba的安全性和调试”所述的testparm来验证修改的正确性。如果满意修改,把这个文件拷贝到原来的位置。
下载和安装
大多数RedHat和Fedora linux软件都是采用RPM格式的。下载和安装RPM软件包并不难,可以参考第6章"安装Linux软件"(那里涉及到具体的操作细节)
Samba由一系列的RPM软件包组成,可以在Fedora安装CD中找到。这些文件包括
- samba
- samba-common
- samba-client
- samba-swat
当你搜索这些文件的时候,记住这些RPM软件包的名字通常带有一系列的数字,比如samba-client-3.0.0-15.i386.
启动Samba
- 你可以采用chkconfig命令使Samba在系统启动时启动
[root@bigboy tmp]# chkconfig smb on
- 你也可以在启动后运行如下的smb初始化脚本来启动/停止/重启动Samba
[root@bigboy tmp]# service smb start
[root@bigboy tmp]# service smb stop
[root@bigboy tmp]# service smb restart
注意事项:和henduoinux软件不同的是,在修改Samba的配置文件后无需重启Samba,因为Samba当每次用户端请求时都读取配置文件。
- 你可以使用pgrep命令来测试smb进程是否在运行,然后你将得到一个进程号
[root@bigboy tmp]# pgrep smb
Samba配置文件
/etc/samba/smb.conf是你主要需要修改的配置文件,它分为五部分如表10-1所示
表10-1 文件格式 - smb.conf
| 小节 | 描述 |
| [global] |
全局
|
| [printers] |
关于打印机的配置 |
| [homes] |
用户登录方式 |
| [netlogon] |
用户登录脚本(默认不配置) |
| [profile] |
域名登陆信息,包括收藏夹和桌面图标(默认不配置) |
你可以手动修改配置文件或者使用SWAT软件的web界面修改。
用SWAT使Samba配置更简单
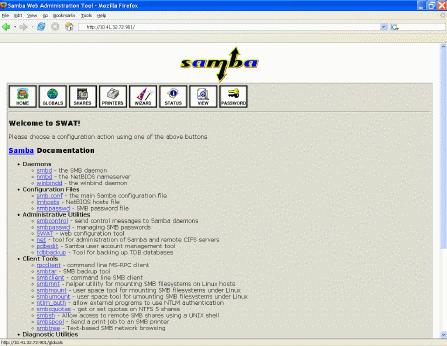
SWAT是Samba的基于web的配置工具,它可以方便你配置而不用记忆所有的文件格式。每个SWAT的屏幕实际上是一张表,它复盖了smb.conf文件中独立的一个节。为了方便使用,每个参数表个都有相应的在线帮助。图10-1展示了SWAT的主登陆界面。
图 10-1 Samba SWAT 主菜单

安装SWAT
你必须时刻记住SWAT编辑smb.conf文件但是你之前手动输入任何注释都将被丢掉。原始的smb.conf文件中有很多有用的注释,你应该在使用SWAT以前保留一个备份以供参考。例如,你可以把原始文件存为/etc/samba/smb.conf.orginal如
[root@bigboy tmp]# cp /etc/samba/smb.conf /etc/samba/smb.conf.original
可以看出,使用SWAT需要有一些对于smb.conf文件中参数的理解因为它删除了那些注释。请在使用SWAT前熟悉配置文件中的大部分重要选项。
SWAT不会加密你的登录密码。因为这可能是一个安全性的考虑,在环境中你可能会创建一个Samba管理者使其没有根用户权限或者仅仅赋予其从图形终端或者localhost来控制SWAT的权力。
启用和停用以及开始和停止SWAT都是由xinted通过配置文件/etc/xinted.d/swat来控制的,具体细节察看第六章, "[[Quick HOWTO : Ch16 : Telnet, TFTP, and xinetd|Telnet, TFTP, and xinetd" 。下面是一个配置文件的示例
service swat
{
port = 901
socket_type = stream
protocol = tcp
wait = no
user = root
server = /usr/sbin/swat
log_on_failure += USERID
disable = no
only_from = localhost
}
这个文件的格式相当容易理解,特别是那里只有两项。
- 参数disable必须设置为no用来接受连接。後面会看到,
- 这个选项可以自动的在yes和no之间切换。
默认配置只允许用户使用root从901端口并且在VGA终端登入。这意味着你必须在你的浏览器上输入"http://127.0.0.1:901" 来登入SWAT管理界面。
你可以给SWAT配置文件中的only_from参数中增加IP地址来允许从这个地址访问SWAT。这里是一个例子,其中仅允许来自192.168.1.3和本地机器的访问。注意在各个项之间没有逗号。
only_from = localhost 192.168.1.3
这时候你可以从ip地址为192.168.1.3的计算机上通过连接"http://192.168.1.100:901"来配置ip地址为192.168.1.100的Samba linux服务器bigboy。
注意大部分防火清都不允许通过端口901的TCP链接。你可以调整你的防火墙策略来允许这个链接。
控制 SWAT
如所有受xinetd控制的应用程序一样,chkconfig命令会根据配置文件中的设置自动停止相应的应用或者激活已经进行的改变。
当SWAT可以使用前,控制它的SWAT程序必须提前激活。你可以在启动后利用xinetd初始化脚本启动/停止/重启动xineted,如下:
[root@bigboy tmp]# service xinetd start
[root@bigboy tmp]# service xinetd stop
[root@bigboy tmp]# service xinetd restart
正如大部分linux系统程序,你可以使用chkconfig命令配置xinetd在系统启动时启动:
[root@bigboy tmp]# chkconfig xinetd on
激活SWAT:
[root@bigboy tmp] chkconfig swat on
停止SWAT:
[root@bigboy tmp] chkconfig swat off
加密 SWAT
By default SWAT is configured via an unencrypted web link using the Linux root account. When running SWAT in the unsecured mode above you should take the added precaution of using it from the Linux console whenever possible.
You can configure SWAT to work only with securely encrypted HTTP (HTTPS) versus the regular HTTP method shown above. Here is how it's done. (Please refer to the VPN section of Appendix I, "Miscellaneous Linux Topics," for more details on encryption methods.)
创建stunnel用户
你可以通过useradd命令来创建一个stunnel用户:
[root@smallfry tmp]# useradd stunnel
创建授权
From the /usr/share/ssl/certs directory and create the encryption key certificate using the make command. Use all the defaults when prompted, but make sure you use the server's IP address when prompted for your server's Common Name or hostname.
[root@bigboy tmp]# cd /usr/share/ssl/certs
[root@bigboy certs]# make stunnel.pem
...
Common Name (eg, your name or your server's hostname) []: 172.16.1.200
...
[root@bigboy certs]#
Note: The resulting certificate has only a 365 day lifetime. Remember to repeat this process next year.
更改授权文件的访问权限
授权应该只允许root和stunnel用户读。可以使用chmod和chgrp命令来更改权限。
[root@bigboy certs]# chmod 640 stunnel.pem
[root@bigboy certs]# chgrp stunnel stunnel.pem
[root@bigboy certs]# ll /usr/share/ssl/certs
-rw-r----- 1 root stunnel 1991 Jul 31 21:50 stunnel.pem
[root@bigboy certs]#
创建配置文件/etc/stunnel/stunnel.conf
You can configure the stunnel application to:
- Intercept encrypted SSL traffic received on any TCP port
* Decrypt this traffic
* Funnel the unencrypted data to any application listening on another port.
For example, you can configure the /etc/stunnel/stunnel.conf file to intercept SSL traffic on the SWAT port 901 and funnel it decrypted to a SWAT daemon running on port 902. Here's how:
- Configure stunnel to run as user "stunnel" placing temporary
# files in the /home/stunnel/ directory
chroot = /home/stunnel/
pid = /stunnel.pid
setuid = stunnel
setgid = stunnel
# Log all stunnel messages to /var/log/messages
debug = 7
output = /var/log/messages
- Define where the SSL certificates can be found.
client = no
cert = /usr/share/ssl/certs/stunnel.pem
key = /usr/share/ssl/certs/stunnel.pem
- Accept SSL connections on port 901 and funnel it to
# port 902 for swat.
[swat]
accept = 901
connect = 902
创建一个新的/etc/xinetd.d文件用于加强SWAT安全性
To start, copy the swat file and name it swat-stunnel. We then configure the new file to be enabled, listening on port 902 and accepting connections only from localhost. We also make sure that the service is set to swat-stunnel.
[root@bigboy certs]# cd /etc/xinetd.d
[root@bigboy xinetd.d]# cp swat swat-stunnel
Your new swat-stunnel file should look like this:
service swat-stunnel
{
port = 902
socket_type = stream
wait = no
only_from = 127.0.0.1
user = root
server = /usr/sbin/swat
log_on_failure += USERID
disable = no
bind = 127.0.0.1
}
在文件/etc/xinetd.d/swat中停止SWAT
The stunnel daemon actually intercepts port 901 traffic on behalf of swat-stunnel. You'll need to disable SWAT to prevent a conflict.
编辑/etc/services文件创建一个SWAT安全登陆项
The xinetd daemon searches /etc/services file for ports and services that match those listed in each configuration file in the /etc/xinetd.d directory. If the daemon doesn't find a match it ignores the configuration file.
We now have to edit /etc/services to include our new swat-stunnel file like this.
swat-stunnel 902/tcp # Samba Web Administration Tool (Stunnel)
激活swat-stunnel
You can then start the new swat-stunnel application with the chkconfig command. You'll also need to shutdown regular swat beforehand.
[root@bigboy xinetd.d]# chkconfig swat off
[root@bigboy xinetd.d]# chkconfig swat-stunnel on
启动stunnel
Now start stunnel for the encryption to take place.
[root@bigboy xinetd.d]# stunnel
In Fedora Core 2 you may get a cryptonet error when starting stunnel as in:
Unable to open "/dev/cryptonet"
This is caused by an incompatibility with the hwcrypto RPM used for hardware-, not software-based encryption. You need to uninstall hwcrypto to get stunnel to work correctly.
[root@bigboy xinetd.d]# rpm -e hwcrypto
You will then have to stop stunnel, restart xinetd and start stunnel again. After this, stunnel should begin to function correctly. Unfortunately stunnel doesn't have a startup script in the /etc/init.d directory and needs to be terminated manually using the pkill command.
[root@bigboy xinetd.d]# pkill stunnel
[root@bigboy xinetd.d]# stunnel
测试SWAT安全性
Your Samba server should now be listening on both port 901 and 902 as shown by the netstat -an command that follows. The server will accept remote connections on port 901 only.
[root@bigboy xinetd.d]# netstat -an
...
...
tcp 0 0 0.0.0.0:901 0.0.0.0:* LISTEN
tcp 0 0 127.0.0.:902 0.0.0.0:* LISTEN
...
...
[root@bigboy xinetd.d]#
测试SWAT的安全登陆
Point your browser to the Samba server to make an HTTPS connection on port 901.
https://server-ip-address:901/
You will be prompted for the Linux root user username and password. There will be a delay of about 60 to 75 seconds with each login.
调试SWAT安全性
Sometimes you'll make mistakes in the stunnel.conf file but changes to this file take effect only after stunnel has been restarted. Unfortunately, there is no stunnel script in the /etc/init.d directory to easily stop and restart it. You have to use the pkill command to stop it and the stunnel command to start it again:
[root@bigboy tmp]# pkill stunnel ; stunnel
Make sure the file permissions and ownership on the stunnel.pem file are correct and that SWAT is always permanently off, but swat-stunnel is permanently on.
You can also refer to Chapter 4, "Simple Network Troubleshooting", to isolate connectivity issues between the SWAT client and Samba server on TCP port 901 amongst other things.
如何使SWAT设置立即生效
当你通过web图形界面执行改变后,SWAT能立即使这些改变生效。
创建一个启动配置文件
现在,我将演示如何给一个小型网络配置一个Samba服务器。你需要编辑smb.conf文件中的各个小节,所以我将带你浏览各个小节。
[Global]小节
[global]小节负责Samba的一般设定。表10-2解释了为了创建一个主域名服务器需要设置的各种参数。
表 10-2 : smb.conf 最简单的设置, "Global" 小节
|
Parameter |
Value |
Description |
|
domain logons |
Yes |
告诉Samba成为一个主域名服务器 |
|
preferred master |
Yes |
使主域名服务器保存网络上所有的windows服务器、客户端以及打印机的名字。当你需要“浏览”本地网络来寻找资源时非常有用。
|
|
domain master |
Yes |
Tells Samba to become the master browser across multiple networks all over the domain. The local master browsers register themselves with the domain master to learn about resources on other networks. |
|
os level |
65 |
当Samba服务器和Windows服务器商议哪个成为主域名服务器时,这个选项决定优先权。65通常能使Samba服务器获胜。 |
|
wins support |
Yes |
允许Samba服务器为网络提供名字解析服务。也就是说追踪所有的域服务器和客户端的ip。
|
|
time server |
Yes |
使samba服务器为域的客户端提供时间更新服务。
|
|
workgroup |
"homenet" |
要创建的Windows域的名字。可以由你自己选择,这里我决定使用homenet。
|
|
security |
user |
使域登陆的申请查询Samba服务器上的samba密码数据库。
|
下面是如何通过SWAT来进行设置.
- 登入SWAT,点击 [global]小节.
- 点击Advanced按钮查看更多选项
- 进行设置完成后点击Commit Changes按钮。
- 当你完成后,你的smb.conf 文件将自动记录这些改变。 你可以登陆到samba服务器上通过命令“cat /etc/samba/smb.conf”来查看验证刚才所做的改变。
[global]
workgroup = HOMENET
time server = Yes domain logons = Yes os level = 65 preferred master = Yes domain master = Yes
Note:''''security = user 和WINS support = yes 是Samba的默认配置,即使你在SWAT中看到了它们,它们可能不会出现在smb.conf文件中。
使用SWAT向导
The SWAT utility has a Wizard button that can be used to configure your server as a PDC quickly. However the defaults may not be to your liking, for example, the default domain is MYGROUP and some of the [global] parameters mentioned previously will be set to auto.
[homes]小节
Part of the process of adding a user to a Samba domain requires you to create a Linux user on the Samba PDC itself. When you log into the Samba PDC, you'll see a new drive, usually named Z:, added to your PC. This is actually a virtual drive that maps to the corresponding Linux users' login directories on the Linux PDC.
Samba considers all directories to be shares that can be configured with varying degrees of security. The [homes] section governs how Samba handles default login directories.
Table 10-3 explains the minimum settings you need to create a functional [Homes] section.
表 10-3 : smb.conf 最简单的设置, "Home" 小节
|
Parameter |
Value |
Description |
|
browseable |
No |
Doesn't allow others to browse the contents of the directory |
|
read only |
No |
Allows the samba user to also write to their Samba Linux directory |
|
create mask |
0664 |
Makes new files created by the user to have "644" permissions. You want to change this to "0600" so that only the login user has access to files. |
|
directory mask |
0775 |
Makes new sub-directories created by the user to have "775" permissions. You want to change this to "0700" so that only the login user has access to directories. |
Here's how to set the values using SWAT:
- Click on the SWAT shares button to proceed to where shared directories are configured.
- Click the Advanced button to see all the options.
- Choose the Homes share.
- Make your changes and click on the Commit Changes button when finished.
- Your smb.conf file should resemble this when finished. You can view the contents of the configuration file by logging in to the samba server via a command prompt and using the cat /etc/samba/smb.conf to verify your changes as you do them.
[homes]
read only = No browseable = No create mask = 0644 directory mask = 0755
[netlogon]和[profiles]共享部分的小节
The [netlogon] share section contains scripts that the windows clients may use when they log into the domain. The [profiles] share section stores settings related to the look and feel of windows so that the user has the same settings no matter which Windows PC is logged into. The [profiles] share section stores things such as favorites and desktop icons.
Your smb.conf file should look like this when you're finished:
[netlogon]
path = /home/samba/netlogon guest ok = Yes
[profiles]
path = /home/samba/profiles
read only = No create mask = 0600 directory mask = 0700
Here's how to do it.
- Click the Shares button.
- Create a [netlogon] share.
- Modify the path and guest ok settings.
- Click on the Commit Changes button.
- Create a [profiles] share section.
- Modify the path, mask and read only settings. The mask settings allow only the owner of the netlogon subdirectory to be able to modify its contents.
- Click on the Commit Changes button.
Remember to create these share directories from the command line afterwards.
[root@bigboy tmp]# mkdir -p /home/samba/netlogon
[root@bigboy tmp]# mkdir -p /home/samba/profile [root@bigboy tmp]# chmod -R 0755 /home/samba
[printers]小节
Samba has special shares just for printers, and these are configured in the [printers] section of SWAT. There is also a share under [printers] called printers which governs common printer settings. Print shares always have the printable parameter set to yes. The default smb.conf [printers] share section looks like this:
[printers]
comment = All Printers path = /var/spool/samba printable = Yes browseable = No
特定群组成员共享权限的设定
The default Samba Version 3 smb.conf file you saved at the beginning of this exercise has many varied examples that you may use and apply to your particular environment.
You can find the steps for creating a simple shared directory for home users in Chapter 11, "Sharing Resources with Samba".
Samba的密码
You should be aware that your Linux password and Samba passwords are stored in two different locations. This provides the Samba administer the flexibility of allowing only some of the Linux users to have Samba accounts.
Use the passwd command to change Linux passwords, which are stored in the /etc/shadow file. Samba passwords are stored in the /etc/samba/smbpasswd file and can be changed smbpasswd command.
This difference is important, as you will see throughout the chapter.
如何创建一个Samba主域名服务器管理员帐户
To do both SWAT and user administration with Samba you'll need to create administrator accounts on the Samba PDC Linux server.
Home Environment
By default, the root user is the Samba administrator, and SWAT requires you to use the Linux root password to be used. Fortunately, you can add workstations to the Windows domain by creating a Samba specific root password. This is done using the smbpasswd command.
[root@bigboy tmp]# /usr/bin/smbpasswd -a root password
Note: Remember that regular Linux logins via the console, Telnet or SSH require the Linux passwd command. Samba domain logins use the smbpasswd password. Samba passwords are stored in the /etc/samba/smbpasswd file.
Corporate Environment
In a corporate environment, you may want more than one person to administer Samba, each with their own usernames. Here are the steps to do this:
1. Create a Linux user group, such as sysadmin with the groupadd command.
2. Use SWAT to update your smb.conf file so that the sysadmin group is listed in the [global] parameter settings.
domain admin group = @sysadmin
admin users = @sysadmin printer admin = @sysadmin
3. Create individual Linux users that are part of this group.
4. Use the smbpasswd command to create Samba passwords for Domain logins for this group. For security reasons this password may be different from the Linux password used to log into the Linux system from the console, via telnet or ssh. (Remember that Linux passwords are changed with the passwd command.)
如何向Samba域中增加工作组
Adding workstations to a Samba domain is a two step process involving the creation of workstation trust accounts on the Samba server and then logging into each workstation to add them to the domain.
为每个工作组创建一个Samba信任的帐户
PDCs will accept user logins only from trusted PCs that have been placed in its PC client database. Samba can create these Machine Trusts in two ways, either manually or automatically.
Manual Creation Of Machine Trust Accounts (NT Only)
The commands in this example create a special Linux group for Samba clients and then add a special machine user that's a member of the group. The password for this user is then disabled and the machine is then added to the smbpasswd file to help keep track of which devices are members of the domain. In summary, a machine trust account needs to have entries in the /etc/passwd and /etc/smbpasswd files. Pay careful attention to the dollar sign ($) at the end and replace machine_name with the name of the Windows client machine.
[root@bigboy tmp]# groupadd samba-clients
[root@bigboy tmp]# /usr/sbin/useradd -g samba-clients \ -d /dev/null -s /bin/false machine_name$ [root@bigboy tmp]# passwd -l machine_name$ [root@bigboy tmp]# smbpasswd -a -m machine_name
This is the only way to configure machine trusts using Windows NT.
Dynamic Creation of Machine Trust Accounts
Although you can use the manual method, the recommended way of creating machine trust accounts is simply to allow the Samba server to create them as needed when the Windows clients join the domain which known as making a machine account on the fly. You can set this up by editing the /etc/samba/smb.conf file to automatically add the required users.
The easiest way to do this using SWAT in the Global menu to modify the add machine script parameter.
[global]
- <...remainder of parameters...>
add machine script = /usr/sbin/useradd -d /dev/null -g samba-clients -s /bin/false -M %u
When you have completed the modifications, you'll need to create the samba-clients Linux group that will be used to help identify the all the domain's Windows clients listed in the /etc/passwd file.
[root@bigboy tmp]# groupadd samba-clients
In Samba version 2, you need to add the client to the smbpasswd file also
[root@bigboy tmp]# smbpasswd -a -m machine_name
Samba version 3 adds it automatically.
使你的客户端电脑识别你的Samba主域名服务器
There are many types of Windows installed on people's PCs and each version has its own procedure for joining a domain. The next sections show you how to add the most popular versions of Windows clients to your domain:
Windows 95/98/ME 和 Windows XP Home版
Windows 9x machines do not implement full domain membership and therefore don't require machine trust accounts. Here's what you need to do:
- Navigate to the Network section of the Control Panel (Start ->Settings->Control Panel->Network)
- Select the Configuration tab
- Highlight "Client for Microsoft Networks"
- Click the Properties button.
- Check "Log onto Windows NT Domain", and enter the domain name.
- Click all the OK buttons and reboot!
Windows NT版
For Windows NT, you must first create a manual Samba machine trust account as explained earlier, then follow these steps:
- Navigate to the Network section of the Control Panel (Start ->Settings->Control Panel->Network )
- Select the "Identification" tab
- Click the "Change" button
- Enter the domain name and computer name, do not check the box Create a Computer Account in the Domain. In this case, the existing machine trust account is used to join the machine to the domain.
- Click "OK". You should get "Welcome to <DOMAIN>" message as confirmation that you've been added.
- Reboot.
You can now log in using any account in the /etc/smbpasswd file with your domain as the domain name.
Windows 200x 和 Windows XP Professional版
For the 200x and XP Professional varieties of Windows, create a dynamic Samba machine trust account, then go through these steps:
- Press the Windows and Break keys simultaneously to access the System Properties dialogue box.
- Click on the 'Network Identification' or 'Computer Name' tab on the top.
- Click the "Properties" button.
- Click on the "Member of Domain" button.
- Also enter your domain name and computer name and then click "OK"
- You will be prompted for a user account and password with rights to join a machine to the domain. Enter the information for your Samba administrator. In this home environment scenario, the user would be root with the corresponding smbpasswd password. Now, you should get a "Welcome to <DOMAIN>" message confirming that you've been added.
- Reboot.
Log in using any account in the /etc/smbpasswd file with your domain as the domain name.
Note: With Samba version 2 you may also have to make a few changes to your system's registry using the regedit command and reboot before continuing.
[HKEY_LOCAL_MACHINE\SYSTEM\CurrentControlSet\Services\Netlogon\Parameters]
"requiresignorseal"=dword:00000000 "signsecurechannel"=dword:00000000
如何向你的Samba域中增加用户
Adding users to a domain has three broad phases. The first is adding a Linux user on the Samba server, the second is creating a Samba smbpasswd that maps to the new Linux user created previously, and the third is to map a Windows drive letter to the user's Linux home directory. Let's take a closer look:
在Linux中增加用户
First, go through the process of adding users in Linux just as you would normally. Passwords won't be necessary unless you want the users to log in to the Samba server via telnet or ssh.
创建user
To create the user, use the command:
[root@bigboy tmp]# useradd -g 100 peter
创建其Linux密码
Giving them a Linux password is only necessary if the user needs to log into the Samba server directly. If the user does, use this method:
[root@bigboy tmp]# passwd peter
Changing password for user peter. New password: Retype new password: passwd: all authentication tokens updated successfully. [root@bigboy tmp]#
把Linux用户映射到一个smbpassword
Next, you need to create Samba domain login passwords for the user
[root@bigboy tmp]# /usr/bin/smbpasswd -a username password
The -a switch adds the user to the /etc/smbpasswd file. Use a generic password then have users change it immediately from their workstations in the usual way.
Remember the smbpasswd sets the Windows Domain login password for a user, which is different from the Linux login password to log into the Samba box.
By default, Samba automatically gives each user logged into the domain an H: drive that maps to the /home/username directory on the Linux box.
Mapping Using "My Computer"
If the auto-mapping doesn't work then try:
- Let the user log into the domain.
- Right-click on the "My Computer" icon on the desktop.
- Click on "Map Network Drive".
- Select a drive letter.
- Browse to the HOMENET domain, then the Samba server, then the user's home directory.
- Click on the check box "Reconnect at Logon", to make the change permanent
Mapping from the Command Line
If you find the "My Computer" method too time consuming for dozens of users or if the PC doesn't have the feature available, then you can use the command-line method and possibly make it into a script.
1. Create a master logon batch file for all users
[root@bigboy tmp]# vi /home/samba/netlogon/login.bat
2. Add the following lines to mount the user's share as drive P: (for private).
REM Drive Mapping Script
net use P: \\bigboy\
3. Make the file world readable using:
[root@bigboy tmp]# chmod 644 /home/samba/netlogon/login.bat
4. Linux and Windows format text files slightly differ. As the file resides on a Linux box, but will be interpreted by a Windows machine, you'll have to convert the file to the Windows format. Use the unix2dos command.
[root@bigboy tmp]# unix2dos /home/samba/netlogon/login.bat
unix2dos: converting file /home/samba/netlogon/login.bat to DOS format ... [root@bigboy tmp]#
5. The final step is to edit your smb.conf file's [global] section have a valid entry for the logon script parameter. This can be done using SWAT via the Globals menu.
[global]logon script = login.bat
Now your users will have additional disk space available on a Windows P: drive whenever they login.
Samba和域
Samba supports domain groups that will allow users who are members of the group to be able to have Administrator rights on each PC in the domain. This enables them to add software and configure network settings. In Windows, Domain Groups also have the ability to join machines to the domain: however, Samba does not support this currently.
The domain admin group parameter specifies users who will have domain administrator rights. The argument is a space-separated list of user names or group names (group names must have an @ sign prefixed). For example:
domain admin group = USER1 USER2 @GROUP
如何从samba域中删除成员
Deleting users from your Samba domain is a two stage process in which you have to remove the user from the Linux server and also remove the user's corresponding smbpasswd entry. Here's how:
1. Delete the users using the smbpasswd with the -x switch
[root@bigboy tmp]# smbpasswd -x john
Deleted user john. [root@bigboy root]#
2. Delete The Linux User by following the normal deletion process. For example, to delete the user john and all john's files from the Linux server use:
[root@bigboy tmp]# userdel -r john
Sometimes you may not want to delete the user's files so that they can be accessed by other users at some other time. In this case you can just deactivate the user's account using the passwd -l username command.