UbuntuHelp:MythTV/MediaMVP Frontend
来自Ubuntu中文
| 点击翻译: |
English |
<<Include(MythTV/Header)>>
目录
Hauppauge MediaMVP as a Mythbuntu Frontend
The Hauppauge MediaMVP MediaMVP home is an MPEG-based media device that connects to a standard television set. It plays streamed media via an ethernet network using Hauppauge's media server/applications or third-party applications such as SageTV and GBPVR. When properly configured, the MediaMVP can function as a Mythbuntu frontend using open source firmware called mvpmc mvpmc home. The MediaMVP normally loads Hauppauge-supplied firmware via a TFTP network connection each time it boots. The mvpmc project takes advantage of this to load its firmware instead. This installation procedure was tested on a model H2 MediaMVP, but should boot any flashed-based model with little or no modifications. It is a bare-bones installation and configuration, and includes only what is required to boot the MediaMVP with mvmpmc firmware to allow it to function as a MythTV Frontend to view LiveTV and recorded programs. Other functions may require additional configuration to be fully functional. As installed and tested following this guide, mvpmc peacefully co-exists on a network with an existing SageTV server- should this be a concern for those who have not made a full switch-over to Mythbuntu yet. ;)
Guide Note
This installation procedure was developed from information culled from the mvpmc website and other sources on the web and represents only one possible installation scenario. It was a trial-and-error process undertaken by two Mythbuntu'ers working 800 miles apart via an ssh connection. The author of this guide has never actually seen, let alone held or operated a MediaMVP. Because of this, it was impractical to fully explore the potential of mvpmc running with MythTV. Many features and options are not included here can be configured later via additions and tweaks to the dongle.bin.config file. More information can be found on the mvpmc website. You are encouraged to share your configuration tweaks, etc. in the [[UbuntuHelp:[head-0bf7bd42e665403ef32e2737fe7953ed9965c467|Advanced Configuration]]] section at the end of this guide.
Important Notes
Before proceeding with this installation, you should make sure that your recordings and tuner(s) are fully compatible with mvpmc. One particular caution is that mvpmc currently (Februrary 2007, version 0.3.4) has issues with AC3 audio streams in recordings, which can cause uncorrectable audio lag in certain situations. This was evident when using firewire as a tuner and also with files recorded via firewire. Using a PVR-150 works perfectly for both recordings and LiveTV, as it records mpeg audio by default. Check the recording profiles in your MythTV frontend setup to and adjust the audio settings of your tuners as needed and if allowed. Also note that mvpmc requires that a DHCP server be running on the local network. This installation was developed using a backend that was already networked through a router- therefore the router provides DHCP. If you are not currently connecting your MediaMVP to a router, and are relying on the pc to provide DHCP services like the Hauppauge server does on a direct-connected pc, then you will need to install a DHCP server and have both it and MythTV up and running correctly before proceeding. There are several versions of the MediaMVP hardware. There are important setup differences between the rev. D and rev H MediaMVP's. As of 2009-12-03, this guide does not seem to work with rev D hardware. (See http://mvpmc.sourceforge.net/mvpmc-HOWTO-singlehtml.html for info on that model. Just be sure to use current dongle files, etc.) Furthermore, the current release of mvpmc will not (yet) work well with Mythbuntu 9.10 (MythTV 0.22). Using the latest daily build gets some functions working. Live TV and commercial skip do not work, but a mvpmc team member is working on commercial skip. However, recorded shows from MythTV 0.22 will play on the MediaMVP mvpmc frontend if the latest dongle is used. This guide (as it is written as of 2009-12-03) points to an older dongle file that will not work with Mythbuntu 9.10 at all. File editing in this guide uses nano- feel free to use kate, vi, mousepad, gedit or the editor of your preference.
Preparing Mythbuntu
To begin, you need to enable remote mysql connections and gather some information. If you are currently using a remote frontend with Mythbuntu and know: the ip address of the backend server, the ip of the machine running mysql (if it is running remotely from the backend server) and your mythconverg database password, you can skip to [[UbuntuHelp:[head-70431cc401ba939fdcb9ec2a6a07058770beb67d|Installing mvpmc]]].
 |
Open up Mythbuntu Control Centre |
| Select System Services | |
| Enable Mysql Service | |
| Click Apply |
Next, you need to determine the ip of the backend machine. Open a terminal window and type `ifconfig`:
pvr@mythbox:~$ ifconfig
eth0      Link encap:Ethernet  HWaddr 00:1A:4D:93:ED:E3
          inet addr:192.168.1.100  Bcast:192.168.1.127  Mask:255.255.255.128
          inet6 addr: fe80::21a:4dff:fe93:ede3/64 Scope:Link
          UP BROADCAST RUNNING MULTICAST  MTU:1500  Metric:1
          RX packets:21437 errors:0 dropped:0 overruns:0 frame:0
          TX packets:19622 errors:0 dropped:0 overruns:0 carrier:0
          collisions:0 txqueuelen:1000
          RX bytes:17010935 (16.2 MB)  TX bytes:4779945 (4.5 MB)
          Interrupt:10 Base address:0x4000
In the example above, the backend address is 192.168.1.100. Yours may be different. Write down this ip address, as you will need it for more than one step in this guide. The ip 192.168.1.100 will be used throughout this guide; any time you see this address, you should substitute the ip address of your backend machine if it is different.
Configure Mythbackend
 |
Select MythTV Configuration |
| Click the Launch MythTV Setup button |
When MytTV setup launches, select 1. General. On the first screen of General Setup:
 |
Replace localhost in the IP address field with the actual ip address of your backend server |
| Do the same for Master Server IP | |
| Next your way through the rest of the screens in General Setup until you reach the Main Menu. |
Esc to exit setup and save your changes. When prompted to run `mythfilldatabase`, cancel- there is no need to do this right now.
Mythfrontend
Next, run Mythtv Frontend and enter Setup and then General:
 |
The Host Name field contains the address of the mysql server. In a typical installation, mysql runs on backend machine. If MythTV is installed this way on your machine, the IP address of your backend should be in the Host Name field. Replace localhost in this field if necessary. |
| Write down the Password- you will need this later | |
| Next until you reach the Main Setup Menu and then exit MythTV Frontend |
Installing mvpmc
When it boots, the MediaMVP searches the local network for an atftp connection on port 16869 and builds a list of available servers to boot from. To that end, we need to launch 2 instances of atftp as a daemon- one listening on port 16869 and another listening on port 69. If the second daemon is not listening on port 69, the dongle will not be served to the MediaMVP. As of the writing of this guide, Mythbuntu lacks some dependencies that we need- including atftpd. These will be included by default in the next Mythbuntu release, but until then we need to install them manually. Open a terminal or change to your home directory:
$ sudo apt-get install xinetd atftpd build-essential
Now we can set up atftpd to run as our mvpmc daemons. For simplicity, we'll put them in /etc/rc.local, so they run at boot. While we are editing /etc/rc.local, we will also add a command to launch another program we will add later.
$ sudo nano /etc/rc.local
Before the exit 0, add:
/usr/sbin/atftpd --daemon --port 16869 --retry-timeout 120 \
--mcast-addr 192.168.1.0-255 --mcast-ttl 2 --verbose=7 /tftpboot

/usr/sbin/atftpd --daemon --port 69

/usr/bin/mvprelay 16881 5906 6337 192.168.1.100 &
You may need to change --mcast-addr 192.168.1.0-255, depending on your network configuration. The example is valid for backends ips anywhere in the 192.168.1.xxx range. If your backend ip is 192.168.2.xxx or 192.168.0.xxx, etc. then you need to change it to --mcast-addr 192.168.2.0-255 or --mcast-addr 192.168.0.0-255 -- also remember to replace 192.168.1.100 with the address of your backend server. It should look similar to this when you are finished:
#!/bin/sh -e
#
# rc.local
#
# This script is executed at the end of each multiuser runlevel.
# Make sure that the script will "exit 0" on success or any other
# value on error.
#
# In order to enable or disable this script just change the execution
# bits.
#
# By default this script does nothing.

/usr/sbin/atftpd --daemon --port 16869 --retry-timeout 120 \
--mcast-addr 192.168.1.0-255 --mcast-ttl 2 --verbose=7 /tftpboot

/usr/sbin/atftpd --daemon --port 69

/usr/bin/mvprelay 16881 5906 6337 192.168.1.100 &

exit 0
Next, we need to create a /tftpboot directory for atftpd to work from. To alleviate any permission issues, we will grant write privileges to everyone (it is readable by everyone by default):
$ sudo mkdir /tftpboot
$ sudo chmod a+w /tftpboot
The MediaMVP needs three files to boot the mvpmc media center: `dongle.bin`, `dongle.bin.ver` and `dongle.bin.config`. These three files are served via TFTP from the /tftpboot directory. Next we need to download the dongle file, which contains the mvpmc operating system itself. The `wget` command below contains a link to the most recent stable version as of February 2008. You should check the download page at mvpmc at Sourceforge for the latest version. Adjust the `http` link as necessary. Note that you want the binary file, not the .tar.gz source file
$ wget http://downloads.sourceforge.net/mvpmc/dongle.bin.mvpmc-0.3.4?modtime=1195468079&big_mirror=0
~+Note for H3 Wireless+~ The H3 Wireless version takes a different dongle file, so you will need this one instead:
$ wget http://www.mvpmc.org/%7Emdrons/dongles/dongle.bin.mvpmc
Now,put a copy in /tftpboot, where it will be served from via atftp and rename it to dongle.bin, which is the required name:
$ cp dongle.bin.mvpmc-0.3.4 /tftpboot/dongle.bin
For the H3 wireless:
$ cp dongle.bin.mvpmc /tftpboot/dongle.bin
Next, we need to make a dongle version file, which is required for the boot process on flash-based MediaMVPs:
$ dd if=/tftpboot/dongle.bin of=/tftpboot/dongle.bin.ver bs=1 count=40 skip=52
A relay service is also required for all flash based MVPs. It receives the UDP packets broadcast from the MediaMVP and replies with a packet telling the MediaMVP where the TFTP server and media servers are located. This example uses mvprelay. Other relay service options can be found on the mvpmc website. As you may have noticed, the extra command you added earlier to /etc/rc.local will launch mvprelay at boot. First, download mvprelay:
$ wget "http://git.mvpmc.org/cgi-bin/gitweb.cgi?p=mvpmc.git;a=blob_plain;f=tools/mvprelay/mvprelay.c" -O mvprelay.c
Then compile it:
$ gcc -o mvprelay mvprelay.c
And then move it to /usr/bin with the rest of the executables:
$ sudo cp mvprelay /usr/bin
At this point, it is a good idea to check and see if everything will run at boot as expected. The easiest way to do this is to reboot. Do so now.
Check the Daemons
When the backend is fully booted, open up a terminal and check to see if everything is running as it should:
$ ps -A | grep xinetd
$ ps -A | grep atftpd
$ ps -A | grep mvprelay
If you get valid PIDs for each, so far so good. If not, check /etc/rc.local for typos and /var/log/syslog for errors.
dongle.bin.config
Now you need to create a dongle.bin.config file. This is a very important file that is served to the MediaMVP, as it is the first script run when mvpmc boots up. It can perform many required and potential functions, such as:
- Setting the time zone (required)
- Setting the system clock from a timeserver (required)
- Setting up network information such as /etc/hosts (required)
- Saving and Loading settings
- Mounting networked storage
- Loading Themes
Consult the mvpmc website for complete information and customization ideas to try later. In this example, we will set up the bare minimum for usability with Mythbuntu (as determined by the author- your mileage may vary). To begin, open the text editor of your choice, copy and paste the following and save it as /tftpboot/dongle.bin.config -- leave your editor open after saving, as you will need to customize this for your needs.
# set up host environment variable
HNAME=`hostname`
export HNAME

# setup time and date
# timezone first
TZ='EST+5EDT,M3.2.0/2,M11.1.0/2'
export TZ
echo "TZ='EST+5EDT,M3.2.0/2,M11.1.0/2'; export TZ" > /etc/shell.config;

# set the system clock from the backend ntp service
/bin/ntpclient -s -h 192.168.1.100

# create an /etc/hosts file
# note -- on H4 hardware, the following and third line (below) caused MVP reboot loop. Including the "BE" lines helped with LiveTV.
LH="127.0.0.1 localhost localhost"
BE="192.168.1.100 backend_hostname backend_hostname"
echo $LH > /etc/hosts
echo $BE >> /etc/hosts

# set up to load and save settings

# load settings
. /etc/udhcpc.config
SETTINGSDIR=/tmp/settings
mkdir -p ${SETTINGSDIR}
SETTINGS=${SETTINGSDIR}/settings
RSETTINGS=settings.${HNAME:-$IP}
LASTSAVED=${SETTINGSDIR}/.lastsaved
touch $LASTSAVED
tftp -g -r $RSETTINGS -l $SETTINGS $SERVER;

# save settings
(
   while true; do
       if [ $SETTINGS -nt $LASTSAVED ] ; then
           tftp -p -l $SETTINGS -r $RSETTINGS $SERVER;
           touch $LASTSAVED;
       fi;
       sleep 300;
   done
)&

# boot the MediaMVP

mvpmc -f /etc/helvB14.pcf -o composite -s 192.168.1.100 -y 192.168.1.100 -T mythconverg -u mythtv -p DBPASSWORD -F $SETTINGS &
Customize dongle.bin.config
The last major step is to customize dongle.bin.config to suit your needs. We will address changes a section at a time. First, you need to customize your time zone and time server, so that scheduling info, etc. are accurately reflected when interfacing with the backend.
# setup time and date
# timezone first
TZ='EST+5EDT,M3.2.0/2,M11.1.0/2'
export TZ
echo "TZ='EST+5EDT,M3.2.0/2,M11.1.0/2'; export TZ" > /etc/shell.config;
This example configures for the US Eastern time zone (EST +5EDT). If you are in another time zone, you need to change both instances of EST and +55EDT to match your location. Some valid choices are:
- UK: GMT0BST-1,M3.5.0/01:00,M10.5.0/02:00
- Germany: MEZ-01:00MESZ-02:00,M3.5.0/03:0,M10.5.0/02:00
- US, Central: CST+6CDT,M3.2.0/2,M11.1.0/2
- US, Pacific: PST+8PDT,M3.2.0/2,M11.1.0/2
Then we set the MediaMVP time via the Mythbuntu backend's ntp server:
# set the system clock from the backend ntp service
/bin/ntpclient -s -h 192.168.1.100
Make sure to correct the backend address, if needed. Note that correctly setting the time is mandatory for using the LiveTV function of MythTV with mvpmc. The next section of the config file sets up an /etc/hosts file, so that the mvp can correctly identify the backend on the network. This is achieved through echoing variables to build the /etc/hosts file on the MediaMVP:
# create an /etc/hosts file
LH="127.0.0.1 localhost localhost"
BE="192.168.1.100 backend_hostname backend_hostname"
echo $LH > /etc/hosts
echo $BE >> /etc/hosts
The only changes you need to make are to the BE= line. Replace the address with the ip of your backend, if needed, and replace both instances of backend_hostname with the name of your backend machine. If you are unsure, you can find out from your terminal:
$ hostname
mythbox
Since mythbox was the name returned, the correct entry for the BE= line in this example would be:
BE="192.168.1.100 mythbox mythbox"
The very last changes to make before booting your MediaMVP for the first time are to the final line of the config file:
mvpmc -f /etc/helvB14.pcf -o composite -s 192.168.1.100 -y 192.168.1.100 -T mythconverg -u mythtv -p DBPASSWORD -F $SETTINGS &
This is the command that launches mvpmc and makes everything happen. Again, this example is minimal but it gets the job done. The following changes are mandatory:
- -o composite specifies the composite output of the MediaMVP- you will need to specify -o svideo if you use the s-video output
- The ip following -s is the address of the mythtv server- adjust this as needed
- The ip following -y is the address of the mysql server- unless it is running on a separate machine than the backend, this ip should be the same as for -s
- Substitute your mythconverg database password for DBPASSWORD
Optional setting:
- /etc/helvB14.pcf is the font the MediaMVP will boot with you may want to change this later
- a complete list of comman line boot options can be found here
Booting the MediaMVP
If it is not already, power down the MediaMVP for a minute or two- it may or may not be necessary to physically disconnect the power cord. Ensure that it is plugged into both the network and television, then boot the MediaMVP. During the boot process, you should see:
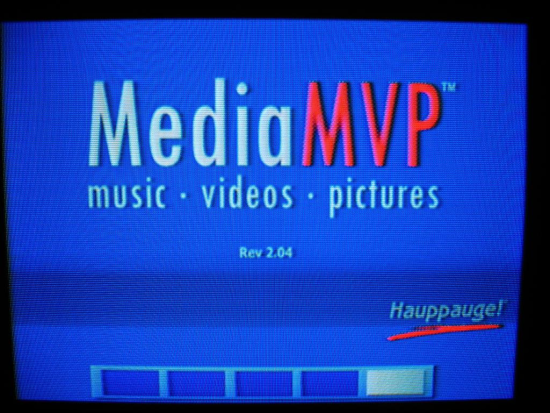 |
The standard MediaMVP boot screen |
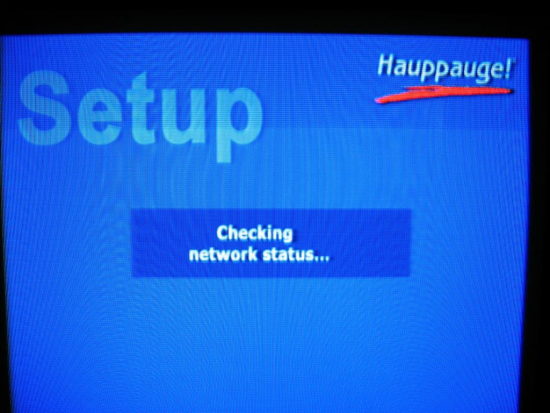 |
Network check |
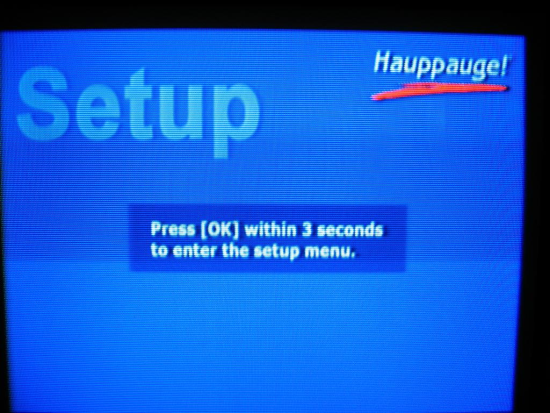 |
After approximately 30 seconds, you should get this prompt...Press OK as instructed |
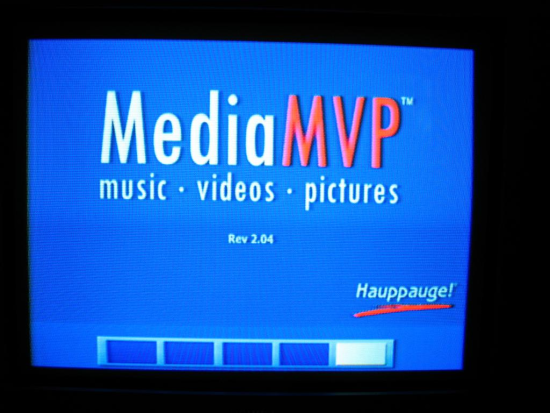 |
It should take approximately 15 seconds for the 5 progress blocks to fill |
 |
Another network scan... |
 |
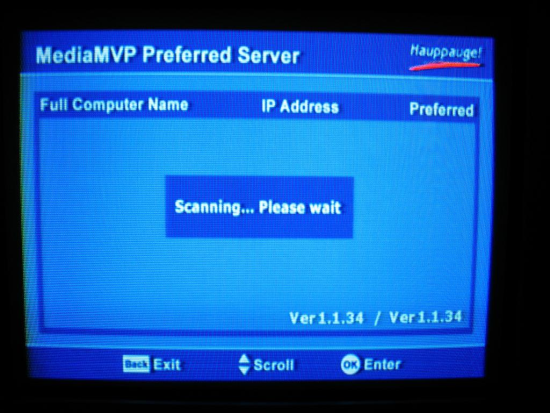
And you should see your MythTV backend listed. In this example it is PVR-DESKTOP. There is also a SageTV server, PC-DESKTOP, on the network too. Select as you normally would. |
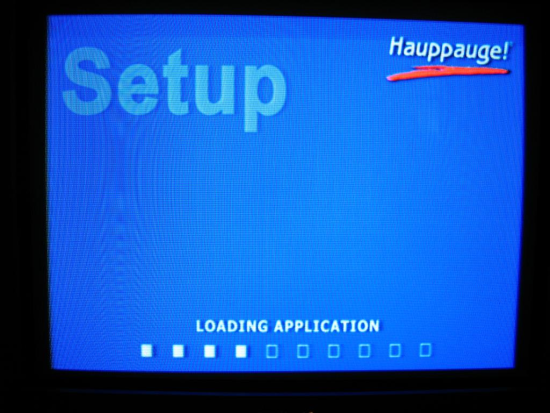 |
More progress blocks while the backend serves the dongle to the MediaMVP |
 |
And a final round of blocks while the MediaMVP boots mvpmc |
 |
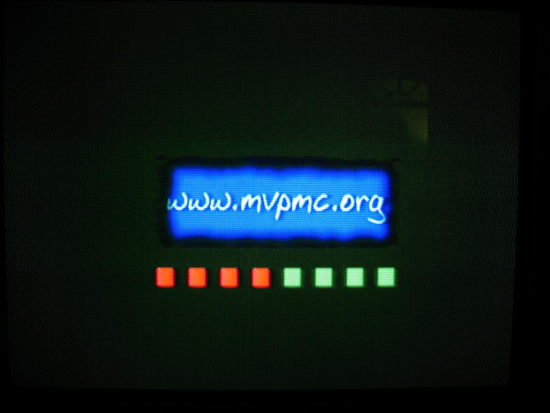
mvpmc is now running- instead of blocks, we get 15-20 seconds of a little cylon action ;) |
 |
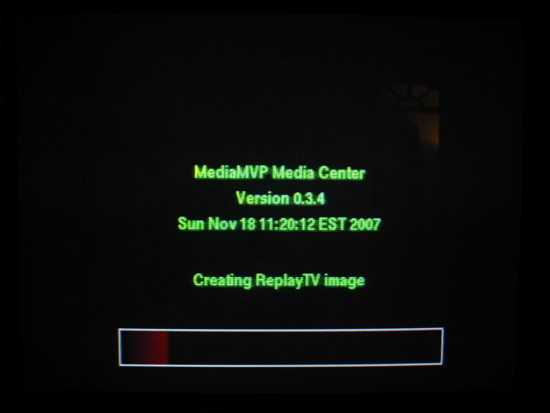
If everything is working correctly, you should get the mvpmc main menu after approximately 90 seconds from the time you booted MediaMVP |
 |
The main mvpmc MythTV menu |
You can also track the progress of the boot process by watching atftpd's log. Since we launched it as a daemon with --verbose=7 (which is debug level), we can look for its entries in /var/log/syslog. A successful boot will look similar to this:
$ tail -n 25 /var/log/syslog
<snip>
Feb  1 20:12:07 mythbox atftpd[6110]: Creating new socket: 192.168.1.100:32772
Feb  1 20:12:07 mythbox atftpd[6110]: Serving dongle.bin.ver to 192.168.1.127:2050
Feb  1 20:12:07 mythbox atftpd[6110]: Creating new socket: 192.168.1.100:32773
Feb  1 20:12:07 mythbox atftpd[6110]: Serving dongle.bin to 192.168.1.127:2051
Feb  1 20:12:35 mythbox in.tftpd[9440]: connect from 192.168.1.127 (192.168.1.127)
Feb  1 20:12:35 mythbox atftpd[9440]: Advanced Trivial FTP server started (0.7)
Feb  1 20:12:35 mythbox atftpd[9440]: Serving dongle.bin.config to 192.168.1.127:2048
With luck, you made it this far and are already watching LiveTV or one of your MythTV recordings on your MediaMVP... ~+ENJOY!+~
Advanced Configuration
Please contribute to this section!
Telnet to the MediaMVP
It is often valuable- especially when setting up advanced configurations- to be able to connect directly to the MediaMVP itself. This is of great aid when setting up filesystems, network information and configuration files- such as the /etc/hosts file the dongle.bin.config builds. The mvpmc software runs a Unix-like kernel called Busybox Busybox home which includes a subset of Unix commands. Knowing the commands available to you is also a great help in setting up advanced configurations. You can connect to the MediaMVP via a 'telnet' session. The Login is root- there is no password.
$ telnet ip.address.of.MediaMVP
Here is a log from a short telnet session, showing built-in shell commands and some available os commands:
majoridiot@pvr1-desktop:~$ telnet 192.168.1.127
Trying 192.168.1.127...
Connected to 192.168.1.127.
Escape character is '^]'.

Welcome to MediaMVP!

192.168.1.127 login: root


BusyBox v1.1.3 (2007.11.18-16:20+0000) Built-in shell (ash)
Enter 'help' for a list of built-in commands.

# help

Built-in commands:
-------------------
        . : alias bg break cd chdir continue eval exec exit export false
        fg hash help jobs kill let local pwd read readonly return set
        shift times trap true type ulimit umask unalias unset wait

# ls
bin      etc      linuxrc  memory   proc     tmp      union    var
dev      lib      live     oldroot  sbin     uPnP     usr

# ls /bin
ash        cp         echo       kill       more       netstat    pwd        splash     umount
busybox    date       false      ln         mount      nice       rm         stat       uname
cat        dd         fgrep      login      msh        ntpclient  rmdir      sync       vpdread
chgrp      df         flashcp    ls         mv         pidof      scp        ticonfig
chmod      djmount    grep       mkdir      mvpmc      ping       sh         touch
chown      dmesg      hostname   mknod      nbtscan    ps         sleep      true

#
Installation and Configuration of a DHCP Server
Luckily, most of the recent versions of the MVP just want an IP address on the local network, and the rest of the options a DHCP server might pass are optional. So, a default installation of a DHCP server (or a typical home router) works just fine. Older MVPs require that the next-server and filename options be set (on the DHCP server). I also set the ntp-servers option, set get-lease-hostnames true, and add host entries for each of my MVPs.
Themes
Please contribute to this section!
Since the MVP does not have sufficient memory to store a full length movie, much less a full library, many people choose to store their media on a networked hard drive or media server. MVP can access this networked drive with a few simple additions to the dongle.bin.config file. The key point to remember is that the MVP directory tree must mirror the networked hard drive directory tree structure. For instance, if the media server has movies located in /media/video then the MVP must have a directory labeled /media/video. Be aware that you will need to set-up NFS on the server and share permissions if this is not already done. To make all this happen you need to add the following lines to your dongle.bin.config file located in the /tftp directory on the server used by the MVP to boot. I prefer to add the lines prior to the mvpmc command (usually the last line in dongle.bin.config).
# boot the MediaMVP
# create a directory on the MVP: /media/video
mkdir /media
mkdir /media/video
#mount the nfs share on the server to MVP
#Note that MEDIA_SERVER_IP is the ip address to the media server
mount -t nfs -o nolock,rsize=4096,wsize=4096,nfsvers=3 MEDIA_SERVER_IP:/media/video /media/video
# mvpmc ....
Reboot MVP and look for your new directory under the filesystem listing.
Music, Videos and Pictures
There is a good summary on the mvpmc wiki of Filesystem browser functions. It's really nice that the music client supports M3U playlists (which you can easily create with a media player). The supported file types are listed on the mvpmc wiki. Most of the popular audio, image and video types are natively supported with a notable exception of MPEG-4 to which MythTV users often transcode their videos and recordings. Also excluded are iso and avi, the formats used for MythTV DVD rips at anything other than "Perfect" quality. The MVP's remote control has Videos, Pictures, Music, Radio and TV buttons. The Filesystem browser jumps to (lower-cased but) same-named child directories of /mvpmc_media when these buttons are pressed. So, the task is to construct a file system for at least the Videos, Pictures and Music buttons. You could assign the TV button to MythTV's recordings network share, but the strange file names would create less than desirable results. Astute readers may note that mythrename.pl, the TV button, Samba symlink support, and the mvpmc symlink support noted below can be combined to allow direct browsing of friendly recording titles. Warning: be very careful with mythrename.pl. In newer versions by default it renames the actual files in your recordings directories (and makes the MythTV db match), but this can break other systems that expect file names in the default format (e.g., <chanid>-<recorded_date_time>.mpg in MythTV 0.21). mythrename.pl does support minor script edits and command line parameters that allow you to instead create a directory filled with friendly-named symlinks. The naming convention/format of those links can be set within the script itself. I like, $dformat = '%T %S %py-%pn-%pj %pg-%pei %pea';. That gives you files named like, Swingtown_Take_It_to_the_Limit_08-9-5_10-00_pm.mpg. It increases reliability if you ensure the 'echo 0 > /proc/fs/cifs/LinuxExtensionsEnabled;' command is before cifs mounts in dongle.bin.config. Necessary edits to dongle.bin.config are included below, but Samba setup (for a mythrename.pl symlinks share) is not. To setup Filesystem browser access to media shared by Samba on your MythTV system: Enable Samba shares for your media server's directories for videos, pictures and music; make them accessible to guest users (at least read access). If you're using Mythbuntu, just enable Samba in the MCC. Create the file system needed on the mvpmc with edits to you dongle.bin.conf file. These edits would probably supercede those in the Network Shares section above. Edit dongle.bin.config in your favorite editor, and place this hunk just before the command that launches mpvmc.
# Make the directory structure for network mount mounts
# I *strongly* recommend that these paths exactly duplicate those on the MythTV backend or media server;
# it makes other advanced configurations much easier.
mkdir /var/lib
mkdir /var/lib/mythtv
mkdir /var/lib/mythtv/videos
mkdir /var/lib/mythtv/pictures
mkdir /var/lib/mythtv/music
# optional implementation with myrename.pl symlinks (this path does not need to be on the media server)
mkdir /var/lib/mythtv/tv
# end optional

# Enable symbolic links in smb client library
echo 0 > /proc/fs/cifs/LinuxExtensionsEnabled;

# Mount network shares (Samba)
# Modify the first line as appropriate for your environment.
MediaSvr=<MediaServerIP>
mount.cifs //${MediaSvr}/videos /var/lib/mythtv/videos -o guest,rsize=34000;
mount.cifs //${MediaSvr}/pictures /var/lib/mythtv/pictures -o guest,rsize=34000;
mount.cifs //${MediaSvr}/music /var/lib/mythtv/music -o guest,rsize=34000;
# optional implementation with myrename.pl symlinks
mount.cifs //${MediaSvr}/<share_of_mythrename.pl_symlinks> /var/lib/mythtv/tv -o guest,rsize=34000;
# end optional

# Make the MVPMC directory (to make remote buttons work in Filesystem Browser)
mkdir /mvpmc_media
# Make symbolic links to the mount points made above
ln -s /var/lib/mythtv/videos /mvpmc_media/videos;
ln -s /var/lib/mythtv/pictures /mvpmc_media/pictures;
ln -s /var/lib/mythtv/music /mvpmc_media/music;
# Optional symlink from /mvpmc_media/radio to /usr/playlist to make the Radio button work.
# /usr/playlist/default.m3u is the storage location of the play list you can configure in the mvpmc configuration web page.
# This could also be linked to a mounted network share that holds M3U play list(s) of internet radio streams.
ln -s /usr/playlist /mvpmc_media/radio;
# Optional symlink for mythrename.pl implementation
ln -s /var/lib/mythtv/tv /mvpmc_media/tv
The process is very similar with NFS shares, but I prefer the Samba setup because Windows boxes (that may be) on your LAN can access those shares natively. The command just prior to the mount commands enables Samba's follow symlink functionality in the samba client on the mvpmc. You can easily make the /mvpmc_media and child directories and mount the network shares to them directly, but the code above is a bit more modular (to be easily modified for existing network mount structures that may be in your dongle.bin.config file) and has other advantages for other advanced configurations (e.g., it makes it much easier to create M3U play lists from the media server/backend or 'nix box/frontend with the same remote mounts points). Reboot your MVP, and the Filesystem Browser (and remote buttons) should work as advertised.
VLC Support
In order to access file types not natively supported by your version of mvpmc, you have to configure VLC access on both the MVP and a PC (with VLC installed). The VLC setup is a bit on the advanced side but is covered on the mvpmc wiki. Results justify the effort though because, with VLC transcoding, the MVP can play MythTV DVD rips in iso and avi formats; once the VLC server IP is configured on the MVP, these files just appear in your Filesystem browser. I wasn't able to get acceptable native playback of a MythTV "Perfect" DVD rip to vob, I think because the bit rate is too high, but playing an ISO Perfect rip or an avi Excellent rip worked just fine with VLC support. There is a significant drain on system resources (esp CPU) on the VLC host when playing non-natively-supported files on the MVP; so, it may be worth the pain to setup VLC on a different machine (even Windows) than a backend or media server that may be impacted by continuous, significant CPU usage at any given time (i.e., running VLC support for mvpmc, MythTV backend, commflagging/transcoding jobs, and Mythweb [especially with mythstreamtv plugin] is asking too much of most hardware). It is absolutely best to have a directory structure on the VLC PC that mirrors the /mvpmc_media directory on the MVP, otherwise you have to create an M3U play list for every (group of) files not natively supported by mvpmc. If you go the play list route, the play lists' file paths have to be those used on the machine hosting VLC, and you'll not be able to skip forward or back (in my experience) when playing these file on the MVP. Direct access (allowed by matching directory structure among MVP and VLC host) obviates the need for play lists and allows skipping around the videos. If the MVP mounts your video, music and pictures shares as above, all you have to do on the VLC machine is make the /mvpmc_media directory in / and create symlinks to those directories/mounted-share-points much as the last few lines of the dongle.bin.config mods above (beginning with "Make the MVPMC directory..." but) excluding the optional lines for the radio and tv symlinks. Edit your dongle.bin.config file and include these options for the 'mvpmc' command (prior to the '&'): "--vlc <IP.of.VLC.host> --vlc-vopts svcd". The first option is mandatory for the MVPs VLC config to survive a reboot; the second is optional but yields much better playback than dvd quality transcoding. FWIW, I see no real point in installing an init script for vlc; there is no real timing issue to negotiate, and vlc responds to normal kill signals. So, a single entry in /etc/rc.local is just fine: '/usr/bin/vlc -I telnet --sout-ffmpeg-keyint=4 &'. I use the --sout-ffmpeg-keyint=4 option to reduce jitter and transcoding artifacts; I don't know what the default setting or acceptable range are, but 3 was better than default, and 4 was better than 3 (for me). VLC setup does NOT play nicely with the Mythweb mythstreamtv plugin; a small mod to the mythstreamtvactive.sh script makes it a bit better:
#!/bin/bash
# See if an older VLC session is alive
# The following doesn't play nice with any concurrent use of vlc (interactive, daemon, or script initialized)
#pids=`pidof vlc`
# So, we ask for just the pids of vlc processes owned by the apache daemon service account (www-data for Mythbuntu).
# This won't help with interference with other possible vlc processes owned by this service account, but, at least it solves the problem
# for interactive vlc sessions and vlc run as a daemon by other service accounts.  Just be very sure not to have any of them bind to tcp 8001.
pids=`pgrep -u www-data vlc`
if [ -n "$pids" ]; then
   echo "1"
else
   echo "0"
fi
a similar fix to mythstreamtv.sh gets rid of the rest of the error messages in the log (and its web page output). Edit mythstreamtv.sh in your favorite editor, and around line 31:
# See if an older VLC session is alive
#pids=`pidof vlc`
pids=`pgrep -u www-data vlc`
if [ -n "$pids" ]; then
and another similar fix to mythstreamtvstop.sh. Edit mythstreamtvstop.sh in your favorite editor, and around line 6:
# See if an older VLC session is alive
#pids=`pidof vlc`
pids=`pgrep -u www-data vlc`
if [ -n "$pids" ]; then
Mythstreamtv has to be reinstalled (i.e., rerun the install script) every time MythWeb is updated; so, I strongly recommend that you make these changes in your live files and in the "respository" directory where the package puts the "source" files. If I've lost you there, just run 'locate mythstreamtv.sh', and you'll quickly see both directories.
Troubleshooting
If your MVP won't boot, you are stuck with parsing your tftpd and dhcpd servers' logs. You could also test your skills with a packet sniffer. The interesting ports will all be UDP: 68 and 67 for dhcp, 16869 and 69 for tftp, and 16881 for mvprelay. If your MVP will boot up but has playback or performance problems, you can obtain the error output of mvpmc via telnet to the mvpmc. "Power off" the mvpmc with the remote. The mvpmc will still be running its kernel and accept telnet connections. Telnet to your mvpmc as root with no password. In the telnet session do
ps | grep mvpmc | grep -v grep
You'll need to kill the running mvpmc processes by killing the parent mvpmc process (the one with full command line arguments and, probably, the numerically lowest pid).
kill <lowest pid returned in above command>
Now check that no mvpmc processes are running. The following command should return nothing.
ps | grep mvpmc | grep -v grep
Now enter the command you use in your dongle.bin.conf to launch mvpmc. For instance,
mvpmc -f /etc/helvB14.pcf -o composite -s 192.168.1.100 -y 192.168.1.100 -T mythconverg -u mythtv -p DBPASSWORD -F $SETTINGS &
This will run mvpmc just like normal except that the telnet session will show you the stderr output (like tailing a log file). Some folks actually redirect this output to a local file, but that seems like risking muddying the waters by potentially running the MVP out of memory. Your telnet session will probably scroll back far enough to find what you need. Use this output along with logs entries on your mythtv server to obtain clues about what may be going wrong. Probably the cleanest way to recover from this testing is just to reboot the MVP via the 'reboot' command. Otherwise you can kill the process with a 'fg 1' followed by a 'Ctrl-c' (sometimes written as '^c'). You'll still probably have to reboot the MVP to get it to behave as expected.
MythProtocol Errors
mvpmc speaks every version of MythTV protocol since the first MythTV release- even versions that newer builds of MythTV no longer speak. For that reason, errors/complaints in the MythTV backend log that the MediaMVP is speaking the wrong protocol are normal and can be ignored. mvpmc begins speaking protocol 18 first, then tries newer protocols until it finds one that works. If you are having difficulties getting mvpmc to work with MythTV, this is not likely to be your problem.
TFTP Timeouts with wMVP
The Wireless MVP (wMVP) can be difficult to boot wirelessly via TFTP. First, the wMVP only supports WEP (no WPA, WPA2 etc) and simply won't connect to some access points. For example, it doesn't connect to my Linksys WRT54G, but connects fine to my ISPs ActionTec wireless DSL/router (even while using DHCP from the Linksys!). If you are finally able to get it to the point of trying to download an image via TFTP, you may run into more troubles. During the "Loading application" stage on a Wireless MVP (wMVP), if atftpd reports errors such as:
atftpd[3692]: timeout: retrying...
atftpd[3692]: tftpd_file.c: 931: abnormal return value 7
then it is likely the TFTP transfer is getting corrupted via the air. The wMVP seems to not tolerate any wireless transmission errors during this TFTP session. Reducing the --retry-timeout of atftpd to 5 or even 1 second is the only way I have been able to boot the wMVP over wireless. Even with this adjustment, sometimes it takes the wMVP several dozen cycles before it gets a good image and boots. If anyone has suggestions here, they will be welcome! My suggestion for the wMVP would be not to use it. Get the cheaper wired model and a wireless bridge/gaming adapter that supports unbroken encryption protocols (WPA [not quite totally broken as of Dec 2008] or WPA2). I've used this setup for several months with no problems reloading the dongle from tftpd. The only downside is that unexpected power disruptions will probably yield a non-booted MVP since the MVP's boot process will usually timeout before the bridge establishes a wireless link. --anonymousdog