“IRedMail”的版本间的差异
来自Ubuntu中文
(→启用免责声明) |
(→添加免责声明) |
||
| 第897行: | 第897行: | ||
===添加免责声明=== | ===添加免责声明=== | ||
| − | iRedmail 是通过Amavisd-new + alterMIME | + | iRedmail 是通过Amavisd-new + alterMIME 实现出站的邮件都添加免责声明。alterMIME支持Per-domain,Sub-domain,Per-user添加免责声明,同时支持txt和html格式。 |
*编辑 /etc/amavis/conf.d/50-user 把注释去掉。启用免责声明的功能 | *编辑 /etc/amavis/conf.d/50-user 把注释去掉。启用免责声明的功能 | ||
2009年12月6日 (日) 16:51的版本
目录
iRedmail 组件
iRedMail主要是使用下面软件来构建邮件系统。
- Apache 2.2.x
- PHP 5.2.x
- MySQL 5.0.x
- OpenLDAP 2.4.x
- Postfix 2.5.x ( MTA )
- Dovecot 1.1.x
- Amavisd 2.6.x
- ClamAV 0.9x
- SpamAssassi 3.2.x
- Policyd 1.8.x
- Pysieved 1.0
- Roundcube 0.2.1 (Webmail )
- PostfixAdmin 2.2.x
- phpMyAdmin 2.11.9.x
- phpLDAPadmin 1.1.6.x
- Awstats 6.9
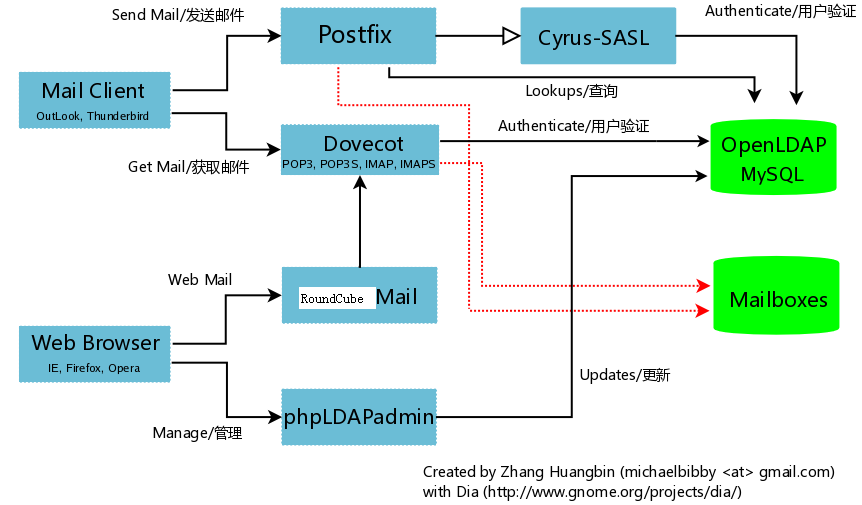
组件的工作原理
iRedMail 简介
RedMail 是一套基于 GPL 发布的 Shell 脚本,目的是全自动安装和配置邮件服务所需要的组件,以减轻系统管理员的负担。它提供了一个基本的命令行下的用户交互界面(使用 dialog 程序实现),用户只需要简单地选择他所希望使用的组件,就可以在几分钟内(少于 3 分钟)部署好一台功能强大的邮件服务器。
- iRedMail 官方中文支持论坛 http://www.iredmail.org/bbs
安装需求
iRedMail 目前支持以下Ubuntu版本:
| OS | Version | Platform | iRedMail Version |
| Ubuntu (Jaunty, 9.04) | 9.04 | i386, amd64 | >= 0.5.0 |
| Ubuntu (Hardy, 8.04 LTS) | 8.04 TLS | i386, amd64 | >= 0.5.0 |
- 生产中部署至少需要512MB 内存.
Downloading Ubuntu CD/DVD images via HTTP/FTP
准备
Hostname
这里说的 hostname 是指使用 'hostname -f' 命令打印出来的系统主机名,例如:
$ hostname -f
 mail.example.com
不管您的 Linux 系统是否作为公网服务器,我们都强烈建议您设置一个合适的主机名。
在 Ubuntu 系统中,主机名的设置涉及到两个文件:
- /etc/hostname: hostname 设置
- /etc/hosts: hostname <=> IP 地址对应
用你熟悉的编辑器编辑 /etc/hostname 文件
$cat /etc/hostname
mail
编辑 / /etc/hosts 文件
$cat /etc/hosts
127.0.0.1   mail.example.com mail localhost localhost.localdomain
检查FQDN Name设置,
Hostname的修改,必须重新启动机器才能生效
# hostname -f
mail.example.com
设置源
使用稳定的版本,需要'main' 和 'universe'
- 对于 Ubuntu 8.04 LTS (Hardy). 需要为iredmail添加 launchpad PPA
$ cat /etc/apt/source.list
deb http://mirrors.163.com/ubuntu hardy main universe
deb http://mirrors.163.com/ubuntu hardy-updates main universe
deb http://ppa.launchpad.net/iredmail/8.04/ubuntu hardy main
导入 PPA的 gpg key
# apt-key adv --recv-keys --keyserver keyserver.ubuntu.com 0xd9226c1a29511386b3b9f8bc8dc2c190ddf700d3
- 对于 Ubuntu 9.04 (Jaunty)
$ cat /etc/apt/source.list
deb http://mirrors.163.com/ubuntu jaunty main universe
deb http://mirrors.163.com/ubuntu jaunty-updates main universe
- 修改源后,都需要刷新列表:
# apt-get update
开始安装iredmail
- 切换到root用户
# sudo su -
- 下载最新版本的iredmail,解压
 #wget http://iredmail.googlecode.com/files/iRedMail-0.5.1.tar.bz2
 #tar jxvf iRedMail-0.5.1.tar.bz2
- 下载邮件相关的软件包,并会自动在目录下创建一个本地的apt 源
 #cd iRedMail-0.5.1/pkgs/
 #bash get_all.sh
- 可以开始执行主脚本,它会调用 'dialog' 程序引导用户配置邮件服务器
 # cd ..
 # bash iRedMail.sh
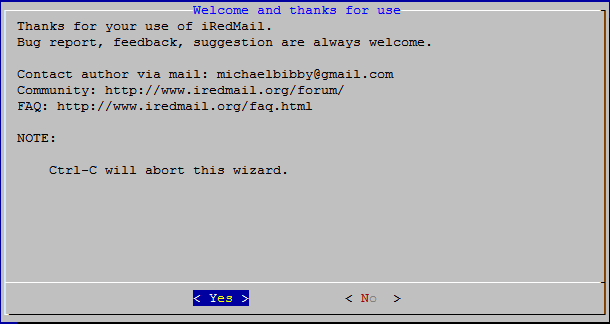
- iRedMail 安装进程的欢迎页面
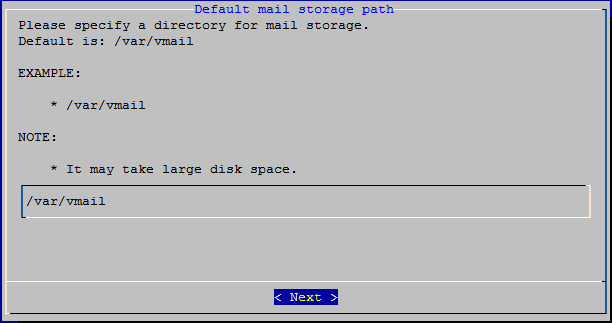
- 选择用于存储所有邮件的目录(注意:由于所有邮件都将存储在这个目录,所以这个目录需要占用较多的磁盘空间)
LDAP
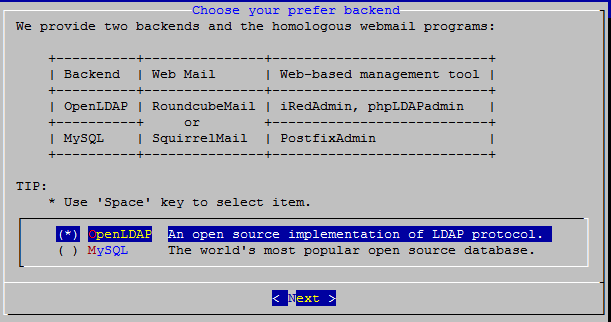
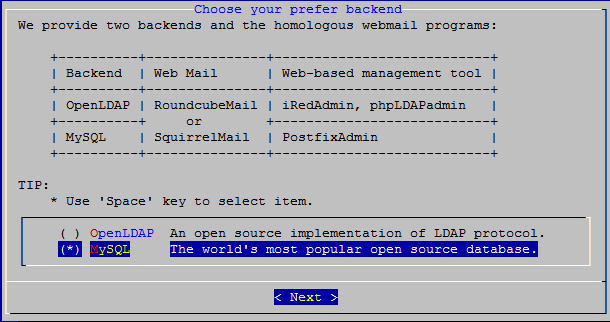
- 选择使用openldap或mysql来存储虚拟域和虚拟用户。这里是选择openldap
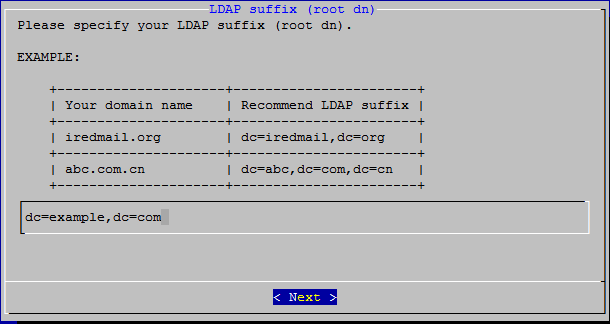
- 设置LDAP suffix
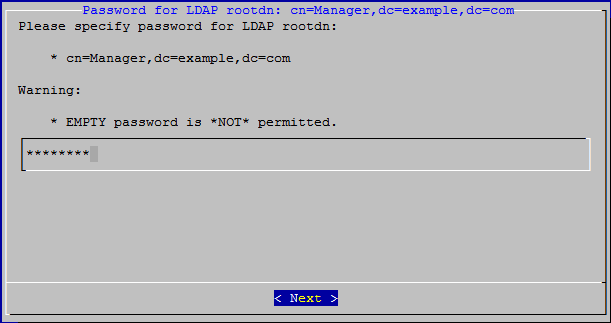
- 设置LDAP管理员cn=manager,dc=example,dc=com 密码
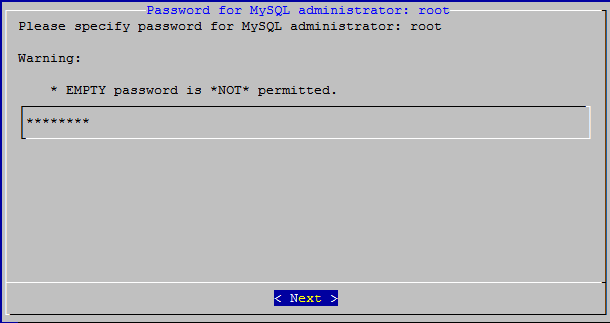
- 设置mysql密码,iredmail需要使用mysql来存储webmail的设置
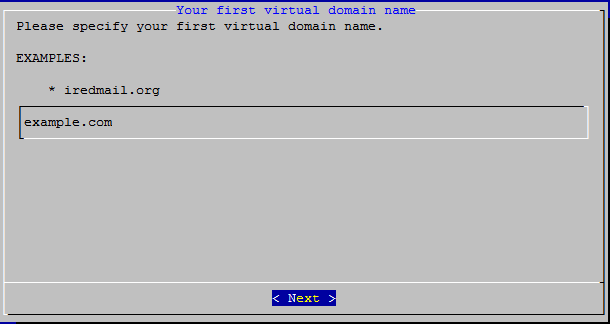
- 添加第一个domain
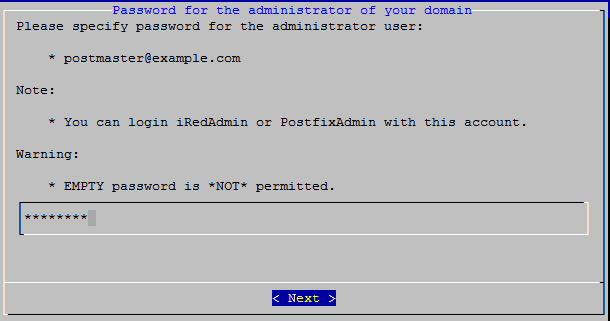
- 设置domain管理员postmaster密码
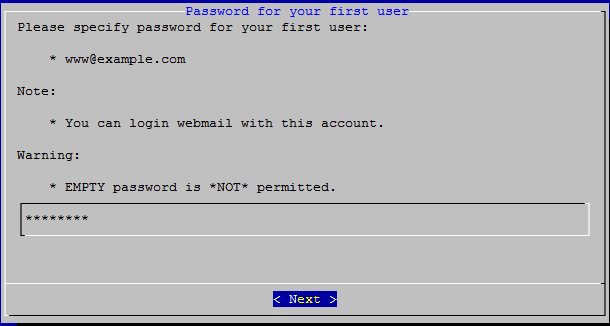
- 设置domain第一个用户www的密码
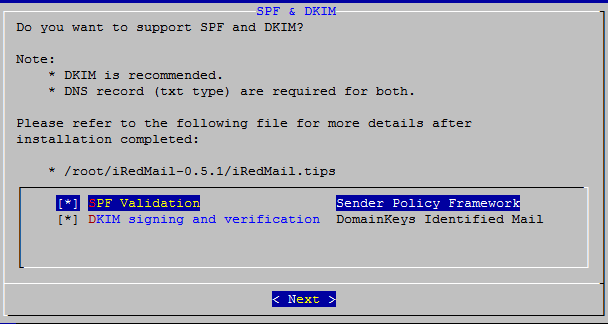
- 是否启用SPF和DKIM
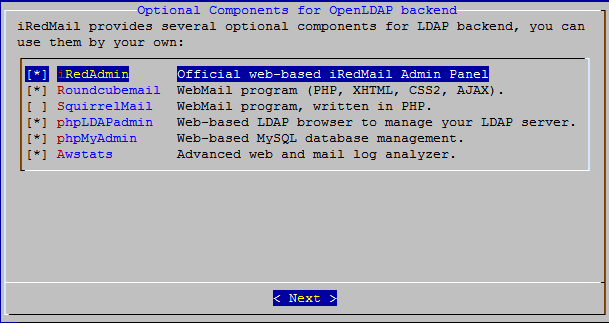
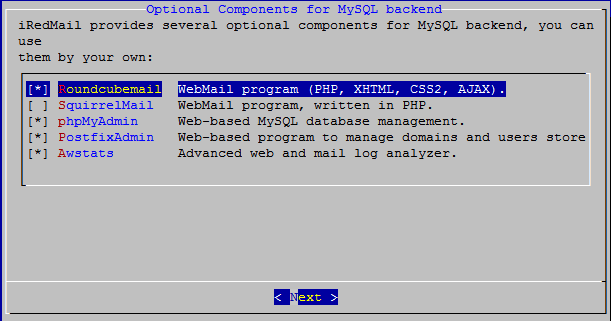
- 选择组件
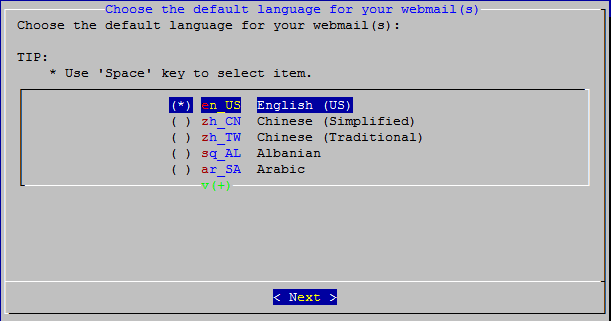
- 选择webmail的默认语言
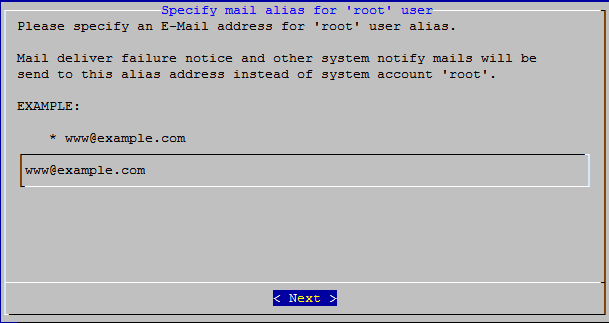
- 设置root的alias
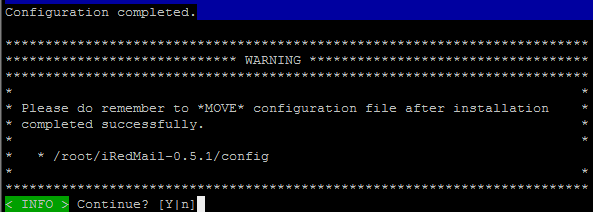
- 决定是否开始安装
- 安装完成后,设置ssh和iptable
*************************************************************************
* iRedMail-0.5.1 installation and configuration complete.
*************************************************************************

< Question > Would you like to use iptables rules shipped within iRedMail now?
< Question > File: /etc/default/iptables, with SSHD port: 22. [Y|n]
< INFO > Copy iptables sample rules: /etc/default/iptables.
< Question > Restart iptables now (with SSHD port 22)? [y|N]
< INFO > Skip restart iptable rules.
< Question > Would you like to start postfix now? [y|N]

********************************************************************
* Congratulations, mail server setup complete. Please refer to tip
* file for more information:
*
*   - /root/iRedMail-0.5.1/iRedMail.tips
*
* And it's sent to your mail account [email protected],[email protected].
*
* If you want to remove and re-install iRedMail, here are steps:
*   - Run script to remove main components installed by iRedMail:
*       # cd tools/
*       # bash clear_iredmail.sh
*   - Remove iRedMail installation process status:
*       # rm -f /root/iRedMail-0.5.1/.iRedMail.installation.status
*   - Install iRedMail like you did before.
*
* Please reboot your system to enable mail services or start them
* manually without reboot:
*
*   # for i in sysklogd  apache2 postfix mysql slapd postfix-policyd dovecot amavis
clamav-daemon clamav-freshclam cron iptables; do /etc/init.d/${i} restart; done

*
********************************************************************
- 你可以重新启动机器或者重启邮件相关的服务
# for i in sysklogd  apache2 postfix mysql slapd postfix-policyd dovecot amavis
clamav-daemon clamav-freshclam cron iptables; do /etc/init.d/${i} restart; done
MYSQL
- 选择mysql作为存储用户和虚拟domain
- 设置mysql密码,iredmail需要使用mysql来存储webmail的设置
- 添加第一个domain
- 设置domain管理员postmaster密码
- 设置domain第一个用户www的密码
- 是否启用SPF和DKIM
- 选择组件
- 选择webmail的默认语言
- 设置root的alias
- 决定是否开始安装
- 安装完成后,设置ssh和iptable
*************************************************************************
* iRedMail-0.5.1 installation and configuration complete.
*************************************************************************

< Question > Would you like to use iptables rules shipped within iRedMail now?
< Question > File: /etc/default/iptables, with SSHD port: 22. [Y|n]
< INFO > Copy iptables sample rules: /etc/default/iptables.
< Backup > /etc/default/iptables -> iptables.2009.12.04.03.58.39.
< Question > Restart iptables now (with SSHD port 22)? [y|N]
< INFO > Skip restart iptable rules.
< Question > Would you like to start postfix now? [y|N]

********************************************************************
* Congratulations, mail server setup complete. Please refer to tip
* file for more information:
*
*   - /root/iRedMail-0.5.1/iRedMail.tips
*
* And it's sent to your mail account [email protected],[email protected].
*
* If you want to remove and re-install iRedMail, here are steps:
*   - Run script to remove main components installed by iRedMail:
*       # cd tools/
*       # bash clear_iredmail.sh
*   - Remove iRedMail installation process status:
*       # rm -f /root/iRedMail-0.5.1/.iRedMail.installation.status
*   - Install iRedMail like you did before.
*
* Please reboot your system to enable mail services or start them
* manually without reboot:
*
*   # for i in sysklogd  apache2 postfix mysql postfix-policyd dovecot amavis clamav-daemon
clamav-freshclam cron iptables; do /etc/init.d/${i} restart; done
*
********************************************************************
- 你可以重新启动机器或者重启邮件相关的服务
# for i in sysklogd  apache2 postfix mysql postfix-policyd dovecot amavis clamav-daemon
clamav-freshclam cron iptables; do /etc/init.d/${i} restart; done
使用iredmail
安装完成后,一定要仔细阅读iredmail.tip,里面包括设置信息和帐号,下面各个应用的访问路径。这个是本安装的范例 (http://code.google.com/p/iredmail/source/browse/extra/iRedMail.tips )
- mysql 存储虚拟用户和domain 我们通过postfixadmin 进行邮件domain,用户管理
- mysql 管理,可以通过phpmyadmin管理
- LDAP 存储虚拟用户和domain,我们通过iRedAdmin进行邮件邮件domain,用户管理
- LDAP 的管理,可以通过phpldapadmin管理
webmail RoundCube
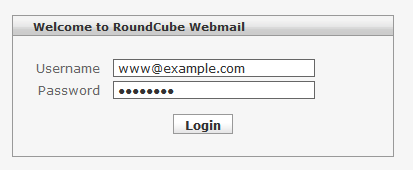
- 可以使用http://your_server/mail/ (or /webmail, /roundcube)访问webmail (注意,postmaster不是邮箱用户,不能登陆)
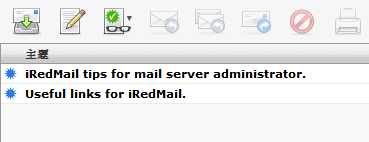
- 由于[email protected]是root的alias,所以会受到系统发的邮件,请细心阅读这两封邮件,iredmail.tip 包含所有的邮件设置的相关信息。
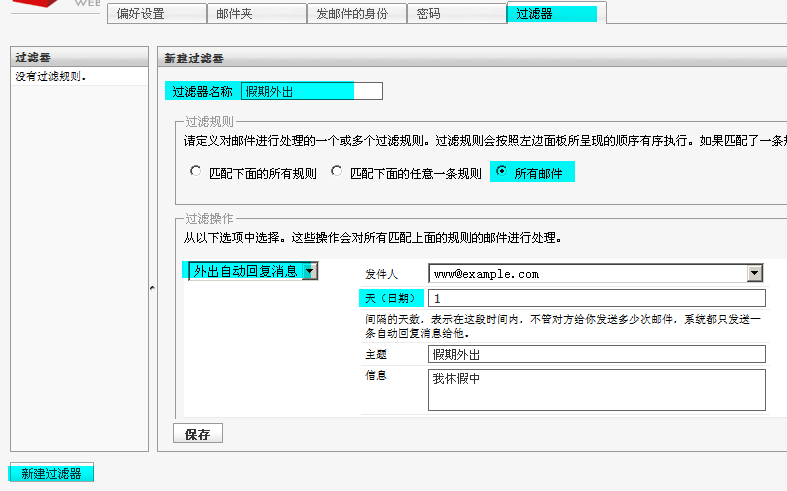
- 设置假期外出,需要新建过滤器
- 全局地址簿 (LDAP)
iRedAdmin
iRedAdmin 是iredmail官方开发邮件后台管理,目前可以管理ldap 版本,mysql的版本正在开发中。
大家也可以通过iredmail官方提供的demo (http://www.iredmail.org/admin_demo.html ) 深入了解iredadmin
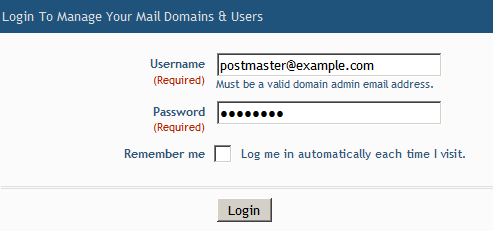
- 登录iRedAdmin
可以使用https://your_server/iredadmin 访问iredadmin (注意是 https )
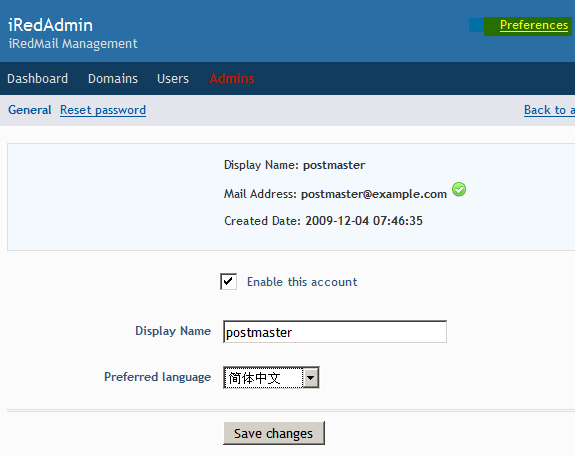
- 修改语言
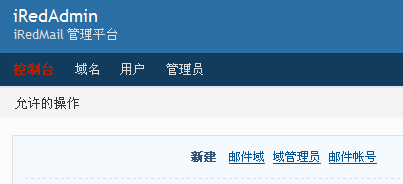
- 控制台
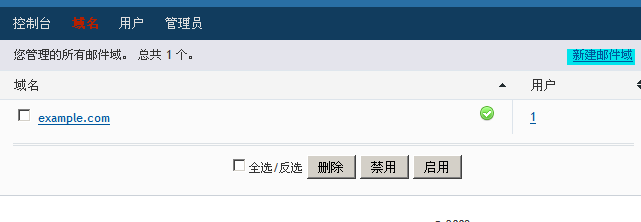
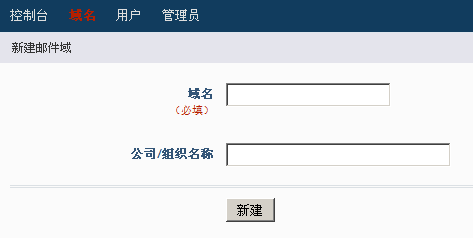
- 域名管理
- 添加domain
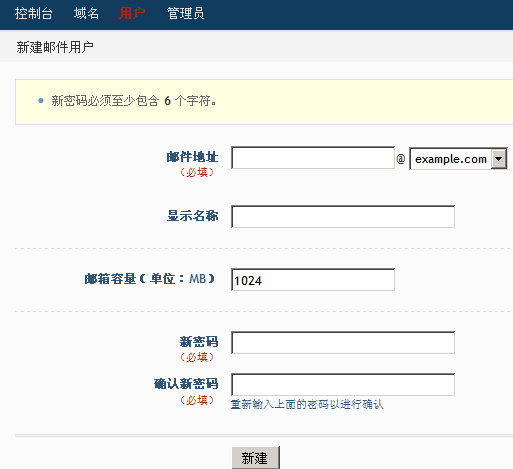
- 用户管理,添加用户
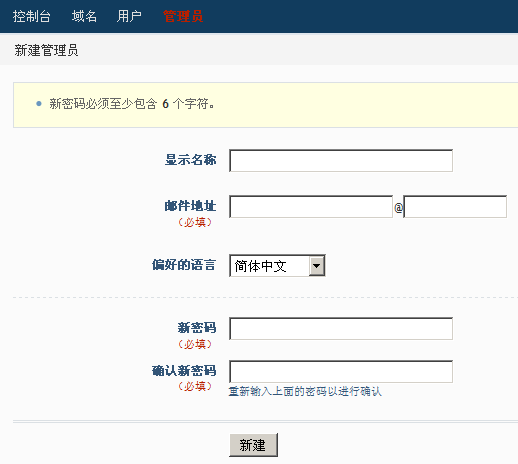
- 管理员管理 添加管理员
phpLDAPAdmin
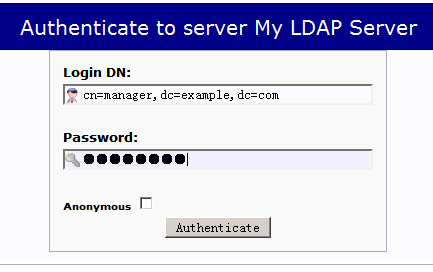
可以使用https://your_server/ldap 访问iredadmin (注意是 https )
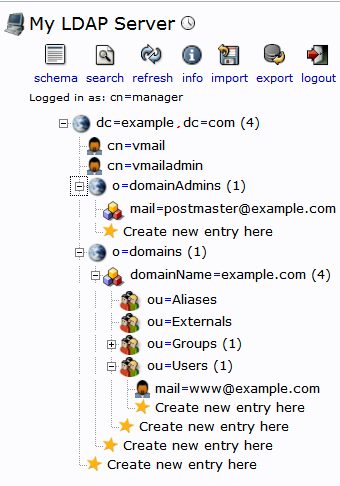
- 登录phpLDAPAdmin
- 查看ldap
Awstats
可以使用https://your_server/awstats/awstats.pl 访问Awstats (注意是 https )
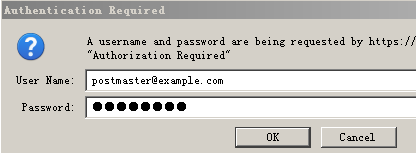
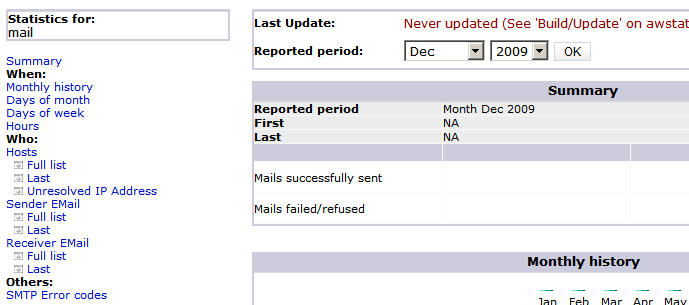
- 登录Awstats
- 如果希望查看邮件的流量,你需要修改你的链接,(https://your_server/awstats/awstats.pl?config=mail ) 在上面链接加上 ?config=mail
phpMyAdmin
可以使用https://your_server/phpmyadmin 访问phpMyAdmin (注意是 https )
PostfixAdmin
如果你选择mysql来存储虚拟用户和domain,那么PostfixAdmin来管理用户和domain,使用https://your_server/postfixadmin 访问phpMyAdmin (注意是 https )
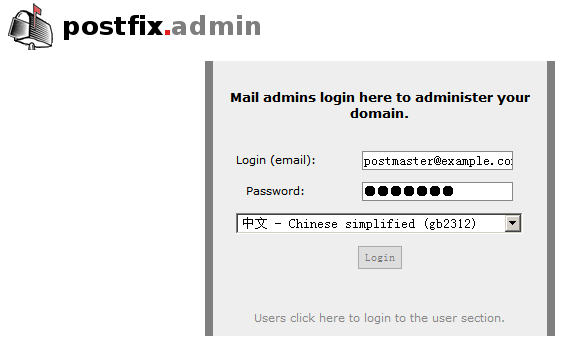
- 登录PostfixAdmin
- 可以利用PostfixAdmin 添加,删除,管理 domain和用户
DNS
DNS记录,需要你到你的域名托管商那里进行设置或者你自己管理DNS服务器。不少域名托管商不支持txt记录或者不支持DKIM记录,所以你就无法使用SPF和DKIM的功能。
DNS的修改,需要48小时以上才能生效。
国内的万网是不支持DKIM,目前新网是支持SPF和DKIM
MX记录
邮件的MX记录最好是指向机器A记录,尽量不要直接指向IP地址(不符合规范)。
- 添加A记录
mail.example.com 192.168.1.100
- 添加MX记录
example.com mail.example.com
SPF记录
- SPF 记录指向A主机记录
example.com. 3600 IN TXT "v=spf1 mx mx:mail.example.com -all"
- SPF 记录指向IP地址
example.com. 3600 IN TXT "v=spf1 ip4:192.168.1.100 -all"
DKIM记录
可以通过iredmail.tips 获得域名的DKIM,也可以在命令行下输入
# amavisd-new showkeys
; key#1, domain example.com, /var/lib/dkim/example.com.pem
dkim._domainkey.example.com.    3600 TXT (
  "v=DKIM1; p="
  "MIGfMA0GCSqGSIb3DQEBAQUAA4GNADCBiQKBgQDGNVMuQRKqYeySIzqTGTm3xRzF"
  "/ZzhmMnpZkEcVVjFAk+t7E388oFGu/knyh6KBKwpZxHUN5HoOYVjMudqaR2FcSvK"
  "z+joFj8Vh3rXoTLa1zHDyfD7hICzxdEgmQZ8MJM5rjPPrRGZXnPowNYDsd6nDJ86"
  "N38iFYU+jALBYDLBwQIDAQAB")
把上面记录添加到ISP的DNS记录
dkim._domainkey.example.com. v=DKIM1; p=MIGfMA0....(省略)DLBwQIDAQAB
添加完DNS记录后,如果记录生效,可以通过运行命令检测
# amavisd-new testkeys
TESTING: dkim._domainkey.example.com      => pass
检查DNS设置
下面有几种方法,可以帮助你检测DNS是否设置生效和正常工作
windows nslookup
C:\>nslookup
Default Server:  unknown
Address:  192.168.1.1

> server 4.2.2.1
Default Server:  vnsc-pri.sys.gtei.net
Address:  4.2.2.1

> set type=mx
> example.com
Server:  vnsc-pri.sys.gtei.net
Address:  4.2.2.1

Non-authoritative answer:
example.com      MX preference = 20, mail exchanger = mail.example.com
> set type=txt
> example.com
Server:  vnsc-pri.sys.gtei.net
Address:  4.2.2.1

Non-authoritative answer:
example.com      text =

        "v=spf1 ip4:192.168.1.100 -all"

> dkim._domainkey.example.com
Server:  vnsc-pri.sys.gtei.net
Address:  4.2.2.1

Non-authoritative answer:
dkim._domainkey.example.com      text =

        "v=DKIM1; p= MIGfMA0GCSqGSIb3DQEBAQUAA4GNADCBiQKBgQCsgZaIvYHAos2jbp3CHW0
AwrTnAEwV1p4EaZP/JuF8t1BETBVg6WJr3YWN5ijCpi9vnw96nmf/u5MgtbLwZ+AzDBkbOY7Jbb/hIO+
mpmmfdJAY3w8KoXLCuQKDysXOys45YtfJEj66s51EHH3W+iXPYw3I/NWHjY3a5/mXnk4XJQIDAQAB"
linux dig
如果你的机器没有dig命令,你需要安装
apt-get install dnsutils
这个时候,就可以使用dig命令
- MX记录
# host exmple.com
example.com has address 192.168.1.100
example.com mail is handled by 10 mail.example.com.
- SPF记录
# dig txt hotmail.com

; <<>> DiG 9.4.2-P2 <<>> txt hotmail.com
;; global options:  printcmd
;; Got answer:
;; ->>HEADER<<- opcode: QUERY, status: NOERROR, id: 43130
;; flags: qr rd ra; QUERY: 1, ANSWER: 1, AUTHORITY: 0, ADDITIONAL: 0

;; QUESTION SECTION:
;hotmail.com.                   IN      TXT

;; ANSWER SECTION:
hotmail.com.            3600    IN      TXT     "v=spf1 include:spf-a.hotmail.com include:spf-b.hotmail.com include:spf-c.hotmail.com include:spf-d.hotmail.com ~all"

;; Query time: 176 msec
;; SERVER: 64.71.161.8#53(64.71.161.8)
;; WHEN: Sat Dec  5 08:43:51 2009
;; MSG SIZE  rcvd: 157
- DKIM记录
#dig txt dkim._domainkey.example.com
web工具
- 检测MX记录
http://zmailer.org/mxverify.html
- 检测SPF记录
- 测试spf和dkim记录
http://www.brandonchecketts.com/emailtest.php
网页里有一个邮箱地址,你可以通过安装过程中创建的第一个用户www,发送邮件给这个测试邮箱,你就可以马上看到结果
- 发邮件到gmail
查看发送过去的邮件的源码, 如果显示 dkim=pass 和 SPF: pass 就表示正常
Received-SPF: pass (google.com: domain of [email protected] designates 66.160.197.199
as permitted sender) client-ip=66.160.197.199;
Authentication-Results: mx.google.com; spf=pass (google.com: domain of [email protected]
designates 66.160.197.199 as permitted sender) [email protected];
dkim=pass [email protected]
查看LOG
Linux下,如果出现问题,那么排错最佳的方式就是查看log,不过为了性能,有些应用,缺省下没有开启错误log,我们需要启用。
APACHE
# tail  /var/log/apache2/error.log                        #查看log

# tail -0f /var/log/apache2/error.log                     #实时查看log
OPENLDAP
当你采用ldap来验证用户,当用户登录出现问题的时候,你就需要查看ldap的log,看那个地方出错。
- 缺省的情况下,openldap的log没有启用,我们需要修改配置文件 /etc/ldap/slapd.conf
loglevel 256 # <-- change form 0 to 256
- 重新启动LDAP服务
/etc/init.d/slapd restart
- 查看log
tail /var/log/openldap.log
dovecot
当接收邮件有问题的时候,我们需要查看dovecot的log,
- 编辑/etc/dovecot/dovecot.conf
mail_debug = yes #把注释去掉
- 从新启动dovecot服务
# /etc/init.d/dovecot restart
- 查看log
# tail /var/log/dovecot.log
Sieve
当RoundCube里过滤器不工作或者有问题的情况下,你就需要查看sieve的log
# tail /var/log/sieve.log
Postfix
查看邮件发送的问题,就需要查看posfix Log
#tail /var/log/mail.log
Postfix 排错,还可以通过Postfix提供邮件队例队列管理工具:
postqueue -p 列出队列里的所有邮件
postsuper -d ID 删除一封邮件
postsuper -d ALL 删除所有邮件
postsuper –h ID 保留邮件
postsuper -r ALL 重新排例
postcat -q ID   显示邮件内容
postqueue -f   清空邮件
邮件客户端
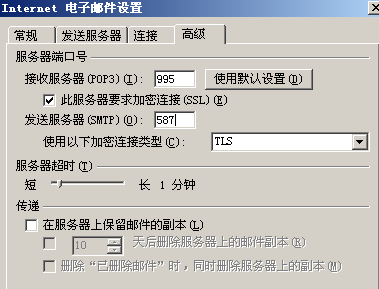
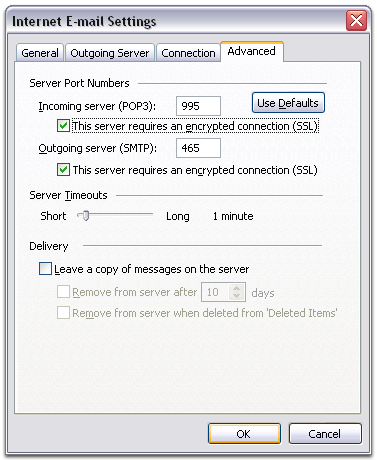
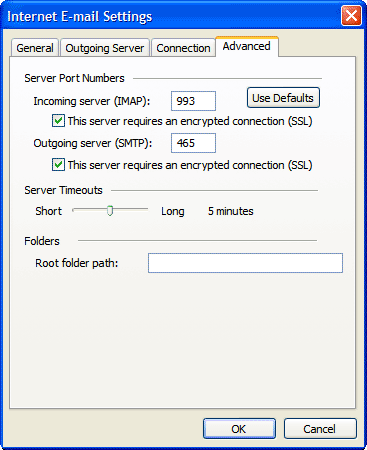
iRedmail提供pop,imap和pops,imaps的连接,可以根据需要选择采用哪种方式
| Protocol | Unencrypted port | TLS Port | SSL Port |
| SMTP | 25 | 587 | 465 |
| POP3 | 110 | 110 | 995 |
| IMAP | 143 | 143 | 993 |
Outlook2007
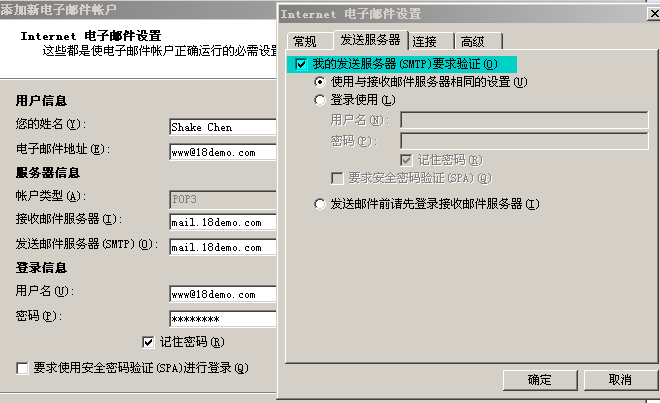
- pop3 非加密
设置帐号
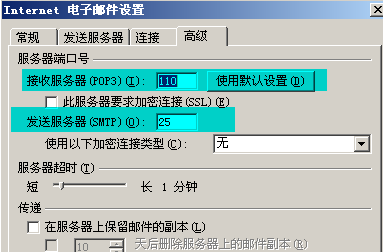
设置非加密端口
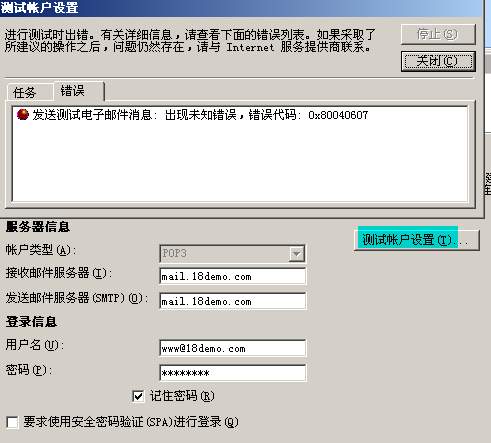
进行测试,会显示发送失败,设置是没有问题,失败是因为iredmail不允许自己单独发送自己邮件。
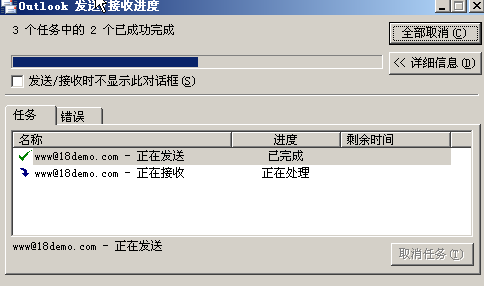
正常收发
- pop3 加密
设置使用加密端口
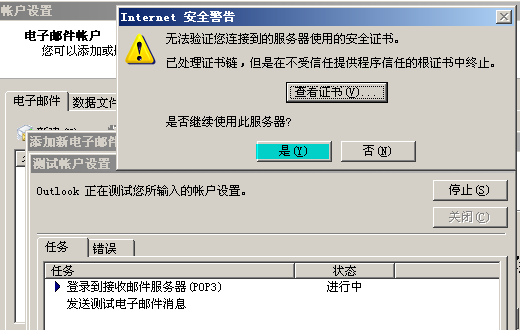
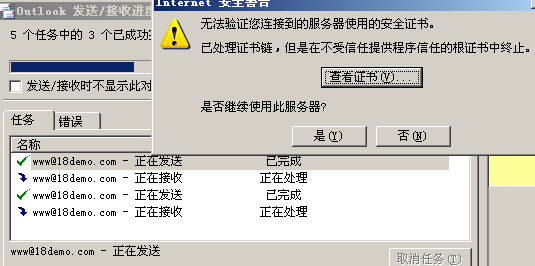
进行测试发送,会提示证书,点击是,就可以
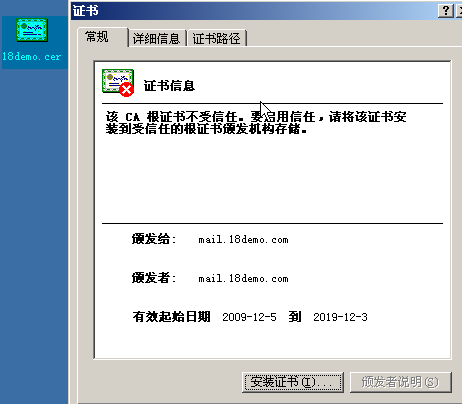
由于证书是我们自己签发,所以导致每次启动outlook,都会提示证书
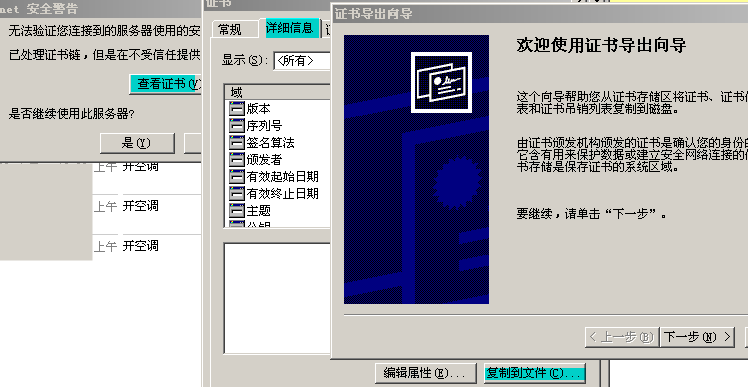
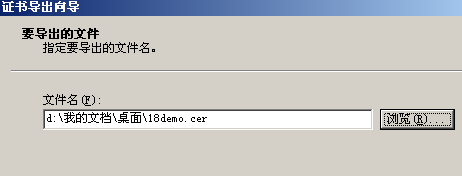
我们可以把证书先导出,再导入,就可以
导出证书
双击证书,导入证书,最后会有一个警告,确认就可以
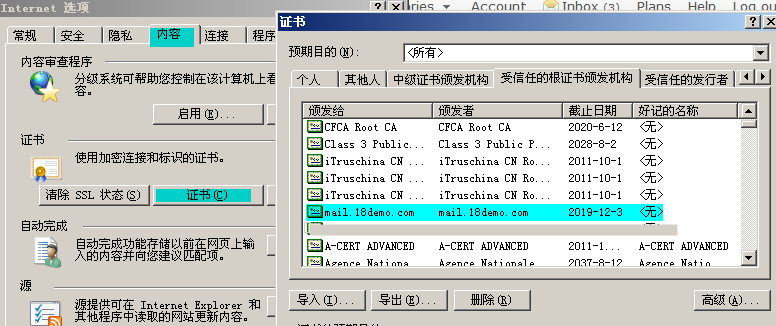
IE里可以看到导入的证书,这个时候outlook启动后,就不会提示证书。(XP系统IE7 )
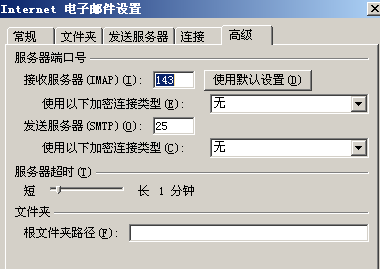
- imap 非加密
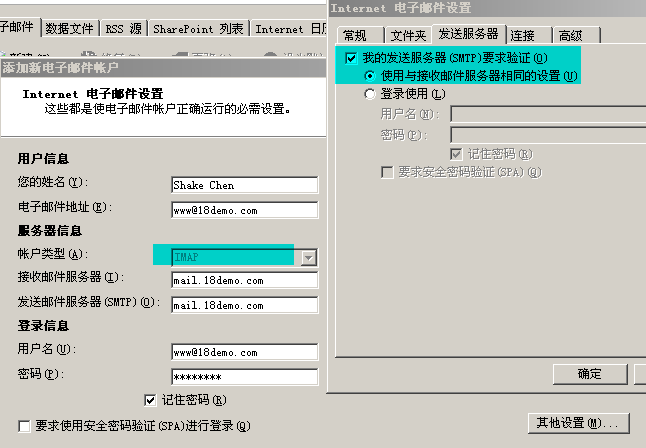
设置imap连接和帐号
设置端口
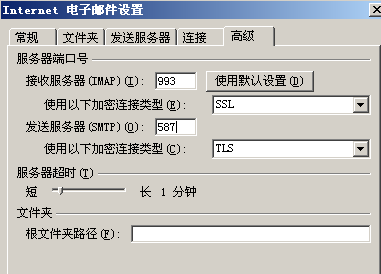
- imap 加密
设置端口
Outlook 2003
- pop3 非加密
这个设置和outlook 2007是一样,参考上面设置就可以, pop使用110,smtp是25
- pop3 加密
注意端口,这是和outlook2007不同的地方,outlook2003 只支持SSL,导入证书,可以参考上面设置
- imap 非加密
这个和2007设置是一样,imap是143,smtp是25
- imap 加密
FAQ
这个faq会不定期更新,最新的FAQ,大家可以直接访问 http://www.iredmail.org/faq.html
停用灰名单
灰名单,是有效阻止垃圾邮件的手段,原理是当一个新的邮箱地址发邮件过来,都会先拒绝2次,然后第三次才会接收下来。一般发垃圾邮件的人,因为队列太长,就不会再尝试投递。
灰名单会导致第一次发送延迟,不过第二次以后就没有问题。如果希望停止灰名单
编辑/etc/postfix-policyd.conf
#   1=on  0=off
GREYLISTING=0   #把1改成0
重新启动policy服务
# /etc/init.d/postfix-policyd restart
修改root的alias
iRedmail的安装过程,我们设置了root的alias,如果我们希望修改邮箱地址。
编辑/etc/postfix/aliases 改成你需要的邮箱地址。以后系统的警告邮件就会发送到新的邮箱。
# See man 5 aliases for format
postmaster:    root
clamav: root
root: [email protected]
policyd: [email protected]
amavis: root
添加免责声明
iRedmail 是通过Amavisd-new + alterMIME 实现出站的邮件都添加免责声明。alterMIME支持Per-domain,Sub-domain,Per-user添加免责声明,同时支持txt和html格式。
- 编辑 /etc/amavis/conf.d/50-user 把注释去掉。启用免责声明的功能
# ------------ Disclaimer Setting ---------------
# Uncomment this line to enable singing disclaimer in outgoing mails.
$defang_maps_by_ccat{+CC_CATCHALL} = [ 'disclaimer' ];  #把注释去掉
- 创建一个test免责声明,这个声明会添加到所有的邮件里。如果希望每个domain或者每个用户不同声明,那么可以单独添加免责声明。
#echo 'Testing disclaimer.' > /etc/postfix/disclaimer/default.txt
- 重启amavisd服务
# /etc/init.d/amavis restart
