Ardour4 初学者教程 03 编辑会话
来自Ubuntu中文
目录
- 1 安排音轨
- 2 设置节拍
- 3 使用范围
- 4 区域常用操作
- 5 区域进阶操作
- 6 改变编辑模式
- 6.1 Edit Modes and Cursor Modes
- 7 创建循环部分
- 8 伸展/收缩区域
- 9 — 返回主目录 —
安排音轨
在随后的章节中,我们将在Ardour中使用几个drumkit爵士鼓创建一个短小的韵律段落。
在以后的教程中,我们将持续为这个段落而工作,诸如Working with Regions与区域相关的工作,以及Creating Looped Sections创建循环部分。我们假设您已经阅读了Getting Started开始部分章节,并且熟悉Importing Audio导入音频、Tracks音轨和Timeline时间线。
导入样本
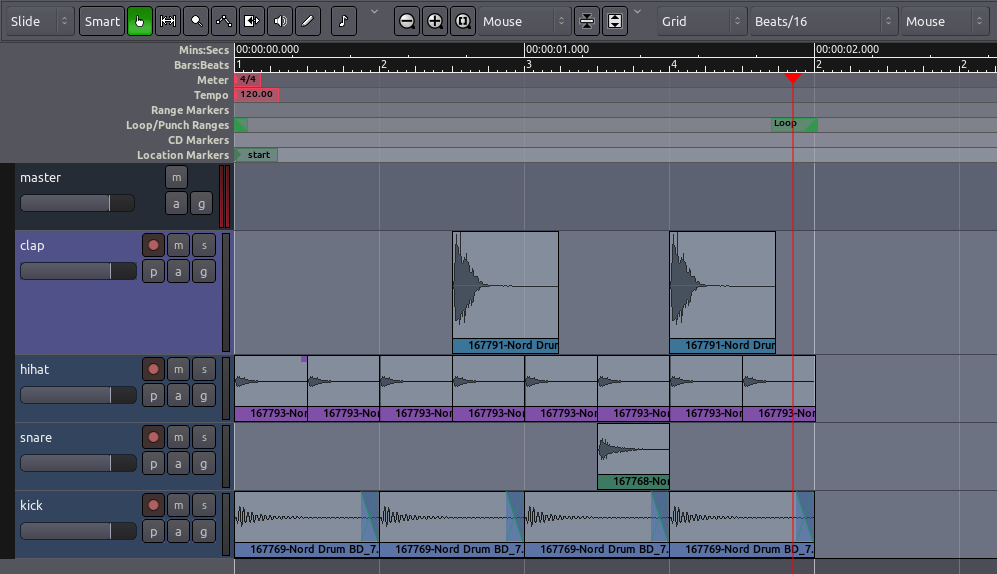
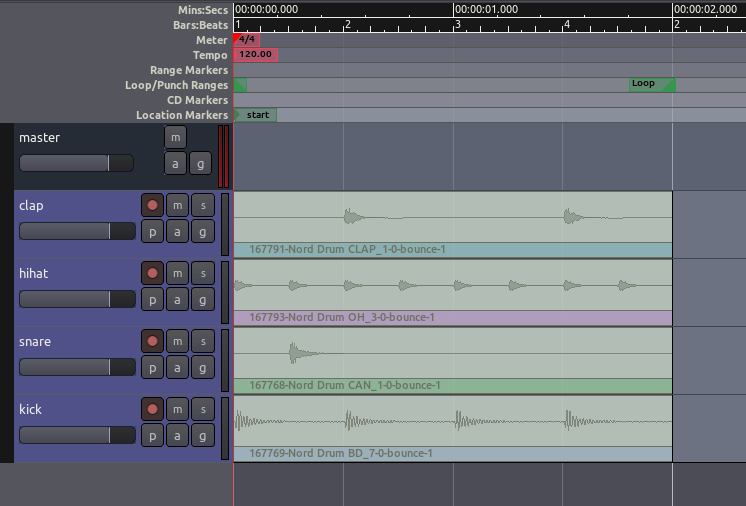
第一步是添加一些声音,这在Importing Audio导入音频章节中有详细阐述。在这里,我们使用的是Add existing media添加已存在的媒体对话框(“Ctrl” + “I”)导入一些drumkit爵士鼓样本作为区域。本教程中使用的样本是来自freesound.org网站的一个样本包。你可以从freesound.org本网站本身下载这些样本,但Ardour的导入窗口也内置有一个便于Search Freesound搜索自由声音的功能。从这里,您可以直接搜索和下载Freesound.org样品。
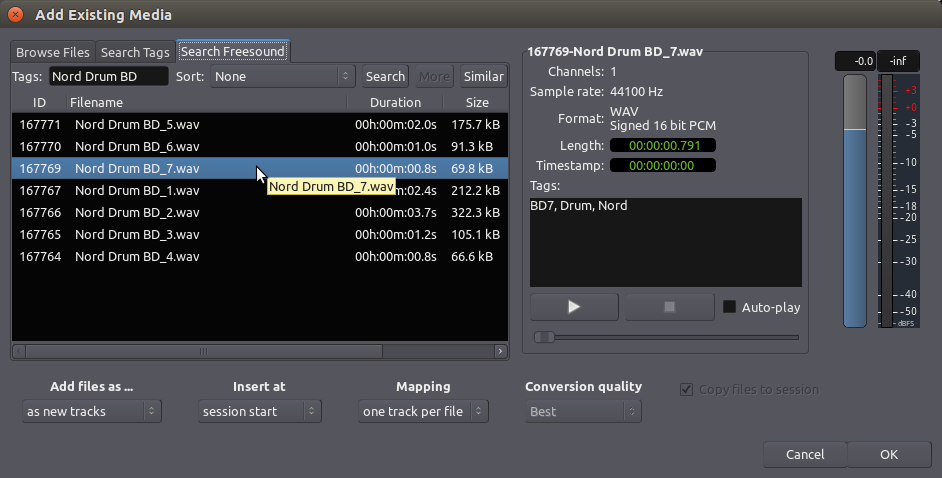
在上面的截图中,我们使用Ardour的搜索Freesound功能来搜索“Nord Drum BD”。注意,我们指定该音频文件应该“as new tracks作为新的音轨”添加进来,并且插入“at session start在会话起点”(菜单选项在左下角)。drumkit爵士鼓样本将会作为一个新的独立音轨显示在编辑器窗口里,每个音轨都使用音频文件的名称。
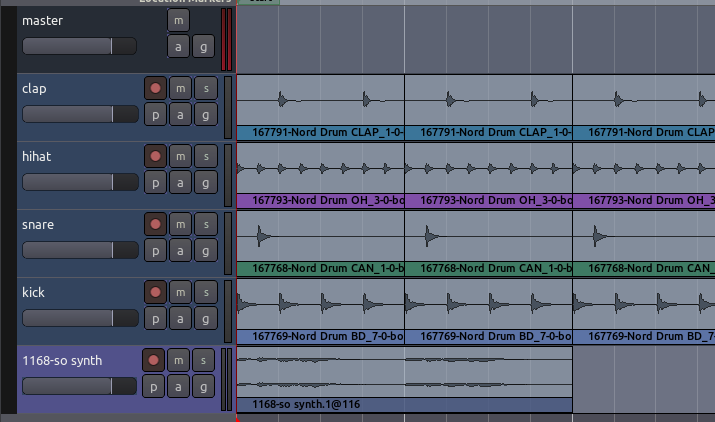
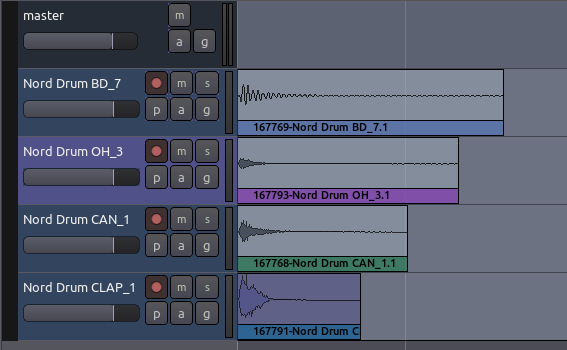
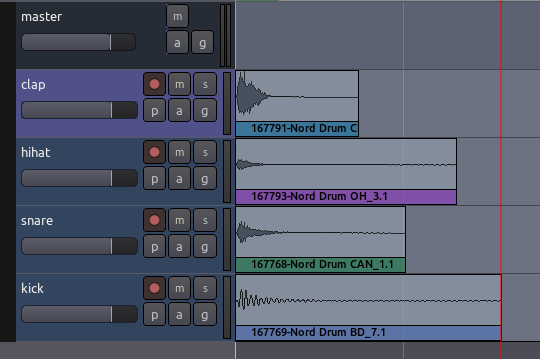
导入更多的声音后(一个snare军鼓,一个hi-hat踩镲,一个clap拍击),我们的会话看起来像这个样子(音轨名称来自于freesound.org里原样本的名称):
整理音轨
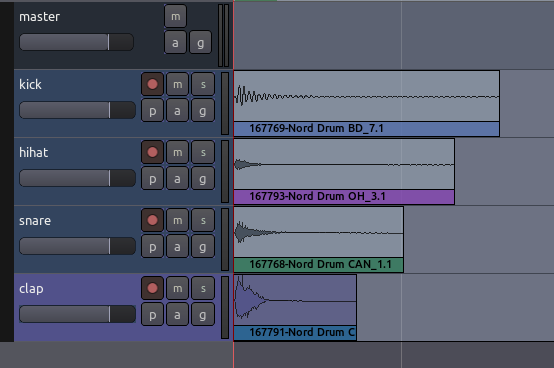
现在我们重命名音轨以便我们可以很快看到每个乐器的位置(双击音轨名称即可编辑它)。
您可能也希望在编辑器窗口里从上到下重新排列音轨的顺序。点击编辑器窗口最右边的Tracks音轨 & Busses总线标签页,然后就可以拖放音轨到您想要的位置。
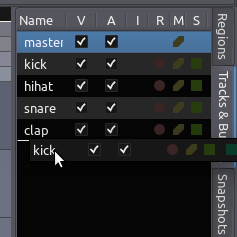
- 提示:您也可以使用这个标签页中的“V”复选框在主版面中显示或隐藏音轨。
这里我们可以排序drumkit爵士鼓,以便让kick drum踢鼓处在底部,snare军鼓和high ha踩镲在中间,而clap拍击在顶部。
设置节拍
Meter节拍决定了确定我们所合成的段落的音乐速度,以Beats Per Minute每分钟拍子数来衡量。
如果我们所合成的东西是有韵律的,在某种程度上它还将确定我们所使用的声音样本的长度。因此,在我们继续之前,能够对节拍进行设置是很重要的。
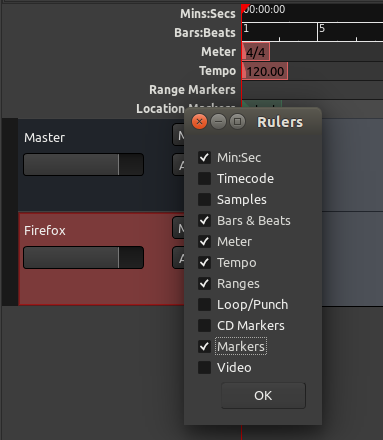
要看到我们的会话与节拍相关联的时间线,我们可以在标尺的“header首部”任何地方单击右键点击,并且勾选以下项目:Meter节拍,Bars & Beats小节&拍子,以及Tempo节奏。
可以为整个Ardour会话设置一个Meter节拍和Tempo节奏,而且可以在同一个会话的不同的地方改变它们。为了做到这一点,在编辑器窗口中定位Timeline Bar时间线栏目的节拍部分,然后右键单击第一个红色小标记打开Meter Dialog节拍对话框。
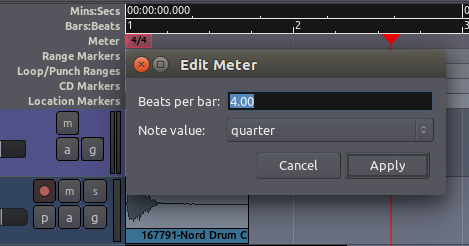
在这里您可以为Beats Per Bar每小节拍子数输入新数值,下面的Note Value音符数值也是一样。点击“Apply应用”以在您的会话中全局应用本次修改。
然后,在Tempo节奏部分里定位第一个红色标记,在它上面右键单击,为您的会话选择BPM(Beats Per Minute每分钟拍子数)。
如果在歌曲或合成里,您的会话的节拍或节奏后来又要改动,只需右键点击节拍或节奏时间线添简单加一个新的标记,并且在弹出的对话框中输入新的节奏或节拍。
使用范围
一个Range范围就是时间线上的一个已选中部分,可以包含一个或多个音轨。
范围工具(快捷键“R”)位于编辑窗口里的播送工具栏上。

当您选择了范围工具之后,您的鼠标指针看起来将会像是一条垂直线。
下面的操作可以有助于创建已选中部分范围,且在您的时间线上对齐区域的边缘。在网格和网格点菜单分别选择“Grid网格”和“Region bounds区域边界”项目,这样以后就能轻松创建范围了(注:快速选中区域以及区域之间的空隙)。

要创建一个已选中部分范围,在时间线上的任何地方拖动鼠标即可。当前的网格和网格点的选项决定了已选中部分范围将如何起作用。一旦范围选择好了,在范围上右键点击它,会打开一个Range-specific范围专用菜单。
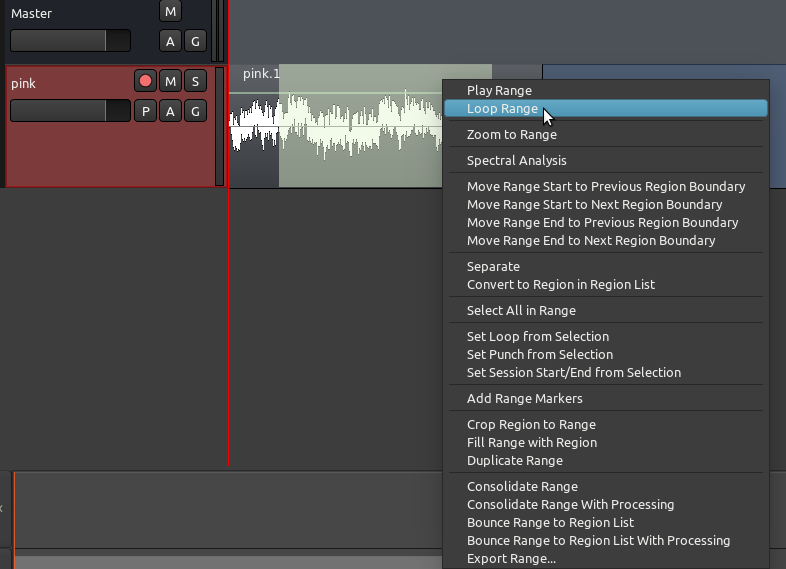
(注:在刚才的右键菜单中选择)Loop range循环范围,即是,在当前范围设置Loop Markers循环标记,并且开始循环播放。可以(在时间线上方的“Loop/Punch Ranges 循环/切换范围”里)通过移动的绿色三角形,来对应改变Loop Start循环的起点和Loop End循环的终点的每一个点。
与编辑有关的其它有用的选项,例如允许您Duplicate复制范围,在范围内Select All选择所有,或者Crop裁剪范围。
设立一个循环
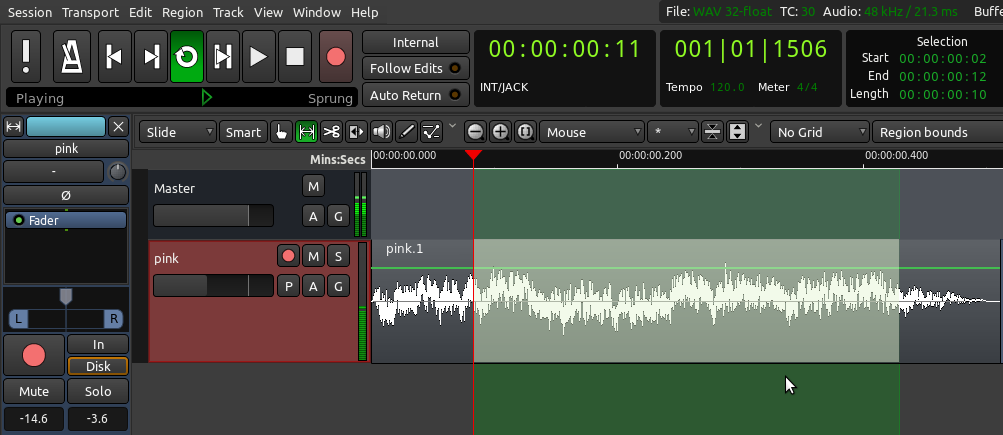
回到我们的韵律段落示例中,我们将希望听到我们合成的段落,当我们回转移动样本时,也许就像是一个循环。要做到这一点,我们必须在我们的会话中创建一个范围听一听,这样我们就能在会话中一次又一次地精确地回到这个点。
如果需要就缩小一些视图(快捷键“-”)以便在时间线里能看到完整的小节。使用范围工具在网格设置的帮助下选择整个小节,然后在范围内右键点击选择“Set loop from selection从已选中部分设置循环”。您可能会想要设置Grid网格,以便您的操作吸附到会话中的某些节拍元素(例如,吸附到Beats拍子)。一旦建立了一个小节的循环,屏幕将会看起来像是这样:
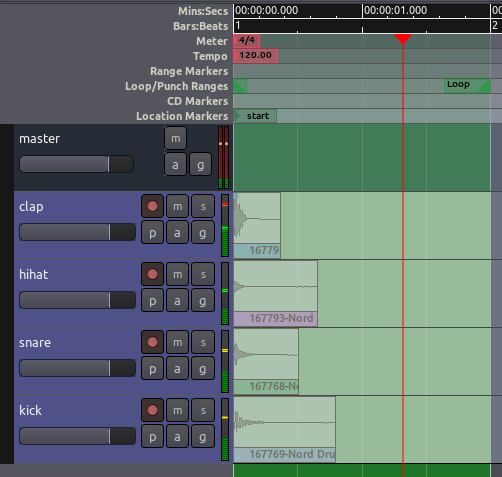
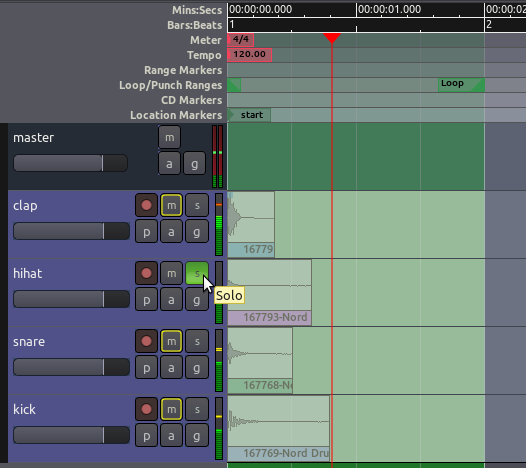
这将设置一个循环范围,您可以通过使用位于编辑器窗口顶端的Transport Menu播送工具栏里的Play Loop播放循环按钮(快捷键:“L”)。当范围循环播放时,您可以使用位于每个音轨上的Solo独奏按钮试听每一个单独的乐器。(注:这个循环对所有音轨有效。)
区域常用操作
在Ardour里,音频的已选中部分被称为Regions区域。
我们一直努力要合成一个简短的韵律段落,我们现在需要知道如何Select选择、Move移动、Split拆分和Trim修剪这些区域,还需要知道如何淡入或淡出它们的音量,以及如何在它们之间创建Crossfades交叉淡化。在合成里,这些选项中的某些部分可能需要发生在特定的Edit Points编辑点,或者在Timeline时间线和Grid网格上匹配我们所能定义的音乐节拍。
选择区域
Grab Mode抓取模式(快捷 G)是选择和移动对象物体的工具。它位于编辑器窗口播送工具栏的正下方(“小手”图标)。您在Ardour里将会经常频繁地使用到这个工具。

当它启用时,您的鼠标指针将看起来像一个小手图标。
请尝试下面的所有操作,实践一下:
- 点击该区域的波形以选中它。点击并拖动一个区域就可以四处移动它(可以在同一音轨向左和向右移动,而且也可以向上和向下移动到其它音轨)。
- 使用 “Ctrl”+“点击” 可以创建区域的一个副本并且可以四处拖动它。
- 选择时按住“Shift”键您就可以选择多个区域。
- 选择了多个区域后,就可以同时移动多个区域。
- 您可以在一个音轨上一次就选择好几个连续的区域,只需要在选择这个序列的第一个和最后一个区域时,按住“Shift”键即可(您在同一个轨道上复制一些区域可以就可以尝试这功能了)。
- 当您选择单独一个区域时,确保一定要点击在它的矩形方框内的波形部分。比波形更低的、带有该区域名字的彩色长条是用于不同的操作(请参考下面的修剪区域)。
- 使用“Del”键删除已选中的区域。
- 标准的复制(“Ctrl”+“C”)、剪切(Ctrl”+“X”),还有粘贴(“Ctrl”+“V”)操作也可以用于区域操作。
- 您还可以在多个区域上,用鼠标拖出一个选择框来全部选中它们。
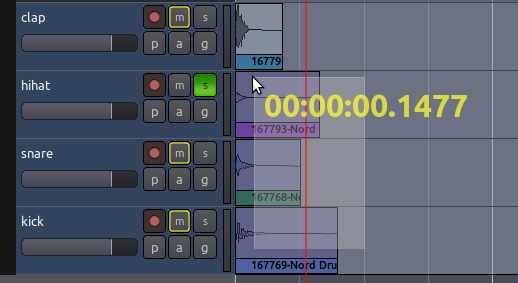
移动区域
当移动的一个区域时,一个Timecode时间码将会以黄色的数字显示在屏幕上。这个时间码是该区域在时间轴上的起点。时间码的单位与第二计时器的单位是一样的,您可以通过右键点击第二计时器并选择新的单位(分:秒,小节:拍子,等)来改变所显示的时间码的单位。
你可以在同一音轨上水平移动区域(横向)到一个不同的时间点,或者您可以垂直移动已选中的区域(向上或向下)到一个不同的音轨。
当一组一个或多个区域被选中时,您你可以通过拖动鼠标来移动整套区域。
- 注意:一定要确保选择时区域点击在它的波形部分,因为点击在底部区域的标题栏上是用于不同的操作(请参考下面的修剪区域)。
复制区域
除了“Ctrl”+“点击”+“拖动”和标准复制/粘贴,Ardour还提供其它一些很方便的复制区域的方法。先使用选择/移动对象物体工具,选择一个或多个区域,然后使用菜单的Duplicate复制功能,就能复制出一个或多个副本(菜单Regions区域 > Duplicate复制)。有三个选项可用:
- Duplicate复制(快捷键“Alt”+“D”):在同一音轨上复制已选中的区域,直接跟随排在原来的后面。
- Multi-Duplicate多个副本(快捷键“Shift”+“D”):一次生成已选中区域的多个副本(相同的音轨,依次排列)。您可以指定副本的数量。
- Fill Track填充音轨:根据需要使用已选中的区域尽可能多的副本填满整个音轨,一直到时间线上的End终点标记处为止。(注:副本太多,这有可能会造系统变得迟钝缓慢。)
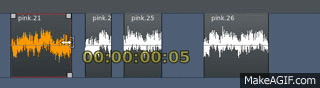
在下面的截图里,就是使用上述方法复制的区域。
使用编辑点
当您使用标准的复制/剪切/粘贴命令时,区域究竟会粘贴到什么地方?确切位置就是由编辑点下拉菜单决定的。
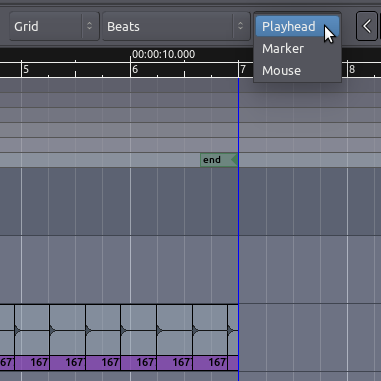
如果选择Mouse鼠标作为编辑点,那么被复制出来的区域会被粘贴到鼠标的当前位置。(注:可以复制到不同音轨)
如果选择Playhead指针作为编辑点,那么被复制出来的区域会被粘贴到原来区域所在的同一条音轨上的红色指针线条上。
最后,如果选择Marker标记作为编辑点,那么被复制出来的区域会被直接粘贴到当前已选中的位置标记的后面。(注:与原来区域所在的同一音轨上)
标记
在一个会话中,能够标记不同的位置,以便供后面的编辑和混音时使用,这是非常有用的。Ardour有好几种方法支持这样做。最常见的方法是使用Location Markers位置标记,在时间上定义确切的位置。
通过右键点击击位置标记工具栏,并选择Add New Location Marker添加新位置标记,即可把位置标记可以添加到时间线。如果您看不到位置标记工具栏,只需右键点击时间线(前端),然后在菜单里选择它,让它可见。位置标记也可以用鼠标选中,并移动到新的位置。右键点击一个位置标记可以让您重命名标记,在其中还有其他选项。
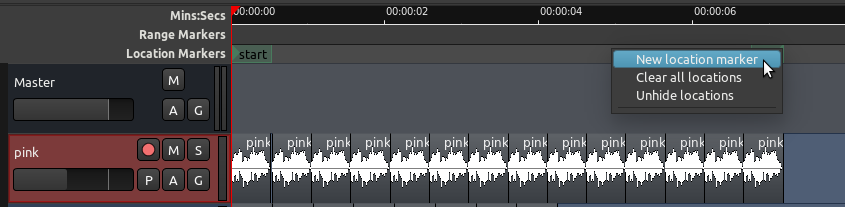
- 提示:当您首先创建一个新会话时,默认会自动添加两个位置标记。它们是start起点和end终点标记,正如您在上面的截图所见一样。如果您不看到end终点标记,缩小视图到足够小,您你就能找到它。
拆分区域
要Split拆分一个区域,简单来说就是把一个单独的区域分成两个独立的区域。有两种方式可以完成:
- 您可以使用剪切模式(快捷键“C”)在任何您打算拆分的地方点击;或者
- 您可以在抓取模式中使用快捷键“S”(即“Split拆分”)。在这种情况下,点区域被拆分的位置取决于当前已选中的编辑点。如果您的当前编辑点菜单里已选中的是鼠标,那么选择一个区域,并将光标放在您打算拆分的那点上,然后按下“S”(可以使用菜单Edit编辑 > Split Region拆分区域完成同样的操作)。

拆分之后,原来的单一区域就变成了两个独立的区域,各自带有一个新的名称,如上图所示。这两个新的区域现在是完全独立的。您可以分别移动和编辑它们。
也可以使用指针或者一个标记作为编辑点来拆分区域。
修剪区域
如果您移动光标靠近一个区域的左边或者右边的边缘附近,您会看到指针变成一个箭头。点击按住并且从区域的两端向内拖动,这个区域将被相应地缩短。这被称为Trimming修剪区域。区域从区域的起点开始修剪(在边缘从左向右拖动)或者从区域的终点开始修剪(从右向左拖动)。
这个操作是安全、非破坏性的:音频不会真的被删除。就好像您只是“隐藏”那些您不想要的或者不再需要的部分。以后,您可以“un-trim恢复修剪”区域(即,扩展它回到原来的完整大小),即使它已经被移动或复制到一个新的音轨也可以恢复。一个被修剪过的区域将继承它的原始区域名称来派生出它自己的名称,您将会在您的区域列表里看到派生的这名称。例如,在上面的图片中,一个原始的区域名称是sample_01,它的被修剪出来的版本则被命名为sample_01.1,sample_01.2,sample_01.15(…),诸如此类。
- 提示:修剪将会受到Grid网格设置的约束。如果您不想让您的修剪被任何网格所约束,只需简单地关闭网格(No Grid无网格)。
删除区域
因为Ardour是非破坏性的,所以您在音轨里删除区域并不是完全从会话中移除。它们总是可以再次从编辑器窗口右侧的区域列表中提取出来(可以从列表中把区域拖到任何音轨上)。
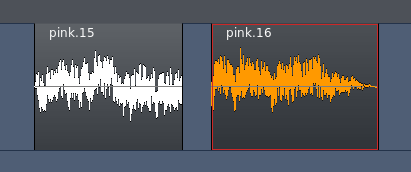
在区域中创建淡化
淡化是一个区域的音量的变化,不论所作为该区域的开始或者结束都可以。在区域起点的淡化是一个淡入,在区域终点的淡化是一个淡出。在每个区域顶部的角落都有两个小操纵杆,可以从边缘向内拖动它以创建一个淡入或者淡出。下面的屏幕截图显示了一个淡入(即:蓝色较暗部分所示)。
事实上,每一个区域都内置淡入和淡出。默认情况下,该地区的淡化很短,短得足以避免点击到位于区域起点和终点的过渡。通过如上述方法调整区域淡化的长度,即可实现更平缓的过渡。
通过右键点击一个淡化(暗蓝色部分),淡化的速度也是可以调整的。
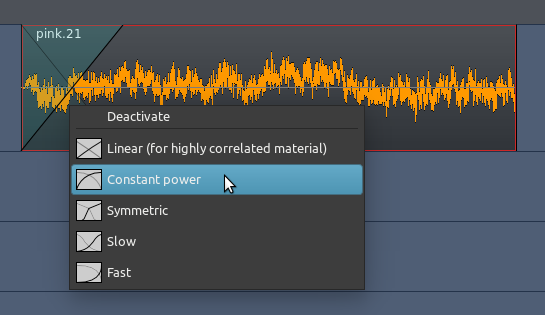
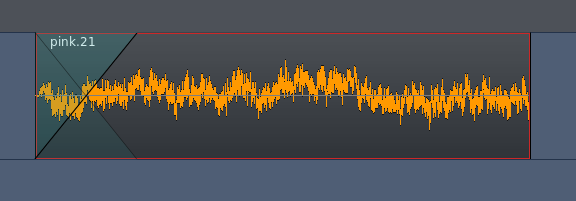
Crossfading Between Two Regions
When one Region Fades Out while another Fades In, this is called a Crossfade. If the two Regions are in different Tracks, you can use the method described above with the Fade In and Fade Out handles. The following screenshot shows an example.
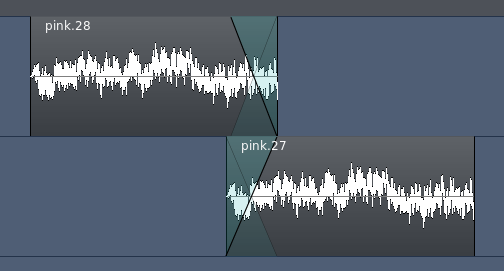
However, if both Regions are in the same Track, you need to overlap them in order to create a crossfade. When regions overlap on the same track, Ardour treats them as layers, that is, one of the regions is considered to be on top of the other. The important rule to understand is:
The Fade In (or Fade Out) of the topmost region represents the crossfade between the two regions.
Once you understand this principle, it’s easy to create and control crossfades between regions. Here’s an example. The two separate regions seen below will be made to overlap in order to create a crossfade.
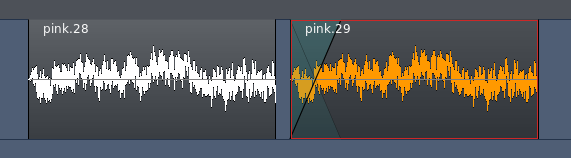
Note that we did not add any extra Fade Out to the first region, but we did add a longer Fade In to the second region. Then we drag the second region partly on top of the first:
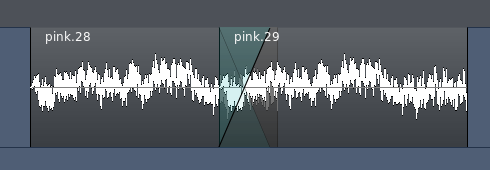
The Fade In of the second region works now as the crossfade between the two regions. In other words, the first region will fade out in a mirror image way as the second region fades in.
In order for this to work, though, we need to make sure that the region that has the desired fade is on top in Ardour’s layering system. In order to change layering of regions, select a region and go to the menu Region > Layering.
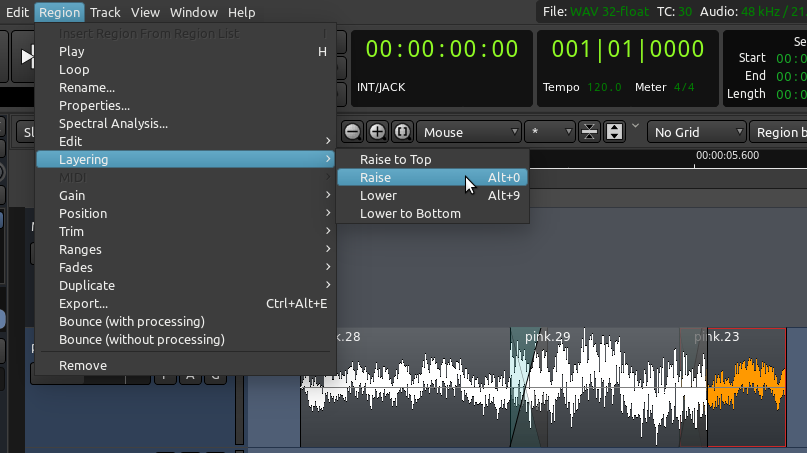
The difference may be hard to hear if you are doing this with the very short percussive sounds we imported earlier. To really hear the effect, import a couple of longer samples to try it out (for example, a sample of rain sounds, and another of a human voice). Overlap several seconds of your long samples on the same track. You will hear the difference as you move the second region to the bottom (“Lower to Bottom”), and then back to top (“Raise to Top”). When it’s on top, we will hear the desired crossfade. When it’s at the bottom, we will hear no crossfade, just an abrupt change from first to second region (assuming your first region has no Fade Out specified, as in the screenshots above).
Using Grid Settings
Experiment with the Grid setting, as discussed in the Setting Up the Timeline chapter, to give different kinds of Quantization—in other words, to constrain the boundaries of each Region to certain grid points. Here, the Grid has been activated and set to Beats/16, to quantize the Regions to sixteenth notes within each bar. You may wish to Trim the endpoints of some of the samples, as discussed above, to fit within the metric structure you have set up (for example, the hihat samples in the screen below have been trimmed so that they don’t not overlap with each other).
区域进阶操作
In this section you will learn a few more things you can do with Regions.
Right-clicking a selected Region reveals a context menu. The first item in the menu (labeled with the Region’s name) contains a large sub-menu. All of these operations are also available from Ardour’s main Region menu.
This section describes a few of the most commonly used operations accessible from these menus.
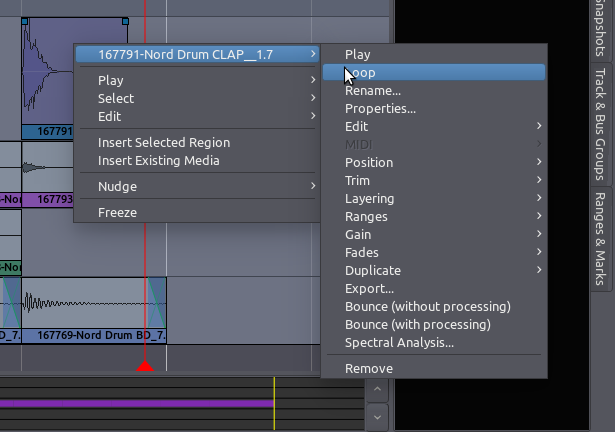
   Play: play back from the beginning to the end of that Region (shortcut “H”).
   Loop: set the loop range to fit that region’s duration, and start looping it right away.
   Rename: change a region’s name.
   Properties: lots of information on the region, plus ability to change its gain.
   Position: among other options, in this sub-menu you will find The Lock toggle box: it locks the Region so that it cannot be Moved or Trimmed. It can still be Split, however, and the resulting Regions will be unlocked.
   Edit: in this sub-menu you find useful tools such as Mute, Pitch Shift and Reverse. Mute renders the region silent. Pitch Shift alters the pitch of a region without changing its duration. Reverse makes the region play backwards.
   Gain: useful options such as Normalize, Boost Gain, and Cut Gain.
   Duplicate: includes Duplicate, Multi-Duplicate, and Fill Track. These were explained in detail in the chapter Working with Regions.
   Spectral Analysis: window displaying the overall frequency content of the Region.
Feel free to explore by yourself other sub-menus not mentioned above. Many of them are mirrors of the options you find under Ardour’s Region menu. Below we go into a bit more details on some of the most useful functions.
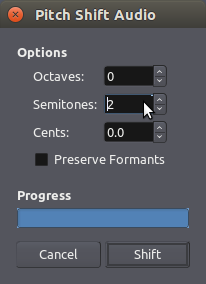
Pitch Shifting
The Pitch Shift function alters the pitch of a region without changing its duration. The function applies a pitch-shifting algorithm to create a new audio clip based on the source clip.
The Pitch Shift window the user to specify the amount and direction of transposition desired. The window includes a Preserve Formants button. When pitch shifting by large amounts, the Preserve Formants option can give results that sound slightly more natural, particularly when used on vocal material.
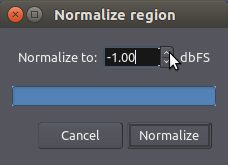
Normalize
The Normalize function (shortcut “Alt” + “3” non-destructively boosts the level of the selected Region so that the Peaks are at 0 dB or less. When Normalizing to 0.0, the region will be as loud as possible while avoiding Clipping. Sometimes you may find useful to normalize a region to a value less than 0, such as -1.0, -3.0, or -6.0 decibels, so it doesn’t become too loud.
Two other useful gain operations for regions are Boost Gain (“Alt” + “6”), and Cut Gain (“Alt” + “7”). Be sure to try them out.
Reverse
The Reverse function reverses the selected region of audio, in effect causing it to play backwards. Reversing a region creates a new audio file ‘behind the scenes’.
Operations on two or more selected Ranges
If more than one range is selected, the operation will apply to all of them (for example, Normalize, Reverse, etc.)
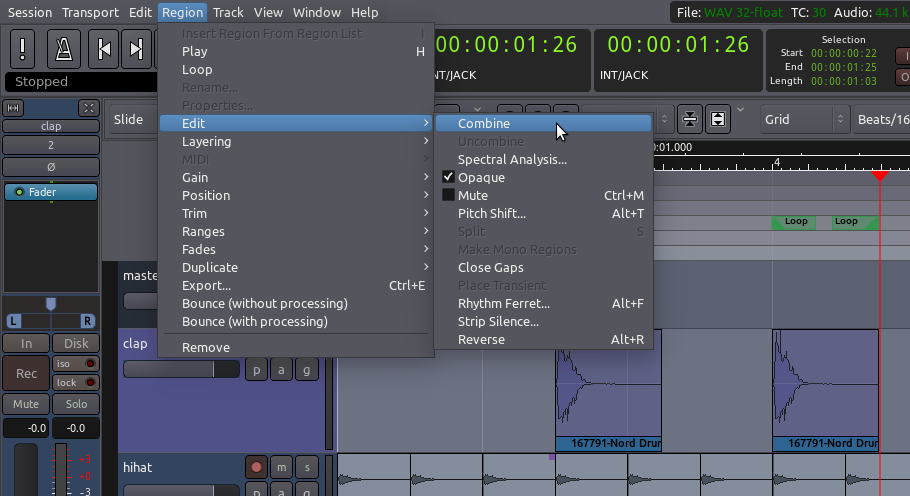
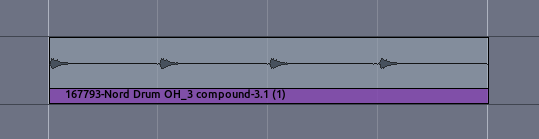
Combine
Some operations from the context menu will only become available when two or more regions are selected. For example, take a look at the “Combine” function, under the sub-menu “Edit”. First we select two adjacent regions:

Then we choose “Combine” from the right-click context menu, or from Ardour’s main menu Region > Edit > Combine:
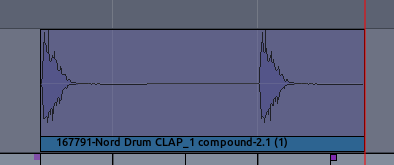
As a result, the selected regions are combined into one. This is particulary useful when you have found an exact sequence of regions that works just as you want, and then you would like to copy and/or move the whole sequence as group.
Notice that the resulting combined region has the word “compound” attached to its name.
改变编辑模式
We have already learned a bit about the Grab Mode (select/move objects) and Range Mode. In this chapter we will get an overview of all the Edit Modes and Cursor Modes available on that part of the Editor Window.
Edit Modes and Cursor Modes

These controls define the behavior of the main canvas and the different functions of the cursor.
The drop-down Edit Mode menu contains three options. Slide Edit is the standard mode, and the one we will be using in this tutorial. It allows you to freely drag regions around horizontally (within the same track) and vertically (between tracks). The other two options limit or block your ability to move regions from their positions, but we will not cover them in detail here.
Grab Mode (shortcut “G”)

This Cursor Mode allows you to select or move objects such as regions and breakpoints (in an automation curve). When this Cursor Mode is selected, your cursor pointer will look like a little hand icon.
Range (shortcut “R”)

This Cursor Mode allows you to click and drag to define or resize Ranges. When this Cursor Mode is selected, your cursor pointer will look like a vertical line.
Cut Mode (shortcut “C”)

Use this Cursor Mode to split Regions into smaller Regions. The cursor turns into the shape of scissors. This allows you to point and click on a Region to split it at the cursor.
TIP: you can cut Regions directly from the Grab Mode too (sometimes this method can be more practical.) Without leaving the Grab Mode, simply place the mouse at the desired location on the Region to be cut, and hit the shortcut “S” (for “split”). Important: your Edit Point (to the right of the Grid settings) must be set to Mouse.
Stretch/Shrink Region (shortcut “T”)

This Cursor Mode allows you to drag and resize the duration of an entire Region without changing the Pitch. This is sometimes called ‘Time stretching’, hence the shortcut “T”. Please see the chapter on Stretching/Shrinking Regions for more details. When this Cursor Mode is selected, your cursor pointer will look like a diagonal arrow.
Audition Mode (listen to specific regions)

This Cursor Mode allows you to click on any existing Region on any track and have it immediately played back. Playback stops at the end of the Region. When this Cursor Mode is selected, your cursor pointer will look like a small loudspeaker icon.
TIP: you can also quickly audition a selected Region without leaving the Grab Mode. Simply select a Region and hit the shortcut key “H”.
Draw Mode (shortcut D)
Use this mode to draw gain automation points. Cursor looks like a pencil. Automation will be discussed in detail in the chapter Using Automation.
You can also edit individual points in this mode if you bring your cursor right on top of the automation point you want to move (mouse will turn into a small cross). However, if you are not precise this may accidentally create a new automation point. If this becomes a problem, you should use the next Mode, which only allows for editing existing points, not creating new ones.

Edit Mode (shortcut E)
Use this mode to edit existing gain automation points. Cursor looks like a hand, and turns into a small cross when you are on top an existing point. Click (hold the click down) and drag in order to move points.

MIDI
The last two buttons explained above are also used to create and edit MIDI information, but we are not covering MIDI in this tutorial.
Horizontal Zoom and view options

The main shortcuts you will probably be using all the time are “-” and “=” (zoom out and zoom in, respectively). Zooming will happen in relation to the Edit Point currently chosen (Mouse, Marker, or Playhead). If in doubt of which Edit Point to choose, try Mouse.
The Zoom to Session button (shortcut “_” - that’s the underscore character) zooms in or out as needed so that you can see the Start and End markers of your project.
All the zoom options discussed above control the amount of horizontal content you will be seeing on screen. Once you have a session with several tracks, you will also want to control the amount of vertical content you are able to fit (see) on the screen. There are several ways to do this:
Use the “Number of visible tracks” drop down menu to select how many tracks you want to fit on your screen.
Use the “Shrink tracks” button to make all selected tracks smaller.
Use the “Expand tracks” button to make all selected tracks larger.
You can also change an individual track size by dragging from its bottom edge, or right clicking on the track header and selecting the desired “Height”.
You can use the navigation tool at the bottom of the Editor window in order to scroll up and down the session, and adjust horizontal and vertical zoom by adjusting the size of the viewing rectangle.
创建循环部分
You can easily repeat sections of audio in your Ardour session.
Here, we take the short rhythmic passage we created in Working with Regions and duplicate it to make a loop.
Before duplicating the passage, it is a good idea to combine individual regions in the same track into a single one: it easier to move them around this way, and it prevents you from accidentally moving a single hihat out of place, for example. There are two ways of doing this: Combine Regions (allows you to “uncombine” later on), and Consolidate Range (“writes it in stone”, does not allow you to separate them later).
If are still planning on making alterations to the rhythm (adding, removing, or moving individual regions), it may be better to use the Combine regions option. If you like the sequence the way it is and don’t want or don’t care to have the ability to separate them later, use Consolidate Range option.
Combine Regions
Simply select all the regions you want to combine:
Then go to menu Region > Edit > Combine (or right-click on the selected regions and find the same option through the context menu, as shown below):

The combined regions will look like this (note the word “compound” appended to the name):
Should you need to separate them again in the future, simply select the compound region and go to the same menu and choose the option “Uncombine”.
Consolidating the Range
A more permanent alternative to Combine is to use Consolidate. When you’ve arranged your Regions into a single “loop cycle” and you’re satisfied with the sound, create a Range with all the regions that will make up the loop. First, make sure every Track used in the loop is selected. Unselected Tracks are gray, and selected ones are blue. If any of the Tracks you used are not selected, hold down the Shift key while clicking on them to add them to the selected group. Finally, use the Range tool to select the entire loop.
Once again, the Grid setting will help you to set the range precisely to the start and end points of your metric bar. Once you have the entire loop selected, Right-Click on the range and select “Consolidate range”. If you would like any Automation or Plugin effects you have added to the loop to be included, select “Consolidate range with processing”.

When the range is Consolidated, new Regions will appear in each Track, each containing all the repetitions of the samples which you set up in the previous steps. Remember, once the range is consolidated, there is no way to undo this operation. In any case, if you find that you need to alter the rhythm in any way, you can always retrieve the original individual samples from the Region List and rebuild the pattern with them.
Duplicating the Range
After you have merged individual regions that form your pattern (using either Combine or Consolidate), it’s time to duplicate the pattern to make it loop for several bars.
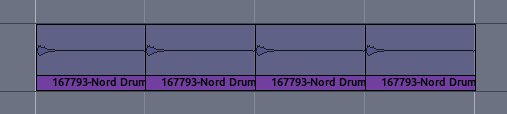
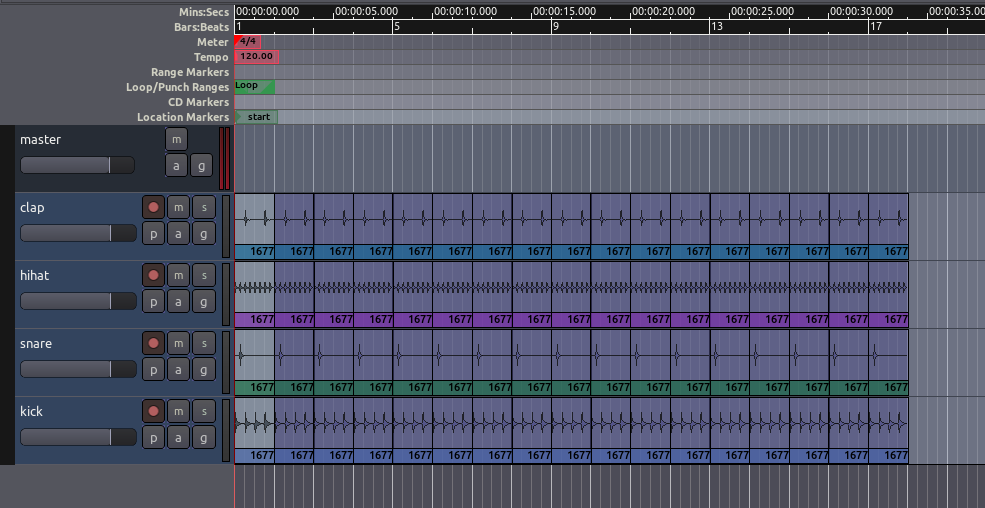
The Multi-Duplicate feature (seen in the Working with Regions chapter) is a good way to accomplish this. Go back to Grab mode (shortcut “G”), select all regions, and hit “Shift” + “D”. Choose how many times you want to duplicate the pattern (for example, 16). After duplication our session looks something like this:
Just for review, other options you could have used for duplication are:
The Fill Track command from menu Region > Duplicate > Fill Track. This would fill the entire track with copies of the selected regions, all the way up to the End Marker.
The single Duplicate command from the same menu (shortcut “Alt” + “D”). This lets you make a single copy at a time.
The single duplicate action with “Control” + Click on the region + Drag a copy.
伸展/收缩区域
Regions can be stretched or shrunk in length without changing their Pitch by using the Stretch/Shrink Regions tool (shortcut “T”, for “Time stretch”).
A small adjustment to the length of a Region may not cause noticeable sound Artifacts. However, the more extreme the change in length, the more obvious the effect of processing on the sound.
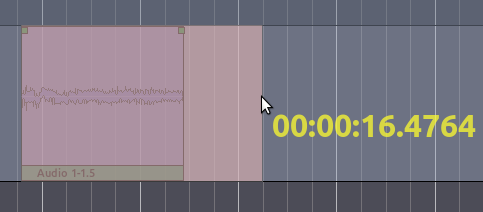
To use Stretch/Shrink Regions, place your cursor on top of the region, and then Click-drag left or right. While dragging, you will see a highlighted area, which represents the new duration to which the Region will be shrunk or stretched when you release the mouse at the current position.
Time-Stretching a Region to Fit the Loop
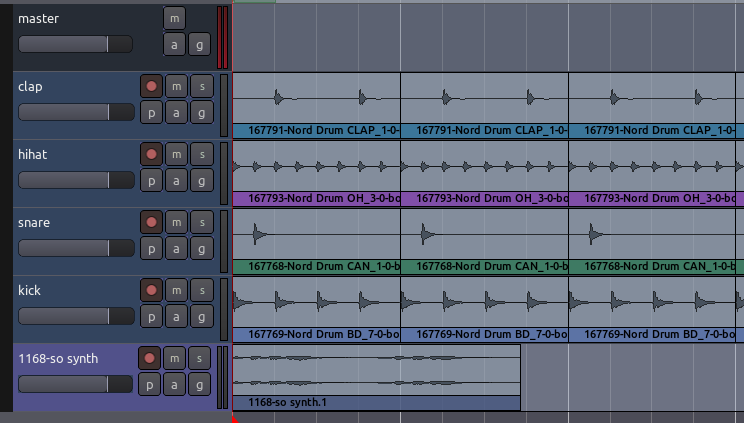
In this tutorial, we’ve added another sound sample—this time, a synthesizer line—from freesound.org to the rhythmic passage we composed in the Creating Looped Sections chapter (search for tag “1168” in the Search Freesound tab of Ardour if you’d like to get the same sample. Import it as a new track).
After importing this synth line, we see that the length of our new Region doesn’t match the existing rhythm we’ve already created. It’s too long to be one bar and too short to be two bars.
We can correct this by using the Stretch/Shrink tool. Select the Region you wish to stretch, and drag the new length to the end of the second Bar, again assisted by the Grid settings.
When you release the mouse button, the Time Stretch Audio dialog will appear. You can experiment with different settings for the Time Stretch operation. Each will affect the sound in different ways. It’s a good idea to experiment with a few different stretch settings to find out which gives the result you’re most happy with.

Click Stretch/Shrink in the Time Stretch dialog to start the operation.
When the Time Stretch operation is complete, the region of the synthesizer line will now be exactly two Bars long, and should fit in with the rhythm we already created with the drum samples.