Ardour4 初学者教程 03 编辑会话
安排音轨
In the following chapters we will use Ardour to create a short rhythmic passage using several drumkit samples.
We will continue working on this passage in later tutorials, such as Working with Regions and Creating Looped Sections. We assume that you have read the chapters in the Getting Started section already, and are familiar with Importing Audio, Tracks, and the Timeline.
Importing Samples
The first step is to add some sounds, which is discussed at length in the Importing Audio chapter. Here, we are using the Add existing media dialog (“Ctrl” + “I”) to import some drumkit samples as regions. The samples used in this tutorial were obtained from a sample pack from the freesound.org website. You can download samples from freesound.org by going to the website itself, but Ardour also has a handy Search Freesound feature built into the import window. From there, you can search and download Freesound.org samples directly.
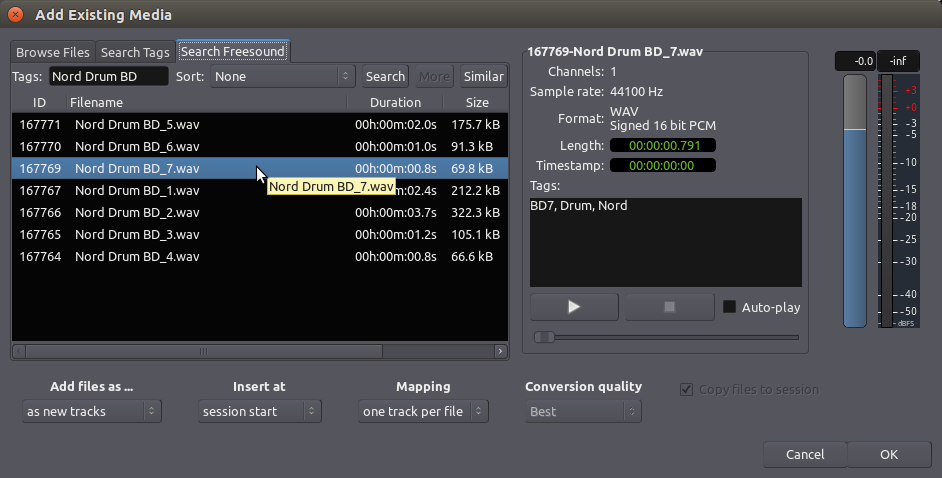
In the screenshot above, we searched for “Nord Drum BD” using the Search Freesound feature of Ardour. Note that we specify that the audio file should be added “as new tracks” and inserted “at session start” (menu options at the lower left). The drumkit sample will appear as new individual track in the Editor Window, each with the name of the audio file used.
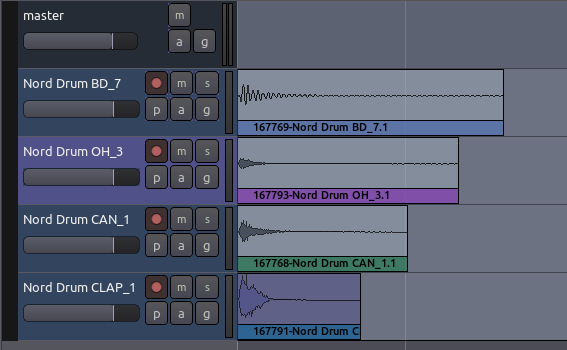
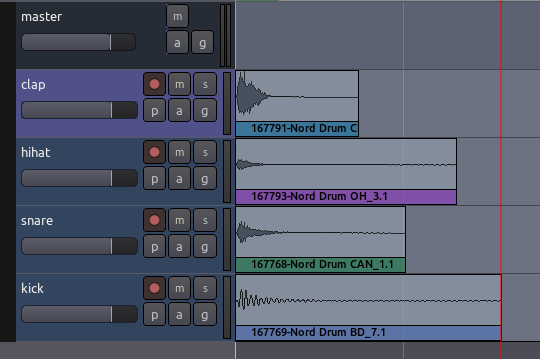
After importing a few more sounds (one snare, one hi-hat, and one clap), our session looks like this (track names come from the original sample name from freesound.org):
Organizing the Tracks
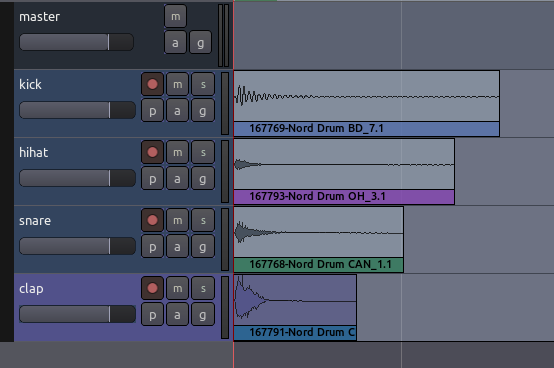
Now we rename the tracks so we can quickly see the location of each instrument (double-click on the track name to edit it).
You may also wish to rearrange the order of the tracks from top to bottom in the editor window. Do that by clicking the Tracks & Busses tab at the far right of the Editor Window and drag-and-dropping the tracks in the order you want.
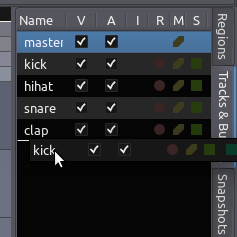
Tip: you can also use the V check boxes in this tab to view or hide Tracks in the Main Canvas.
Here we have ordered the drumkit so that the kick drum is on the bottom, the snare and high hat are in the middle, and the clap is on top.
设置韵律
The Meter determines the musical speed of the passage we are composing, as measured in Beats Per Minute.
If we are composing something which is rhythmic, it will also determine the lengths of the sound samples we use to some extent. So it is important to be able to set up the Meter before we continue.
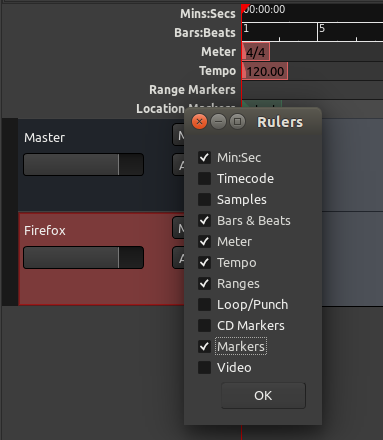
To see the meter-related timelines for our session, we can right-click anywhere in the “header” of the Rulers and check the following options: Meter, Bars & Beats, and Tempo.
It is possible to set a Meter and Tempo for the entire Ardour session, as well as to change them at different points in the same session. In order to do this, locate the Meter section of the Timeline Bar in the Editor Window, and right-click on the first small red mark to open the Meter Dialog.
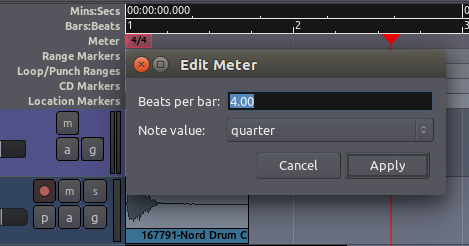
Here you can enter new values for the Beats Per Bar as well as the Note Value. Click “Apply” to apply the changes globally to your session.
Then, locate the first red mark in the Tempo section, right-click on it, and choose the BPM (Beats Per Minute) for your session.
If the Meter or Tempo of your session changes later in the song or composition, simply add a new marker by right-clicking in the Meter or Tempo timeline and selecting New Tempo or New Meter and entering the new Tempo or Meter in the resulting dialog.
使用工作区
A Range is a selection of the Timeline that can include one or more Tracks.
The Range tool (shortcut “R”) is located just below the Transport Menu in the Edit Window.

When you have selected the Range tool, your mouse pointer will look like a vertical line.
It can be useful to create Range selections that align with the edges of regions on your Timeline. Selecting the “Grid” and “Region bounds” items for Grid and Grid Point menus respectively makes this easy.

To make a Range selection, drag anywhere on the Timeline. The current Grid and Grid Point options determine exactly how the Range selection behaves. Once a Range has been selected, Right-Clicking on it opens a menu with Range-specific operations.
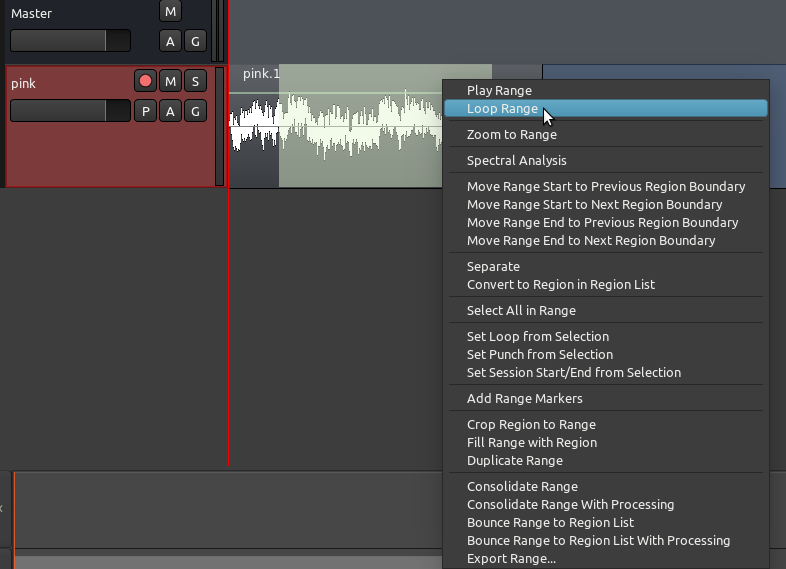
Loop range, for example, sets up Loop Markers around the current Range and begins looped playback. The Loop Start and Loop End points can be changed by moving the green triangles which correspond to the each point.
Other useful options here for editing allow you to Duplicate the Range, Select All within the Range or Crop the Range.
Setting Up a Loop
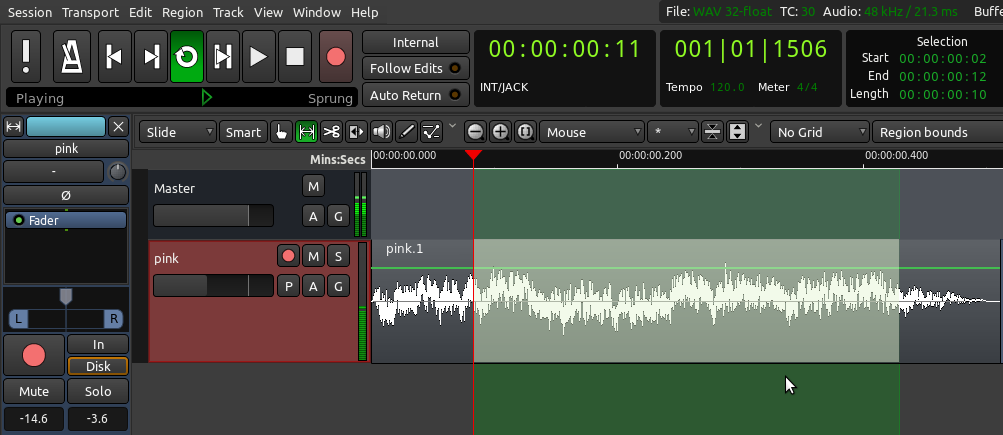
Returning to our rhythmic passage example, we will want to hear the passage we are composing, perhaps as a loop, while we are moving the samples around. To do that, we must create a Range to listen to within our session, so that we can return to exactly this point in the Session again and again.
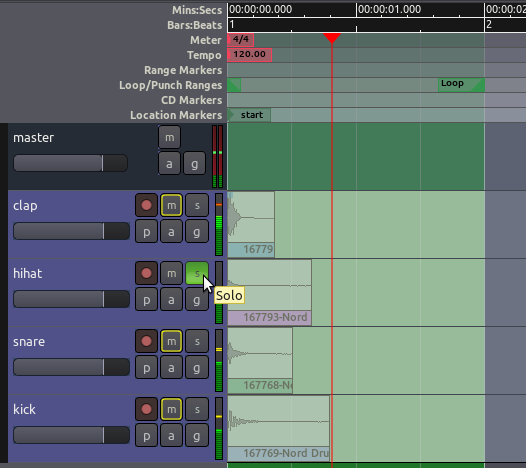
Zoom out if needed (shortcut “-”) to see full bars in the timeline. Use the Range tool to select an entire bar with the help of the Grid settings, and right-click inside that range to “Set loop from selection”. You will probably want to set the Grid so that your actions snap to certain metric elements of the session (for example, snapping to Beats). Once the one-bar loop has been set up, the screen will look like this:
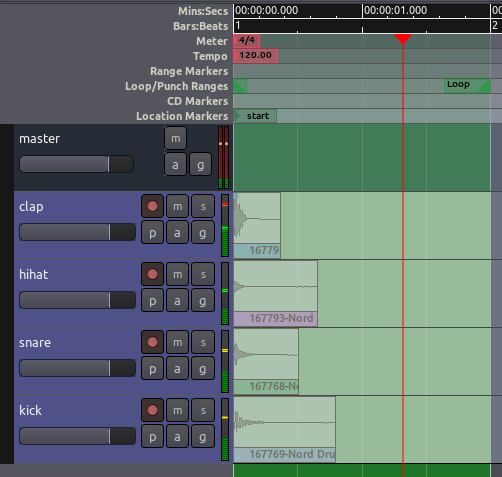
This will set up a loop range which you can play by using the Play Loop button in the Transport Menu at the very top of the Editor Window (shortcut: “L”). While the Range is looping, you can use the Solo button on each track to listen to each the instruments individually.