Ardour4 初学者教程 05 导出会话
来自Ubuntu中文
目录
导出一个会话
Exporting 导出是把一个区域、音轨,或者整个会话保存为您的计算机上的一个文件的进程,这样您就能听到它,把它刻录为CD-R光盘,或者把它转换为 MP3 共享到互联网上。
导出整个会话
一旦您已经完成了您的作品,最常见的导出操作就是导出整个会话成为一个音频文件。
整个会话的鸟瞰视图
从这一点来说,在导出之前 Zoom Out 缩小(推远)并且看一看您的整个会话,是个好主意。
- 从“Number of visible tracks 可见音轨的数量”菜单中选择“All 所有”。
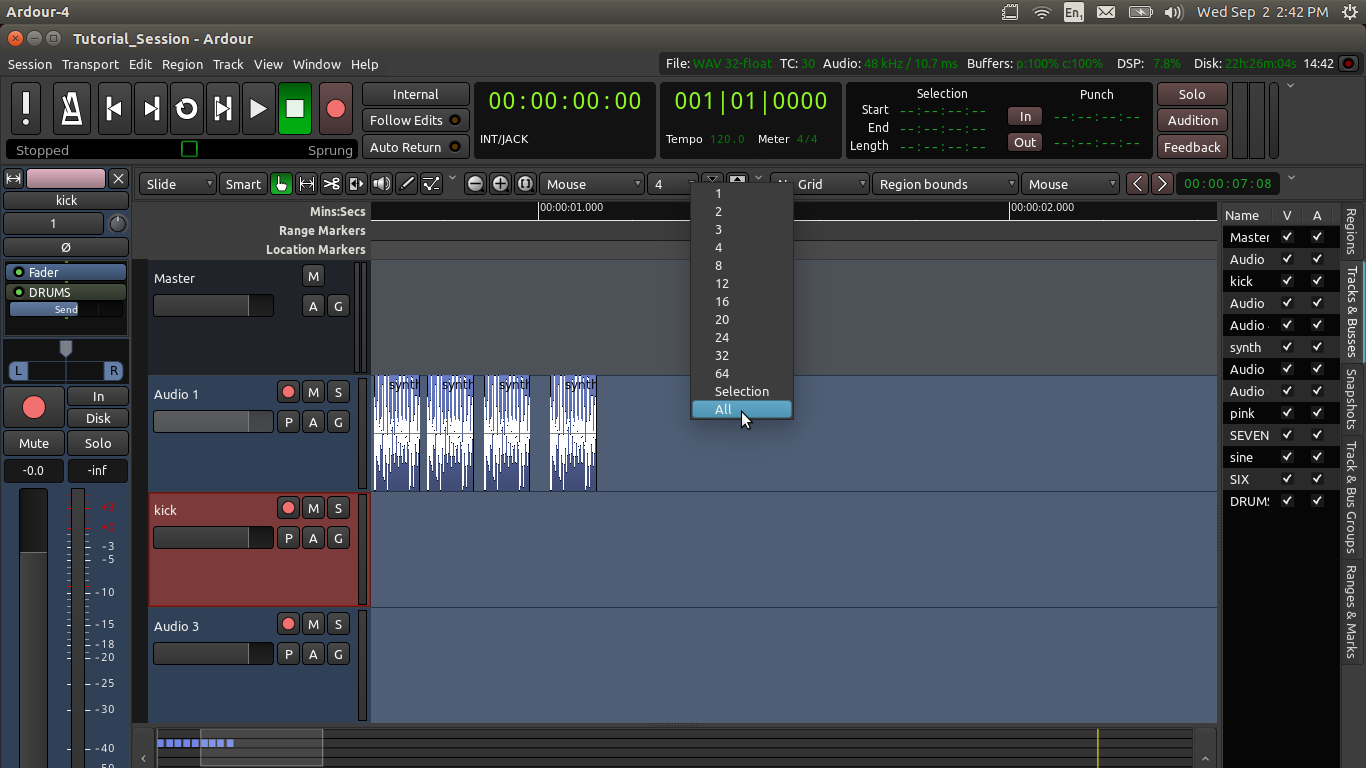
- 点击“Zoom to Session 缩放至整个会话”按钮(缩放选项里的第三个按钮)(注:即“+”右边的那个“[ ]”按钮,快捷键是“shift” + “_”):

- 现在您应该对您的整个会话有一个很好的概览,就像这样:
最后一次听一听您的作品,并确保您所听到的一切是您所希望达到的(任何Solo独奏或Mute静音按钮您忘了撤销激活吗?有没有任何需要调整的音量没有做的吗?诸如此类,等等)。
Start and End Markers
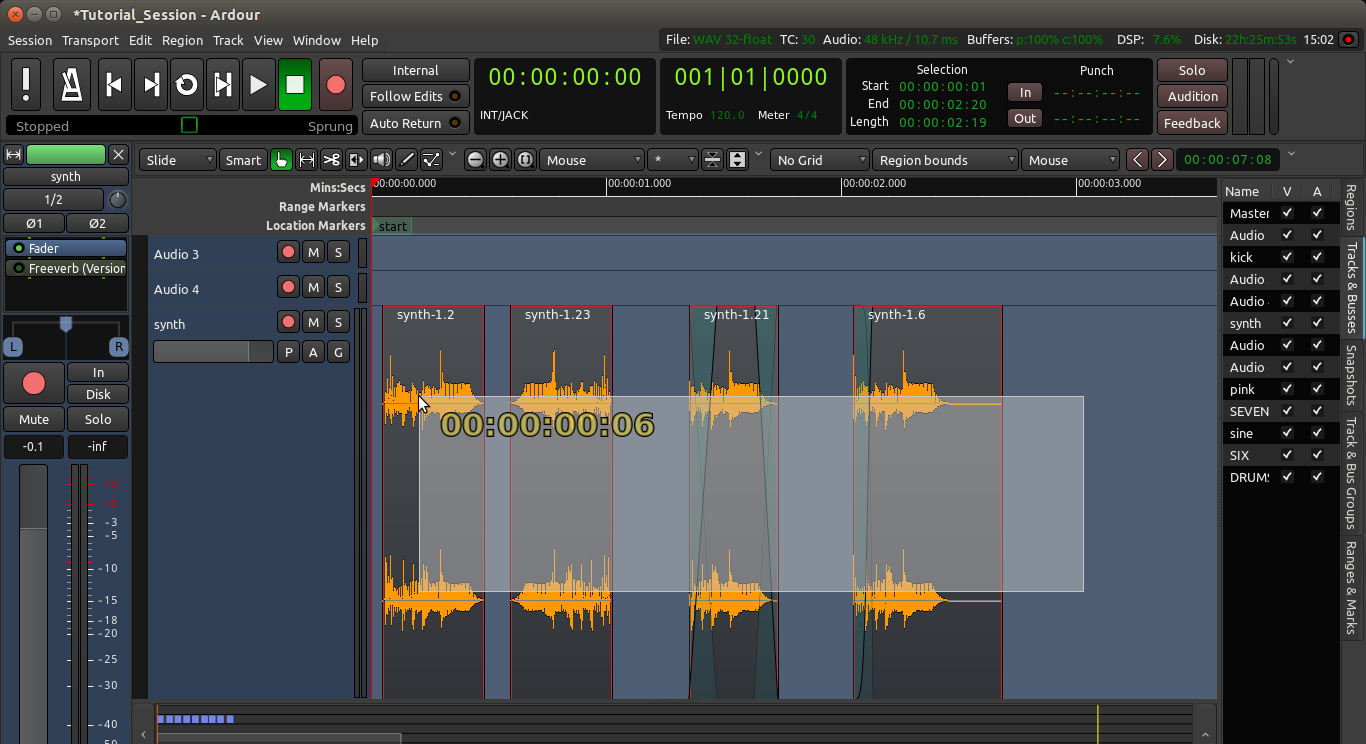
Finally, make sure the Start and End markers are in the right place.

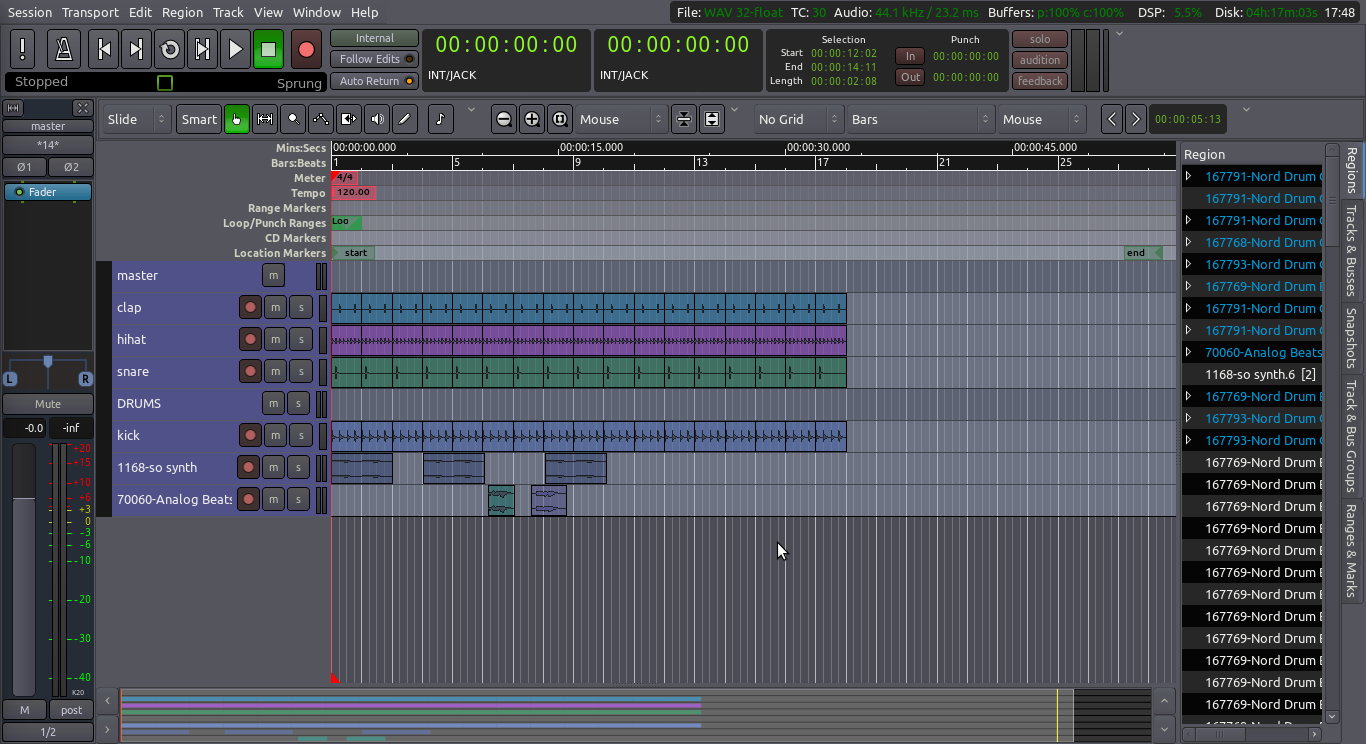
Everything included between the Start and End Location Markers in the Timeline will be exported, so you have to set the markers first if they are not in the correct position. In the image below, clearly the End marker is too far to the right in the timeline. This will result in a huge silence after the end of the piece (that is, between the last Region and the End marker).
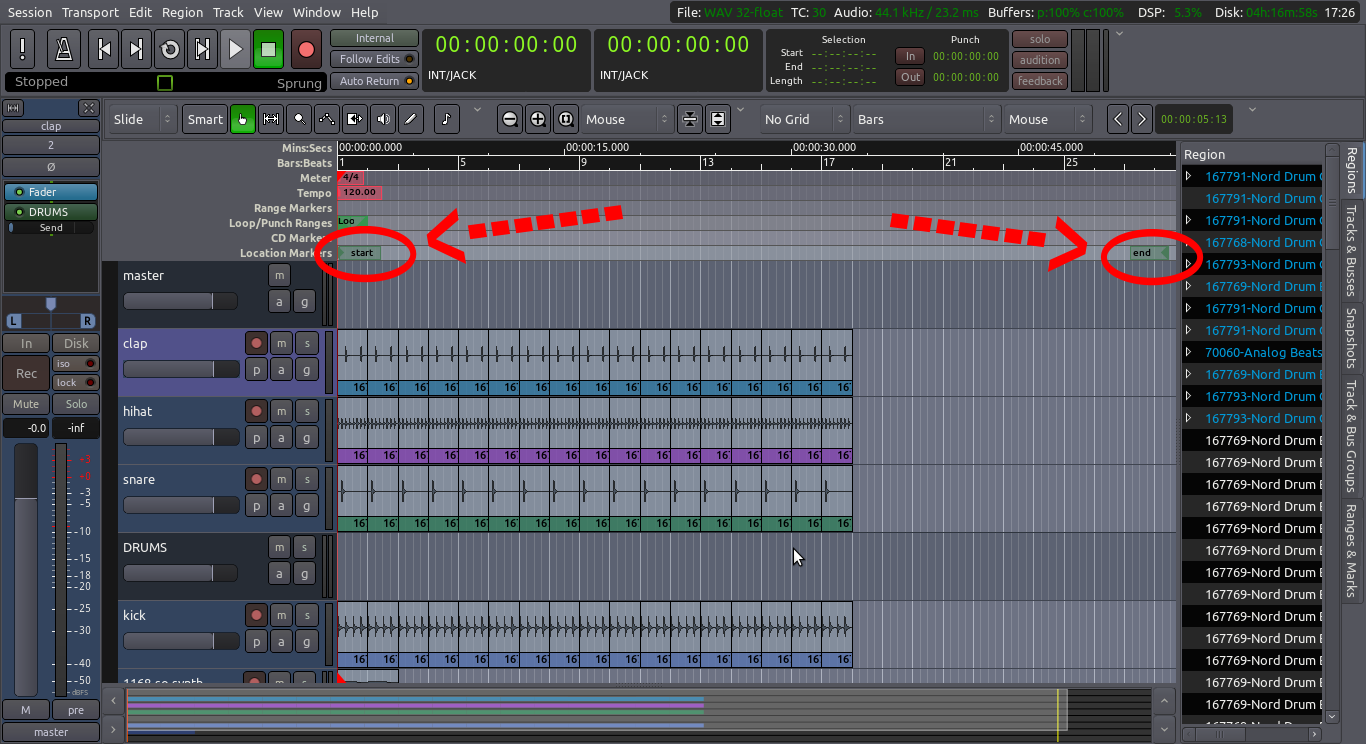
If your End marker is too far after the end of your piece, click and drag it to the left until it is pretty close to the end of the very last Region of your composition.
导出它!
To Export a Session, use the top menu: Session > Export > Export to Audio File(s)…. This will open up a dialogue box with several options.
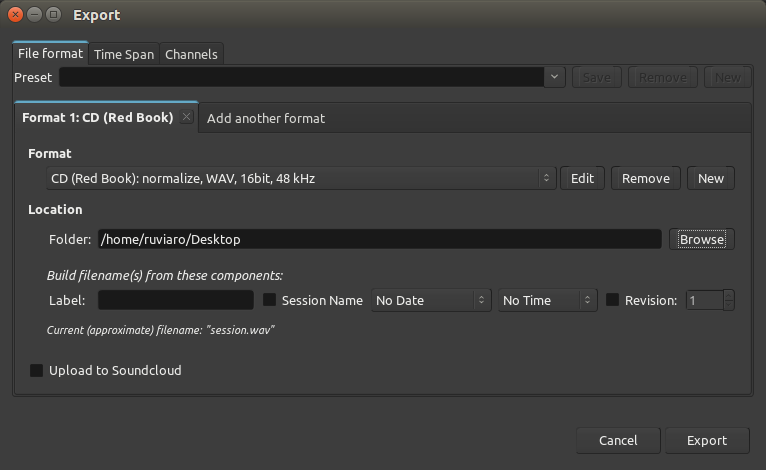
   *Preset: this is NOT where you write the file name. Don’t worry about this field now.
   *Format: this allows you to choose the file format (WAV, MP3, OGG, FLAC, etc.). The default is CD (Red Book), which will give you a WAV file.
   *Add another format: if you’d like to export in more than one format at the same time, click on this tab.
   *Location: this is the place where you will find the file after it is saved. By default, it is in the “export” folder that lives inside your main Session folder. You could also click “Browse” and select the Desktop, for example.
   *Label: THIS is where you can create a unique name for the file. Ardour will automatically append the session name to the exported file, so if you don’t write anything here the name may end up something generic like “my-session.wav”. Use this field to give a unique name to your file.
Having chosen your options, click Export. After the operation is finished, you can find the file using your file browser.
TIP: Export is handled through the Master Bus, so the final file will include all the sounds from Tracks and Busses that were routed to it. This will include any Normalizing, Fading, Panning, and Automation you have created, along with the individual edits made to the Regions as well. If any of the Tracks have the Mute or Solo buttons engaged, this will also affect which Tracks will be heard in the Exported file.
高级选项
Click on the tabs “Time span” and “Channels” in case you need to access advanced export options.
导出一个区域
You may wish to Export only a Region of your Session, perhaps to use as a sample in another application, or to Edit it in a different editor program. This chapter shows you how.
导出一个区域
To Export a Region, select it (so it becomes blue), and then right-click into the sub-menu Export, or use the top menu: Region > Export.
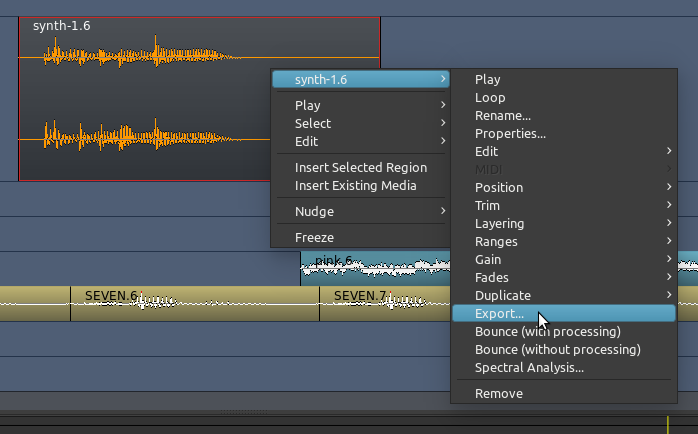
This will open up the same Export dialog box explained in the Exporting a Session chapter. Choose your options, and click “Export”. Only the selected Region will be exported.
Please note that when exporting a Region, not all parameters and edits are exported. Trimmed, split, stretched and reversed regions can be exported, but edits such as and Panning, and Automation are not exported. Also, the volume of the audio Track itself or the Master Bus will not affect the exported file. To export these edits, please see the chapters on Exporting a Range and Exporting a Session.
一次导出多个区域
If you are building a collection of samples to use later in another software, and your samples are basically trimmed and edited Regions, at the end of the process you will need to export all of them. If the number is large, exporting them manually can be tedious. Here’s one way of exporting several Regions at once.
In Grab Mode (shortcut “G”), select all the Regions you want to Export. They do not need to be on the same Track.
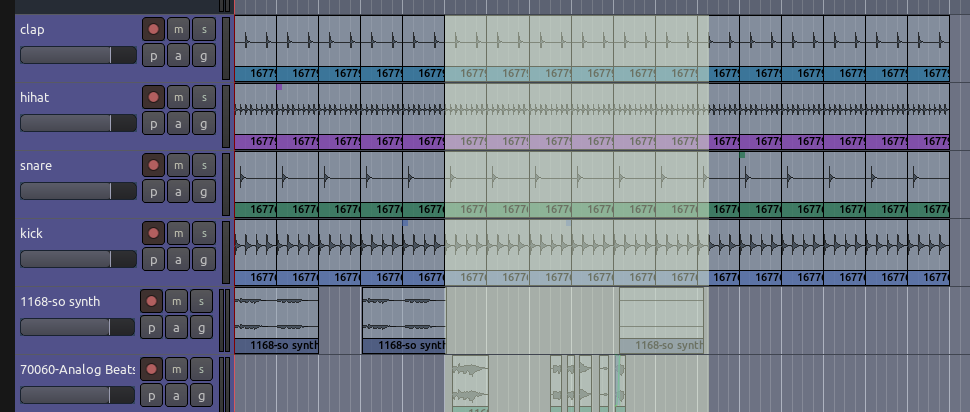
Go to menu Region > Ranges and choose Add Range Marker Per Region.
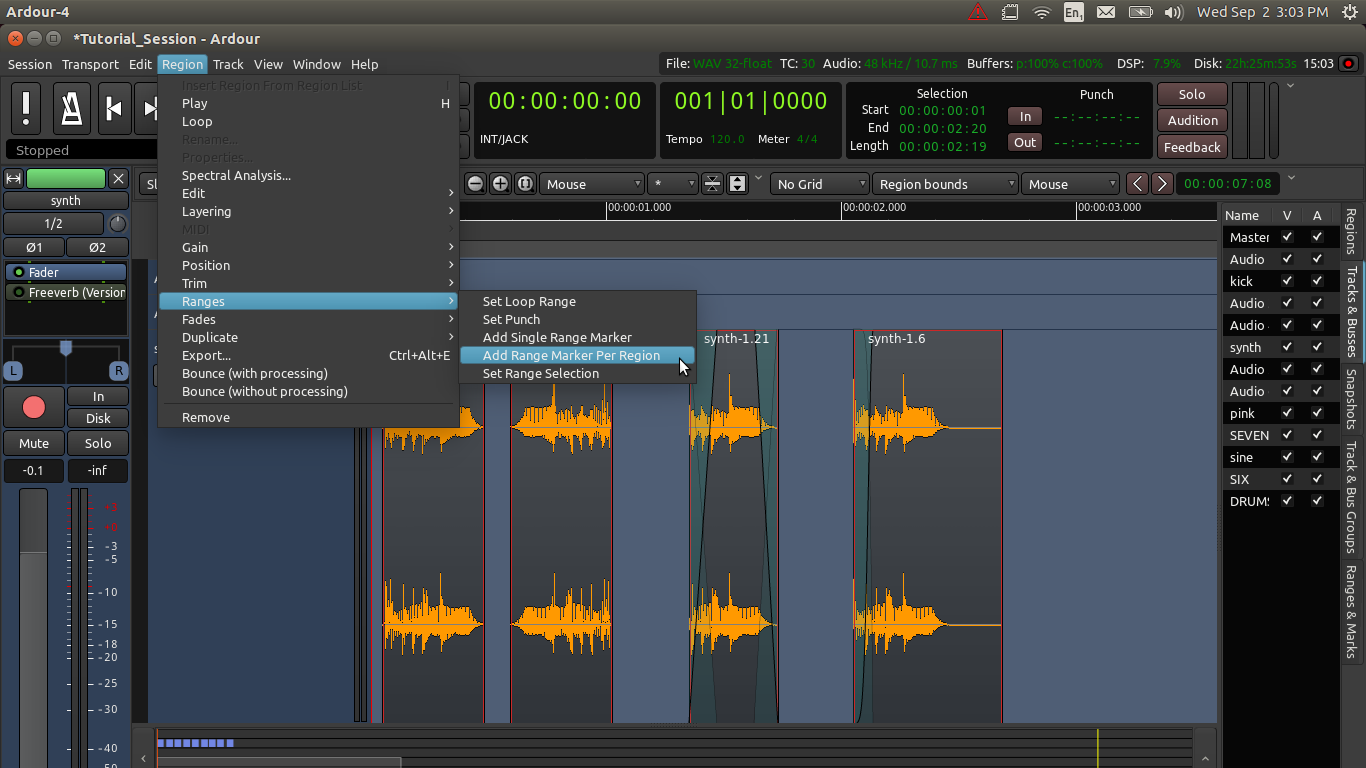
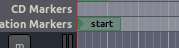
Ardour has now just created Range Markers that fit exactly the beginning and ending of your selected Regions (see the green rectangles in the Range Markers ruler):

Go to menu Session > Export and choose Export to Audio File(s) (shortcut “Alt” + “E”).
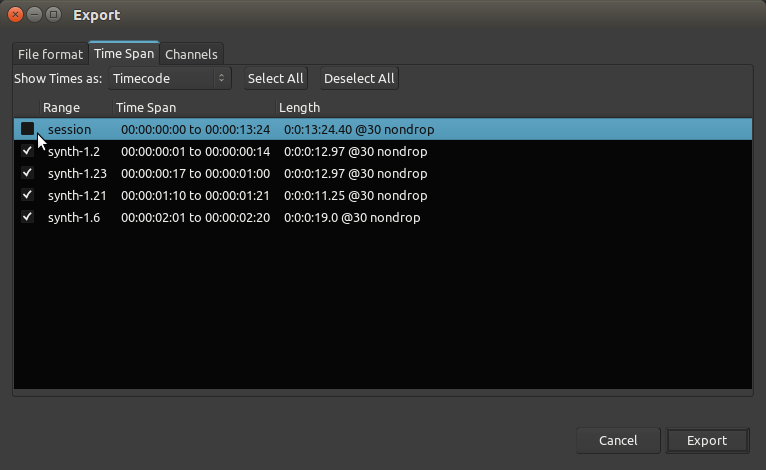
In the Export dialog box, click on the “Time span” tab. You will see all the newly created Ranges listed there. There is also a default Range that stands for the entire Session.
Under “Time Span”, click “Select All”, and de-select the very first Range (the “session” Range). The reason is because we want to export the shorter Ranges, not the whole Session.
Go back to the main tab (“File format”).
Click “Export”.
You Regions have now been exported to single audio files.
IMPORTANT: this method exports everything that falls under each defined time range. In other words, if you have other regions in other tracks sounding simultaneously with the region(s) you want to export, they will be mixed together. Another way of looking at it is this: the export operation will export everything that plays under the defined time ranges. If that is not what you want, you can use solo or mute buttons on select tracks to ensure you export only what you want.
导出一个范围
Learn how to export a selected portion (Range) of your Session.
Exporting is the process of saving a Region, Track or Session to a file on your computer. As we learned previously, exporting an isolated Region does not export all of the changes you might have made to that Region. To export edits such as Panning, Fader Automation, and Plugin effects, you must Export either a Range or the entire Session.
导出一个范围
To export a range, follow these steps:
CLick on the Range Mode button (shortcut “R”)

Make a Range selection:
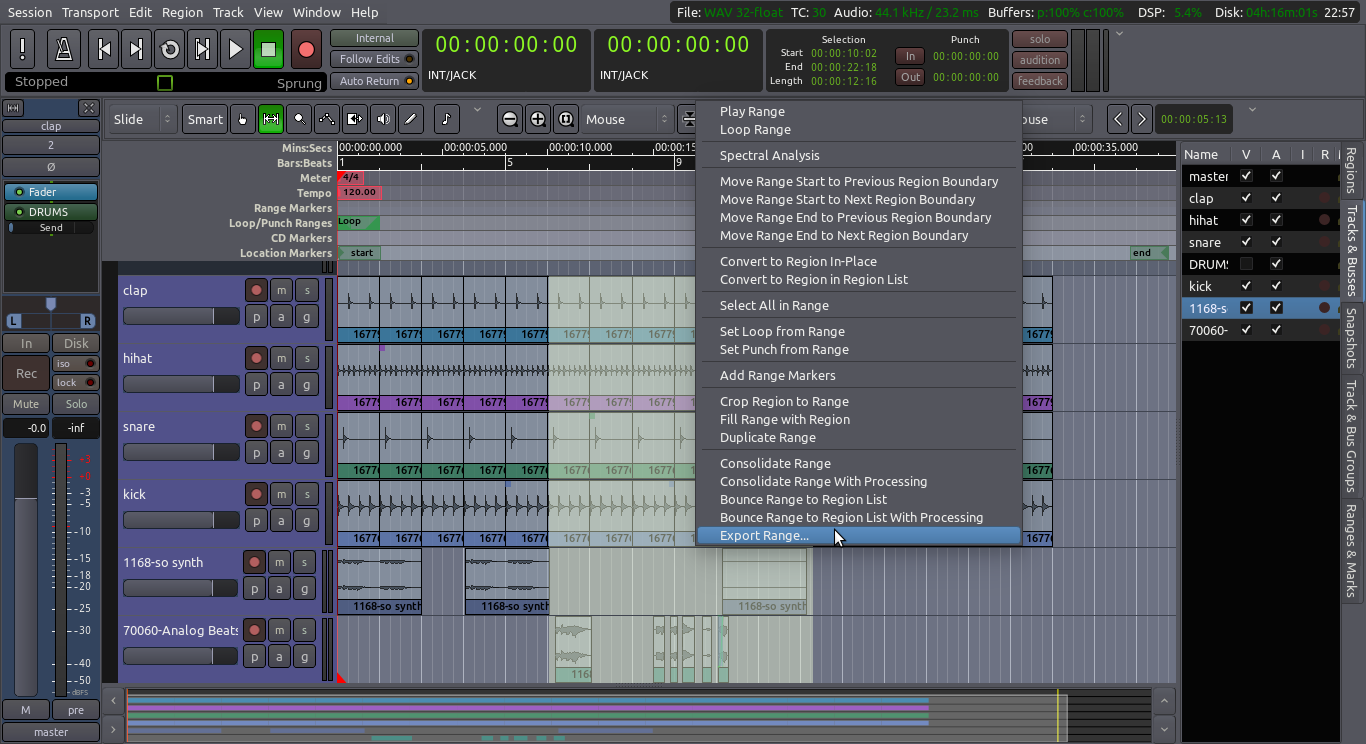
Right click on the Range and choose “Export Range” from the menu:
This will open the familiar Export dialog explained in the Exporting a Session chapter. Choose your options, if any, and click Export. The Range will be exported and saved as an audio file.
What exactly is a Range?
To define a Range is simply to specify a beginning and ending point in time. The Selection display to the right of the secondary clock shows the start and end times of the selected range, as well as its duration. The Range created through the method above will disappear as soon as you click outside of it.
The Export Range command will export everything that plays through the Master Bus, exactly as it plays back in your Session. If any of the Tracks have the Mute or Solo buttons engaged, this will also affect which Tracks are heard in the Exported file.
What is a Range Marker?
Range Markers are essentially two location markers the are grouped together to mark the beginning and end of a section in the timeline. You can user Range Markers to “bookmark” (so to speak) one or more Ranges that you need to remember or use again later. Range Markers look like this on the timeline:
range markers
There are a few ways to create Range Markers:
   From a Range selection, right click on it and choose “Add Range Marker”.
   From the timeline, right click on the “Range Markers” horizontal space and choose “New Range”.
   From one or more selected Regions, right click on the Region and choose “Add Single Range Marker” (if a single Region is selected), or “Add Range Marker Per Region” (if multiple Regions are selected).
TIP: You can clear all existing Range Markers by right-clicking on the Range Markers area of the timeline and choosing “Clear All Ranges”.