“Ardour4 初学者教程 05 导出会话”的版本间的差异
来自Ubuntu中文
(→同时导出多个区域) |
(→同时导出多个区域) |
||
| 第89行: | 第89行: | ||
http://brunoruviaro.github.io/ardour4-tutorial/images/Ardour4_Export_Region_Multiple_3.png | http://brunoruviaro.github.io/ardour4-tutorial/images/Ardour4_Export_Region_Multiple_3.png | ||
| − | + | 在菜单中选择 ''Session 会话'' > ''Export 导出'' 并选择 ''Export to Audio File(s) 导出为音频文件''(快捷键 “''Alt''” + “''E''”) | |
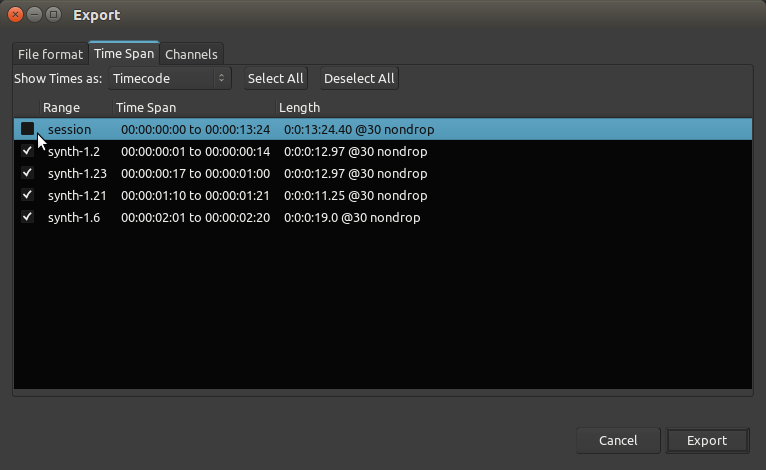
| − | + | 在导出对话框里,点击“''Time span 时间跨度''”标签页。您将会看到最近创建的范围排列在这里。这里也有一个代表着整个会话的默认范围。 | |
| − | + | 在“''Time span 时间跨度''”下面,点击“''Select All 选择所有''”,然后取消勾选首个范围(即“session 会话”范围)。因为我们打算导出较短的范围,而不是整个会话。 | |
http://brunoruviaro.github.io/ardour4-tutorial/images/Ardour4_Export_Region_Multiple_4.png | http://brunoruviaro.github.io/ardour4-tutorial/images/Ardour4_Export_Region_Multiple_4.png | ||
| − | + | 回到主标签页(“''File format 文件格式''”)。 | |
| − | + | 点击“''Export 导出''”。 | |
| − | + | 您的区域现在被导出为一个单独的音频文件了。 | |
IMPORTANT: this method exports everything that falls under each defined time range. In other words, if you have other regions in other tracks sounding simultaneously with the region(s) you want to export, they will be mixed together. Another way of looking at it is this: the export operation will export everything that plays under the defined time ranges. If that is not what you want, you can use solo or mute buttons on select tracks to ensure you export only what you want. | IMPORTANT: this method exports everything that falls under each defined time range. In other words, if you have other regions in other tracks sounding simultaneously with the region(s) you want to export, they will be mixed together. Another way of looking at it is this: the export operation will export everything that plays under the defined time ranges. If that is not what you want, you can use solo or mute buttons on select tracks to ensure you export only what you want. | ||
2016年2月26日 (五) 11:08的版本
目录
导出一个会话
Exporting 导出是把一个区域、音轨,或者整个会话保存为您的计算机上的一个文件的进程,这样您就能听到它,把它刻录为CD-R光盘,或者把它转换为 MP3 共享到互联网上。
导出整个会话
一旦您已经完成了您的作品,最常见的导出操作就是导出整个会话成为一个音频文件。
整个会话的鸟瞰视图
从这一点来说,在导出之前 Zoom Out 缩小(推远)并且看一看您的整个会话,是个好主意。
- 从“Number of visible tracks 可见音轨的数量”菜单中选择“All 所有”。
- 点击“Zoom to Session 缩放至整个会话”按钮(缩放选项里的第三个按钮)(注:即“+”右边的那个“[ ]”按钮,快捷键是“shift” + “_”):

- 现在您应该对您的整个会话有一个很好的概览,就像这样:
最后一次听一听您的作品,并确保您所听到的一切是您所希望达到的(任何Solo独奏或Mute静音按钮您忘了撤销激活吗?有没有任何需要调整的音量没有做的吗?诸如此类,等等)。
起点和终点标记
最后,确认Start起点和End终点标记都处在正确的位置。

在时间线里,位于起点和终点位置标记之间所包含的一切东西,都将被导出。所以,如果它们不在正确的位置,您就必须先设置这标记。在下图中,很显然,终点标记在时间线右边的位置离得太远了。这将导致在最后一个有声音的片段之后,出现一个很长的无声片段(即,最后一个区域和终点标记之间的空白)。
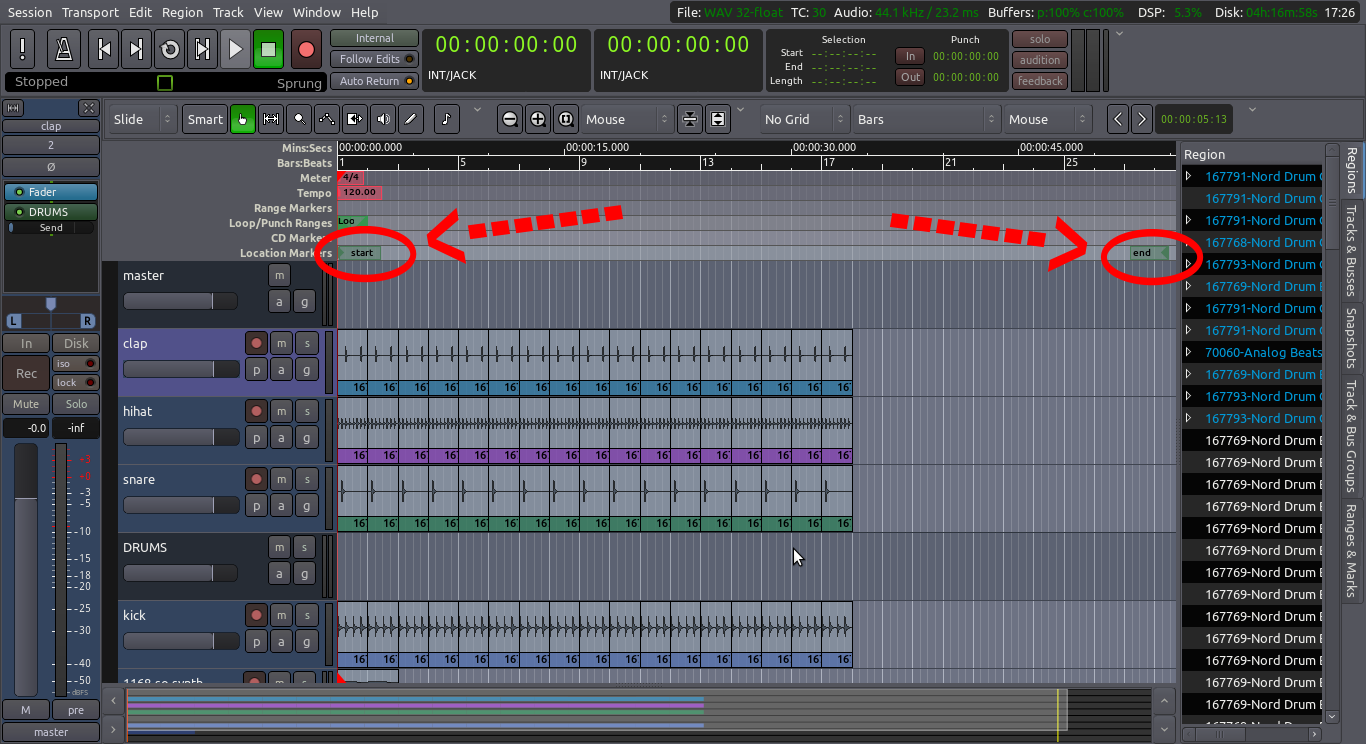
如果您的终点标记距离您的最后一个有声音片段太远,点击并拖动它移向左边,直到它非常接近您的作品的最后一个区域的终点。
导出它!
要导出一个会话,可使用顶部的菜单:Session 会话 > Export 导出 > Export to Audio File(s)…. 导出为音频文件… 这将打开一个对话窗,其中带有几个选项。
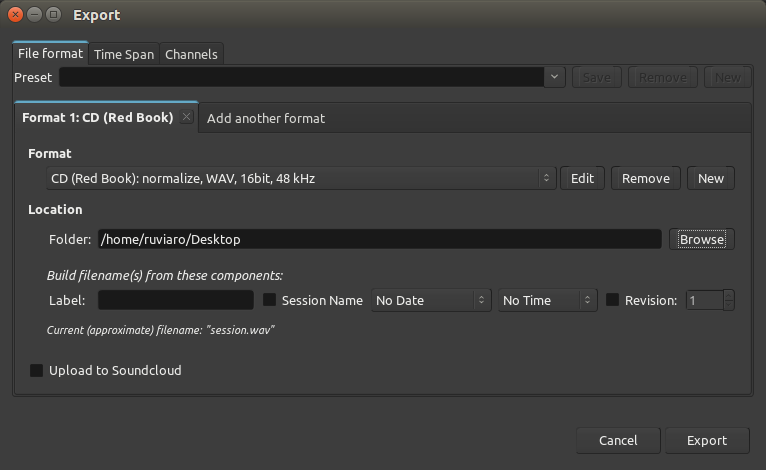
- Preset 预设:这里不是您写入文件名的地方。现在不必关心这个地方。
- Format 格式:这里允许您选择文件格式(WAV,MP3,OGG,FLAC,等等)。默认是 CD (Red Book)(注:一种专业规范的音频 CD 格式), 这将给您生成一个 WAV 文件。
- Add another format 添加另一个格式:如果您打算同时导出不止一个格式,点击这个标签页。
- Location 位置: 这是保存完成后,您能找到文件的地方。默认地,它保存在您的主会话文件夹中的“export”文件夹里,您也可以点击“Browse 浏览”并选择诸如“Desktop 桌面”这样的文件夹。
- Label 标签:您可以在这里为文件创建一个唯一的专有名称。Ardour将自动地挂靠会话名称到导出的文件上,因此,如果您在这里不写入任何东西的话,文件名一般会以类似“my-session.wav”这样来结尾。建议使用这个字段为您的文件起一个唯一的专用名称。
您的各个选项选择完成后,点击 Export 导出。操作完成后,您可以使用您的文件浏览器找到导出的文件。
- 提示:Export导出是通过Master Bus主控总线来处理的,所以最终的文件将包括所有从音轨和总线路由到主控总线的声音。这将包括您所创建的任何 Normalizing 规范化,Fading 淡化,Panning 声相偏移,以及 Automation 自动化,同样连同对区域所做的独立编辑一起。如果有任何音轨被Mute静音或Solo独奏按钮限定着,这也将影响那条音轨在导出的文件中是否可以被听见。
高级选项
如果您需要访问高级导出选项,点击”Time span 时间跨度”和“Channels 声道”标签页即可。
导出区域
您可能希望仅仅导出您的会话的一个区域,也许用于在另一个应用程序里作为样本,或者要在不同的编辑器程序中编辑它。本章节将向您展示如何导出一个区域。
导出一个区域
要导出一个区域,选中它(然后它会变成蓝色),接着右键点击进入子菜单选择 Export 导出,或者使用顶部的菜单:Region 区域 > Export 导出。
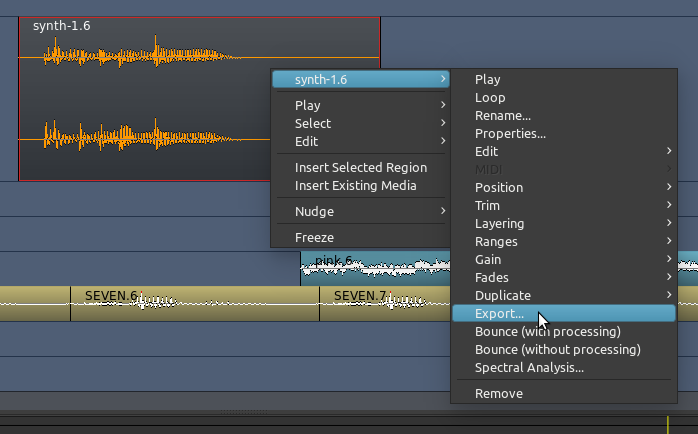
这将打开一个导出对话框,它与导出一个会话章节所阐述的一模一样。选择您的各种选项,然后点击“Export 导出”。只有被选中的区域将被导出。
请注意,当导出一个区域时,并不是所有的参数和编辑都会被导出。Trimmed 修剪,split 拆分,stretched 延伸和 reversed 反转区域可以被导出,但所编辑的诸如 Panning 声相偏移,以及 Automation 自动化不会被导出。并且,音轨本身或者主控总线的音量不会影响被导出的文件。要导出这些编辑后的效果,请参阅导出一个范围和导出一个会话章节。
同时导出多个区域
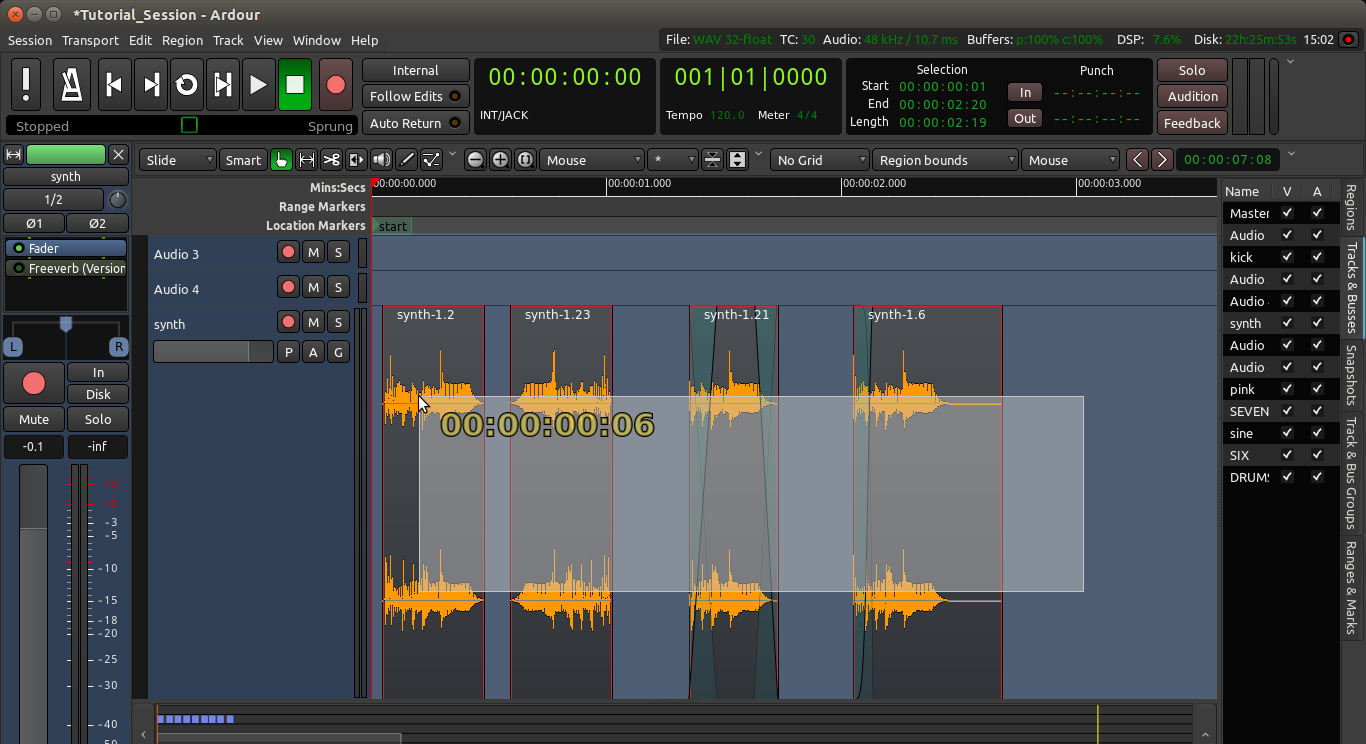
如果您正在构建一批样本,以便日后在另一个软件中使用,并且您的样本都是简单的修剪和编辑区域而已,在这工作的最后您需要导出它们。如果数量很多,手动一个个导出是很冗长乏味的的。这里有同时导出多个区域的方法。
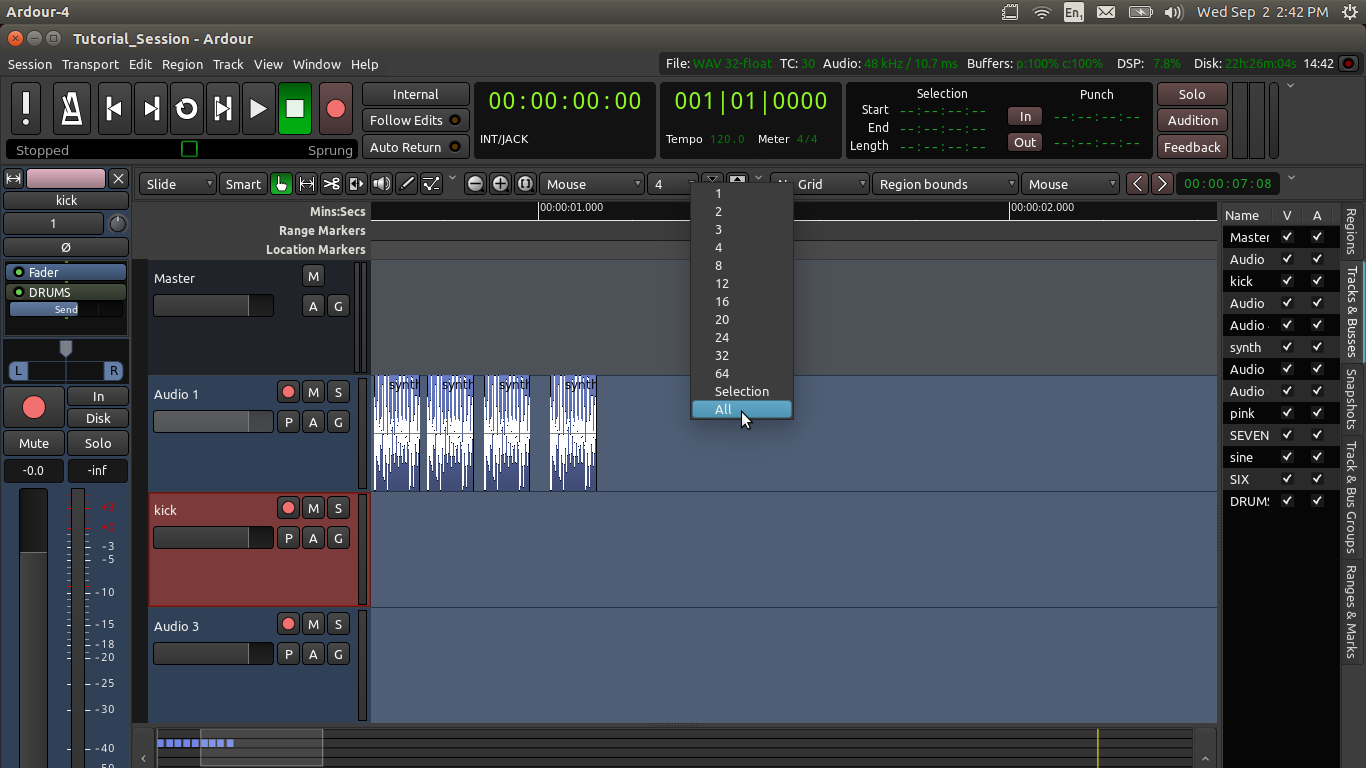
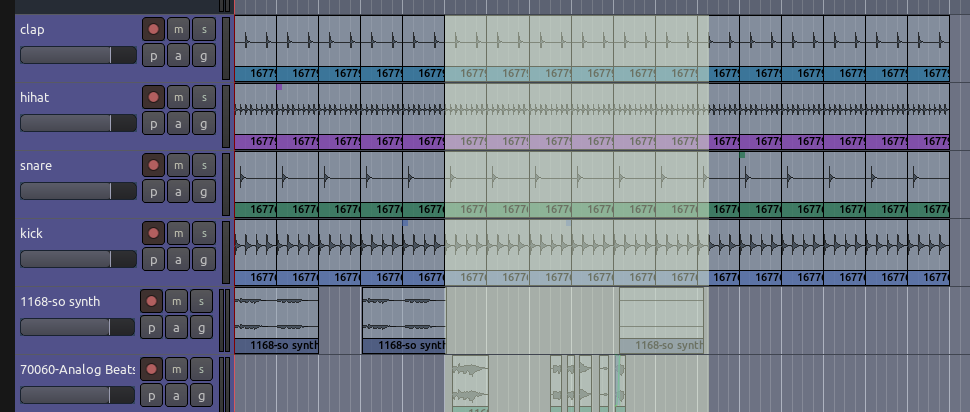
- 在抓取模式下(快捷键“G”),选中您想要导出的所有区域。它们不需要在同一个音轨上。
- 在菜单中点击 Region 区域 > Ranges 范围 并选择 Add Range Marker Per Region 为每个区域添加范围标记。
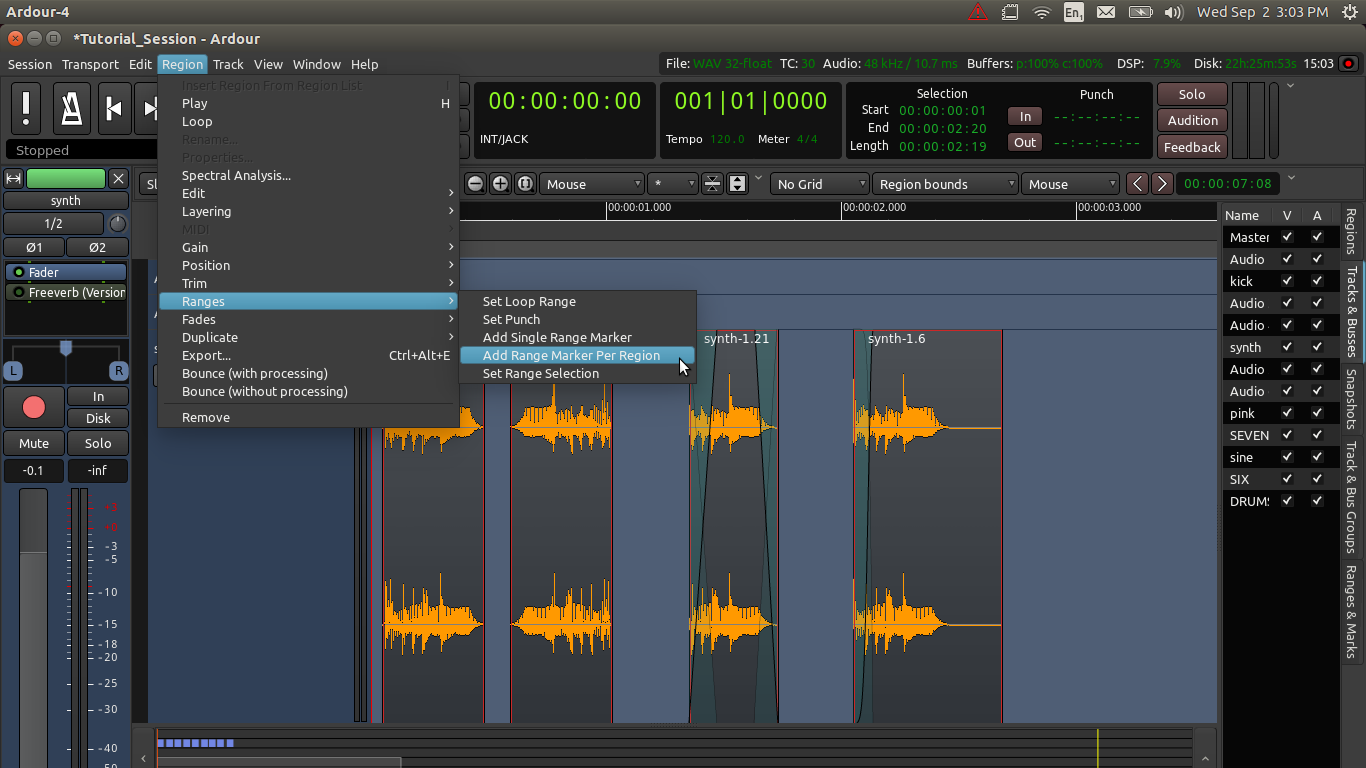
现在Ardour刚创建的范围标记完全匹配您所选中的区域的起点和终点(请注意看范围标记标尺上的绿色矩形):

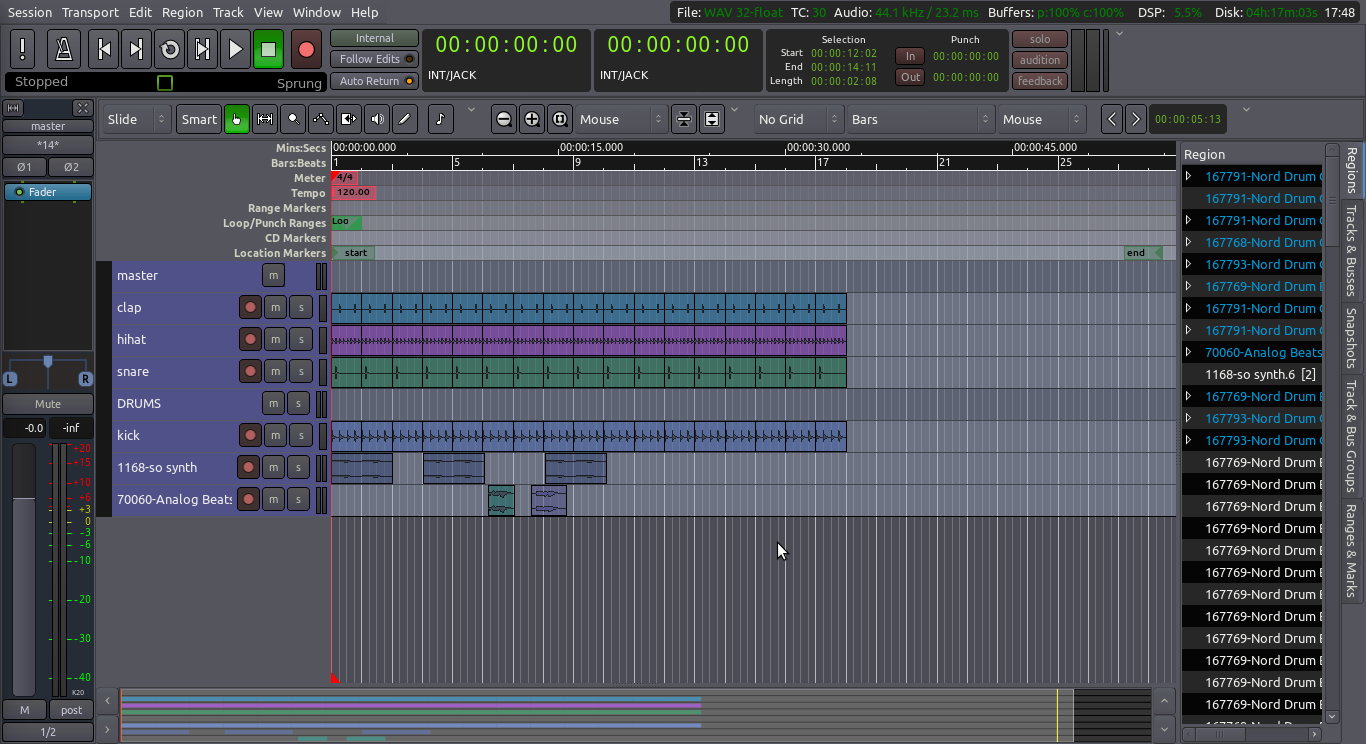
在菜单中选择 Session 会话 > Export 导出 并选择 Export to Audio File(s) 导出为音频文件(快捷键 “Alt” + “E”)
在导出对话框里,点击“Time span 时间跨度”标签页。您将会看到最近创建的范围排列在这里。这里也有一个代表着整个会话的默认范围。
在“Time span 时间跨度”下面,点击“Select All 选择所有”,然后取消勾选首个范围(即“session 会话”范围)。因为我们打算导出较短的范围,而不是整个会话。
回到主标签页(“File format 文件格式”)。
点击“Export 导出”。
您的区域现在被导出为一个单独的音频文件了。
IMPORTANT: this method exports everything that falls under each defined time range. In other words, if you have other regions in other tracks sounding simultaneously with the region(s) you want to export, they will be mixed together. Another way of looking at it is this: the export operation will export everything that plays under the defined time ranges. If that is not what you want, you can use solo or mute buttons on select tracks to ensure you export only what you want.
导出一个范围
Learn how to export a selected portion (Range) of your Session.
Exporting is the process of saving a Region, Track or Session to a file on your computer. As we learned previously, exporting an isolated Region does not export all of the changes you might have made to that Region. To export edits such as Panning, Fader Automation, and Plugin effects, you must Export either a Range or the entire Session.
导出一个范围
To export a range, follow these steps:
CLick on the Range Mode button (shortcut “R”)

Make a Range selection:
Right click on the Range and choose “Export Range” from the menu:
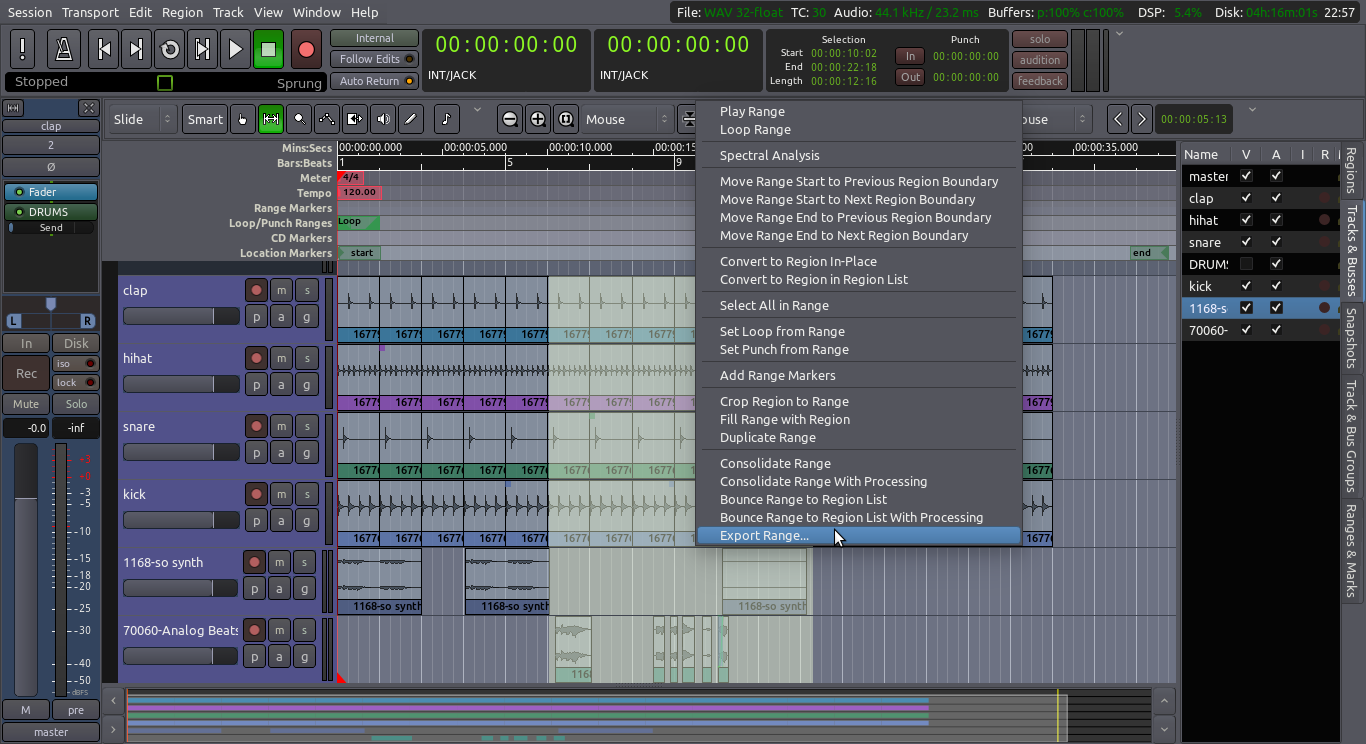
This will open the familiar Export dialog explained in the Exporting a Session chapter. Choose your options, if any, and click Export. The Range will be exported and saved as an audio file.
What exactly is a Range?
To define a Range is simply to specify a beginning and ending point in time. The Selection display to the right of the secondary clock shows the start and end times of the selected range, as well as its duration. The Range created through the method above will disappear as soon as you click outside of it.
The Export Range command will export everything that plays through the Master Bus, exactly as it plays back in your Session. If any of the Tracks have the Mute or Solo buttons engaged, this will also affect which Tracks are heard in the Exported file.
What is a Range Marker?
Range Markers are essentially two location markers the are grouped together to mark the beginning and end of a section in the timeline. You can user Range Markers to “bookmark” (so to speak) one or more Ranges that you need to remember or use again later. Range Markers look like this on the timeline:
range markers
There are a few ways to create Range Markers:
   From a Range selection, right click on it and choose “Add Range Marker”.
   From the timeline, right click on the “Range Markers” horizontal space and choose “New Range”.
   From one or more selected Regions, right click on the Region and choose “Add Single Range Marker” (if a single Region is selected), or “Add Range Marker Per Region” (if multiple Regions are selected).
TIP: You can clear all existing Range Markers by right-clicking on the Range Markers area of the timeline and choosing “Clear All Ranges”.